
CloverDX as Kafka event consumer
This article contains an example project.
In previous article, we covered how to establish a Kafka connection and how to publish messages into a Kafka topic. This article will cover the other side of operation - how to consume Kafka messages and some important properties which may either process run more efficiently or tumble server when misconfigured.
Reading from a Kafka Topic
 With
With KafkaReader component, CloverDX now allows us to connect to a Kafka Topic and consume its data. As in previous article, we’re going to explain this process on a simple example that connects to a Topic, consumes its messages, and inserts them into a database table. To illustrate work with yet another component (KafkaCommit), we’re going to commit our read to the Kafka broker, setting new message offset. It is not necessary to use KafkaCommit in the solution but we'll get to that later.
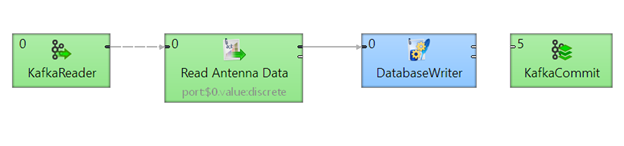
Let's first take a look at our example graph, before we get to more detailed explanation of each component's role.
Step 1: Configure Kafka Reader
 KafkaReader is the cornerstone of this example. It has a lot of properties, in this article though, we will cover only a couple, because they are absolutely necessary to configure to set up the component or may introduce some issues, when set up incorrectly. The very first is unsurprisingly a connection definition, here we can either create a new connection or choose an existing one from the drop-down list.
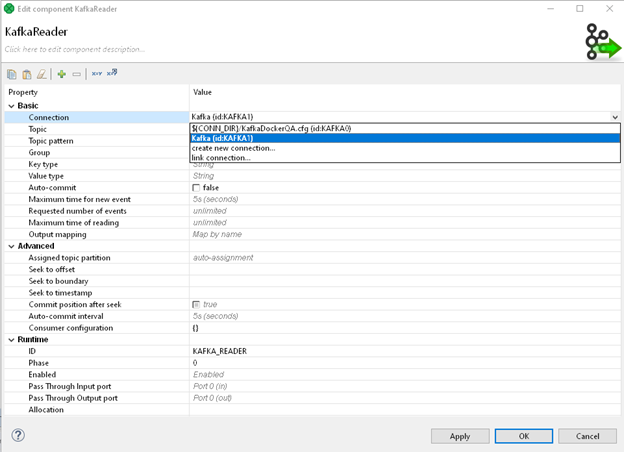
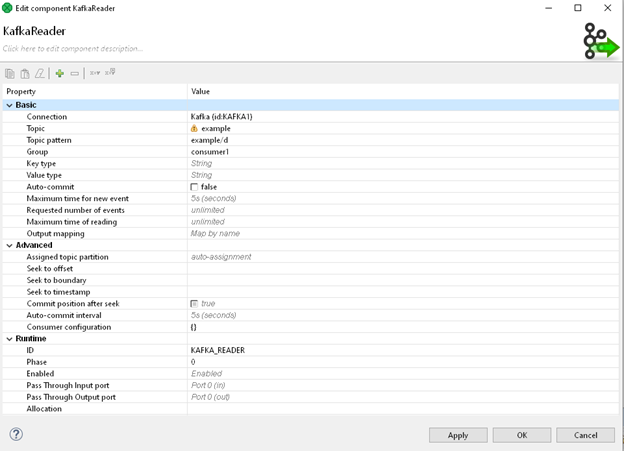
Next, is a Topic we’re going to subscribe to. If we want to read from a single Topic, we can simply provide its name via Topic property. However, if we want to read from multiple topics, we have a couple of options. We can either:
- Provide a semi-colon separated list using
Topicproperty (ex:topic1;topic2;topic3) - Provide a regular expression to encompass all our topics via
Topic Patternproperty. To achieve same result as in first example, we'd usetopic[1-3]
If both are provided, the Topic Pattern property takes precedence.
Consumer group is another required property of Kafka Reader so that we can effectively auto-assign partitions if there are multiple consumers in a group.
The Maximum time for new event is important efficiency-related property. It defines the amount of time (in seconds) our reader will wait for new messages to appear on our topic before CloverDX decides it has read all available messages and terminates the input stream. Its configuration requires knowledge about Kafka write velocity as one needs to be careful not to set up this parameter too high as that would effectively convert our job into a streaming job which would never end. Some components (like Aggregate or Sort) would keep waiting for end of an input data stream indefinitely.
On the other hand, too short interval could result in very high number of triggered jobs, also having a negative impact on server's performance.
With all of our properties set, we can go ahead and move onto the next step.
Step 2: Deserialization of Kafka message data
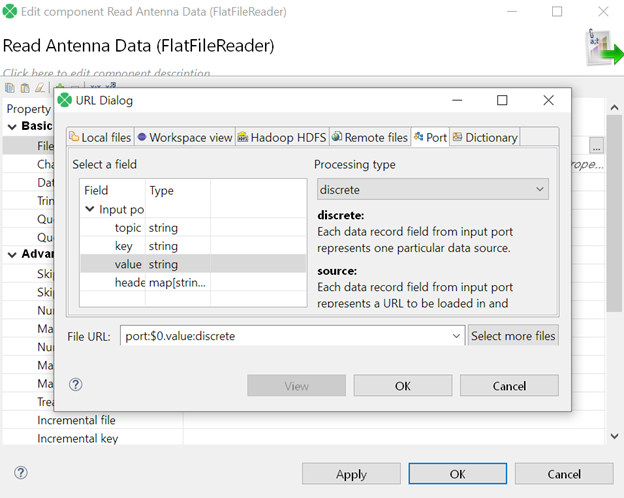
The next step of our process is going to take our Kafka message and turn it into a columnar format so that we can send it to our database.
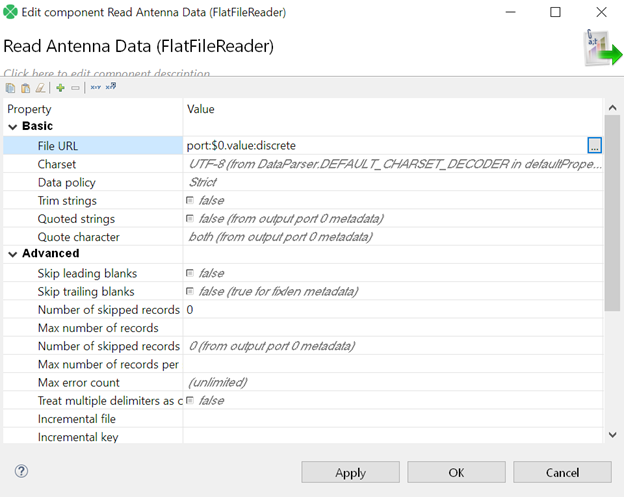
Again, we're going to process our incoming data from our first input port as discrete values (remember my previous article?). Only "trick" here is to have correct metadata attached to output from FlatFileReader. That is, if data are in CSV format. When in other formats, use different de-serialization component, like JSONExtract, Reformat (for Avro), ParquetReader, etc. to convert data into CloverDX format.
Step 3: Post-processing data
Finally, we can send our data to a DatabaseWriter component that will take our incoming data flow and write it to a Database of our choosing. This will allow us to persist our information. At this point, handling of data does not really differ from any other data source. For simplicity of our example here, we just decided to just write it into a database but this is where you "add your secret sauce".
Final word about read-commit
Kafka maintains a pointer to the index of each partition called an Offset. Every time we read from a partition, we need to communicate to Kafka on how to update the Offset so that only new messages are read on our next run. This is the process known as Commit.
If you look closely on Figure 3: Configured KafkaReader, you may notice, checkbox Auto-commit is unchecked. This is, because in our little example we've gone route 2 of the following paragraph.
- Auto-commit in Kafka Reader component: There’s a property called “Auto-Commit” that will automatically commit our offset as message is read in. This is the simplest way to update our Kafka Topic reading position but has a couple limitations as well. If we're doing something like writing our Kafka Messages to a Database, we’re going to have a CloverDX job that will first read from a Kafka topic and then use another component to write out to the DB. If there’s ever a situation where our Kafka Reader reads messages, but DBWriter component (or any other part of the job) fails, we’re going to lose all read messages because we already auto-committed our offset to a new position. Luckily, there’s a way to wait until our job is done processing our messages before commit.
- Commit using KafkaCommit component: The KafkaCommit component allows us to pick exactly when we commit our offset to a new position. In this case, we’re going to commit after our job was run as a success and all of our messages from our Kafka Topic were processed correctly. There is another way of using KafkaCommit. It is possible to map message index to KafkaCommit, so the component will take this index and commit to its position. Using this approach, you may commit as many messages as you like - from a single one to every message. Small word here though, index can be only commited in an increment, so sequence '1-2-3-4' is OK, sequence '1-3-2-4' is NOT and you'll receive an error if you try so. Commit only for '4' will have the same effect as the first example.
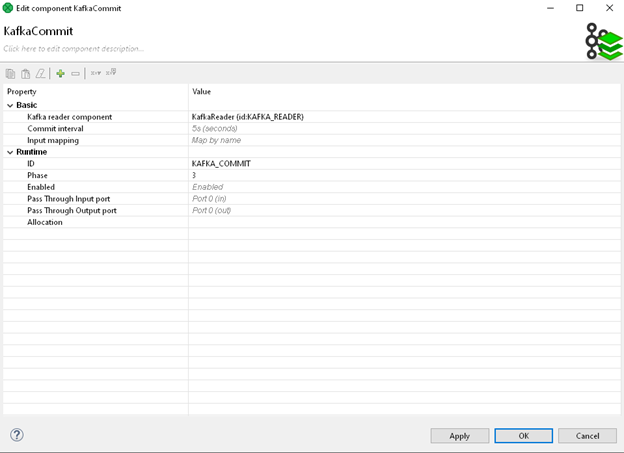
 We just have to set the “Kafka reader component” property to the KafkaReader component that we already have in our graph. We can also choose to commit at different time intervals. However, in this case, we’re going to wait until our whole job has processed before committing our offset to a new position.
Summary
In these two articles, we learned how to work with Kafka event streaming in context of CloverDX platform and described small nuances in configuration may affect efficiency. In the future, we may consider looking in how to pair Kafka components with CloverDX Server's Kafka event listener. Watch out for new articles!
More from Tech Blog
-
CloverDX Server diagnostics with ChatGPT or Claude via MCP
Administrating a healthy CloverDX Server usually means correlating information scattered across performance logs, job tracking tables, execution logs,... AI -
Data Quality Examples on GitHub
As our first set of examples, we published a project called DataQualityExamples which demonstrates how users can address their data quality issues with... CloverDX How-To -
Introducing CloverDX Examples on GitHub
We’re excited to introduce the CloverDX Examples repository on GitHub. The repository is a growing collection of helpful and practical examples designed to... CloverDX How-To -
Sending emails via Azure Communication Services SMTP
There are many situations where it is helpful to get a message from your active pipelines. These may include logs, summaries of successful completion, or... Cloud -
Connecting to REST APIs (OpenAPI)
Connecting to REST APIs is a crucial aspect of modern data integration, and the REST Connector in CloverDX provides a streamlined approach. The video below... RESTConnector -
Performance tuning: How to troubleshoot database-related performance issues in CloverDX
Performance is undoubtedly one of the key factors when running data transformations. In this article, we will look at how to troubleshoot database-related... Performance
Visit CloverDX Blog
-
How financial services firms use automation to cut reporting from days to half a day
-
Data integration after an acquisition: How fast-growing companies stay in control
-
Boomi vs CloverDX for enterprise data integration
-
Boomi Alternatives: A Complete Guide (2026)
-
Why SaaS engineers are stuck doing manual customer data onboarding – and how to fix it