
How to connect and publish messages to Kafka
This article contains an example project.
Kafka is a distributed event streaming platform capable of handle massive volumes of events. It is designed and operates similar to a messaging queue. Kafka was originally developed by a development group at LinkedIn and was open-sourced to the public in 2011.
Here at CloverDX, we’ve been able to help many organizations integrate their Kafka deployments with more traditional ETL processes to help make a unified data backbone that includes both real-time streaming events as well as batch processing.
In this blog article we’re going to go over some key concepts important to understanding Kafka and show you how we can use this powerful technology to quickly ingest new data and kick off CloverDX data processes.
Setting up Kafka connection
In your CloverDX Designer, open a graph you want to have a Kafka connection, than in “Outline” view, right click on Connections and choose Create Kafka Connection.
Edit the Kafka name and server information to point to your existing Kafka instance. The default port for most Kafka bootstrap servers is typically 9092.
Our connection dialog allows you to Validate Connection to see if the host CloverDX Designer has access to it (or in case of local project, Designer itself has access to it). A successful validation message should look like this.

Congratulations! We now have a successful connection to our Kafka instance. Now we can learn how to write data into Topics our Kafka instance.
Publishing to a Kafka Topic
 CloverDX bundles
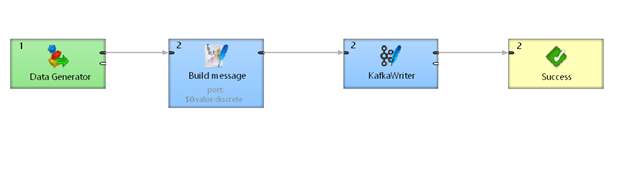
 KafkaWriter component that allows us publish messages into a Kafka topic from any data source supported by the platform. We’re going to explain KafkaWriter configuration on an example that generates random dataset, produces a single Kafka message, and writes it out to a Kafka Topic using a KafkaWriter.
Step 1: Generate Data
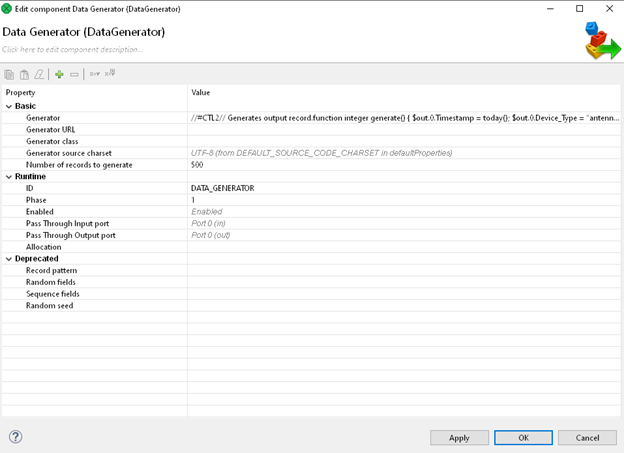
 In order to simulate a real data source, we're going to use a
 DataGenerator Component. We've configured our generator to generate 500 records of randomized data.
Step 2: Formatting Kafka Message
At this point, we need to convert 500 records of random data in a columnar format into a message one. Here, we chose CSV but that might as well be an Avro, JSON, XML, Parquet, etc. The approach to serialize into these formats would be very similar – we would just use different serialization components. Keep in mind, Avro and JSON serialization can be done using CTL functions.
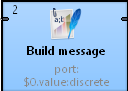 In order to accomplish this task, we’re going to utilize the
 FlatFileWriter. Configuration of this component is going to be slightly different than when used in traditional cases.
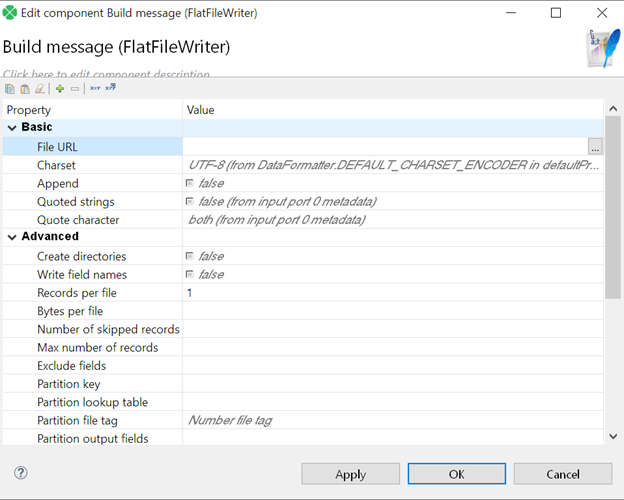
We're setting our Records per file property to 1 in order to make sure we output our Kafka message (i.e., one inbound record) as a single serialized string.
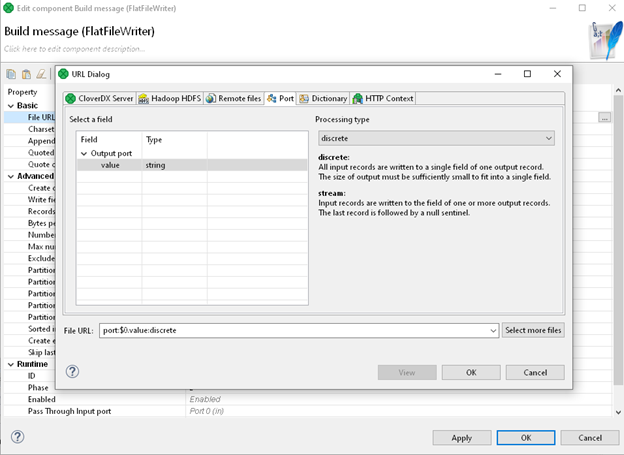
We need to set up our File URL property to specify the destination for serialized records. Since the target is not a file, but rather component's output port, in property configuration dialog select Port in dialog's tabs. This section offers a selection of output metadata fields (string and byte) and a processing type. Because our goal is to create a single message for single input record, we choose discrete.
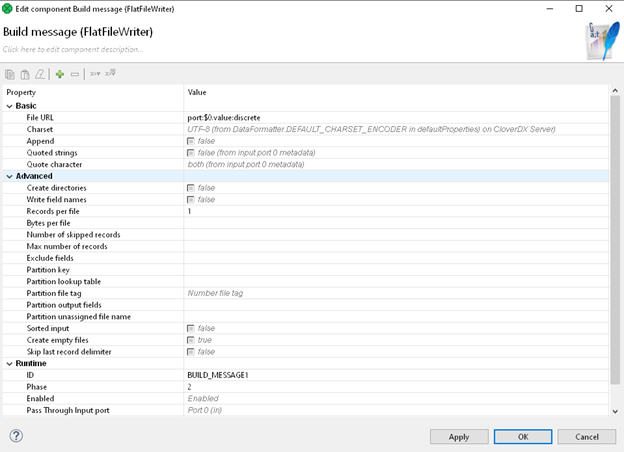
Once we've set this up, we can exit back to our fully configured FlatFileWriter. Dialog should now look like the one below.
Step 3: Publishing to Kafka Topic using Kafka Writer
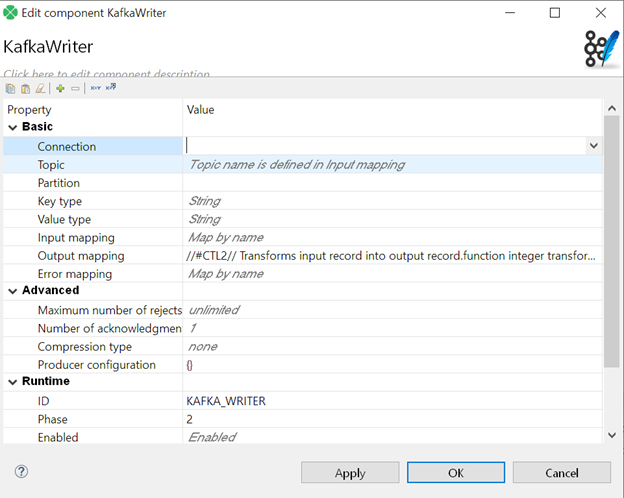
 There are only two mandatory properties our
 KafkaWriter: Connection and Topic. We also recommend defining an Output mapping as it allows custom data conversion into a format Kafka expects.
Now, we can either create a new connection or select an existing connection (like the one we made earlier in this blog). So we're going to use the drop-down menu and select the connection we've already established.
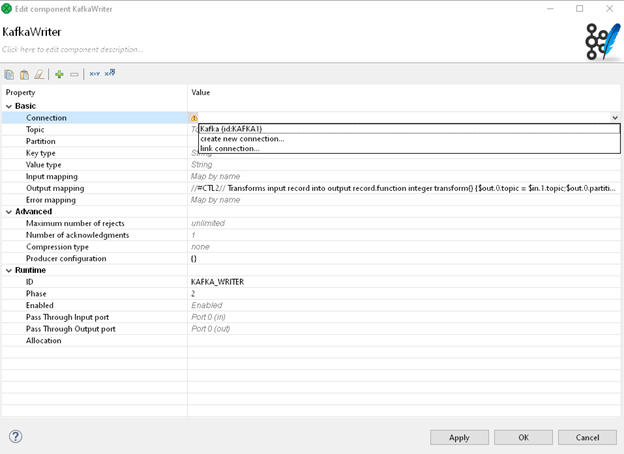
(Pro tip: we can also drag an existing connection from our project outline and drop it onto Kafka components to assign a connection)
Once we have our connection selected and ready to go, we can go ahead and type in Topic we want our data to be published.
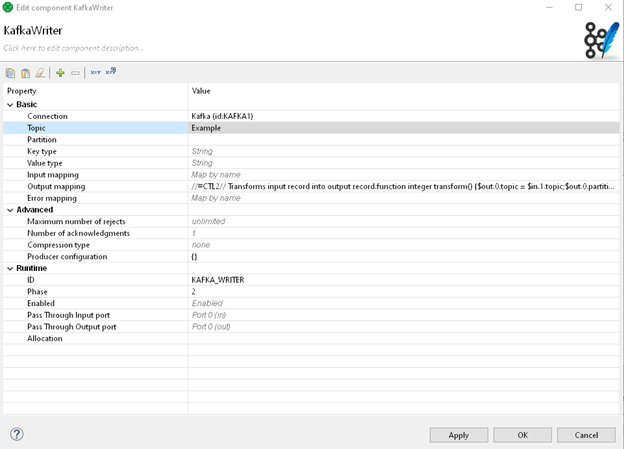
When it comes to partitions, we can either specify a partition we want to send messages to or leave it blank so that Kafka will automatically choose a partition to write to. We can also specify how we want our messages to be written. In Kafka, you can write Keys and Values as either a String or Byte datatype. By default, the Kafka Writer is to use String type. Since this fits our needs, we'll keep the default.
Step 4: Running our Graph and Validating Success
 The final component in our graph is a
 Success component. This is strictly optional but may be useful when you also want to post-process information returned from Kafka. Possibly for audit purposes (e.g., using DatabaseWriter). KafkaWriter provides information about each message successfully written to our Kafka Topic.
To give a better idea about information provided by KafkaWriter on its output, see below screenshot. Information includes besides key and message itself also topic, partition, publish timestamp and offset. Key and message value is only provided when either mapped using Output mapping configuration property or automapped from metadata.
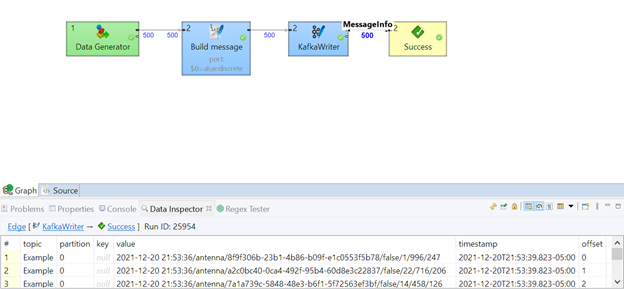
Congratulations! We've successfully published data to a Kafka topic.
More from Tech Blog
-
CloverDX Server diagnostics with ChatGPT or Claude via MCP
Administrating a healthy CloverDX Server usually means correlating information scattered across performance logs, job tracking tables, execution logs,... AI -
Data Quality Examples on GitHub
As our first set of examples, we published a project called DataQualityExamples which demonstrates how users can address their data quality issues with... CloverDX How-To -
Introducing CloverDX Examples on GitHub
We’re excited to introduce the CloverDX Examples repository on GitHub. The repository is a growing collection of helpful and practical examples designed to... CloverDX How-To -
Sending emails via Azure Communication Services SMTP
There are many situations where it is helpful to get a message from your active pipelines. These may include logs, summaries of successful completion, or... Cloud -
Connecting to REST APIs (OpenAPI)
Connecting to REST APIs is a crucial aspect of modern data integration, and the REST Connector in CloverDX provides a streamlined approach. The video below... RESTConnector -
Performance tuning: How to troubleshoot database-related performance issues in CloverDX
Performance is undoubtedly one of the key factors when running data transformations. In this article, we will look at how to troubleshoot database-related... Performance
Visit CloverDX Blog
-
How financial services firms use automation to cut reporting from days to half a day
-
Data integration after an acquisition: How fast-growing companies stay in control
-
Boomi vs CloverDX for enterprise data integration
-
Boomi Alternatives: A Complete Guide (2026)
-
Why SaaS engineers are stuck doing manual customer data onboarding – and how to fix it