
CloverDX Transformation Language: How to Extend CTL with Java Functions
CloverDX/Eclipse project source code available
In this article, I will walk you through the process of extending CTL (CloverDX Transformation Language) with your own custom functions implemented in Java. Think of this as adding your own Java functions to the standard CTL function library so that you can transparently use them wherever there’s a piece of CTL code—in Reformat transformations, Filter expressions, etc.
Why Java for Custom Functions (And Not CTL)?
Imagine you have some custom complex logic already implemented in Java packages, maybe some 3rd party library with potentially dozens of outside dependencies. Let’s say you want to share that functionality across applications, CloverDX included. There might be thousands of lines of code that you don’t want to be re-implementing in CTL.
Other reasons for using Java over pure CTL are performance and the expressive power of Java. While performance begins to matter only with large volumes of data, CTL has never been designed to fully replace general purpose languages. CTL makes working with data records easy, however for very complex algorithms it lacks the expressiveness and eco-system of libraries that Java can give you.
Compare to Function Libraries in Plain CTL
In this article, we’re talking about native Java code working as CTL functions. That’s quite different from simply writing a shared function library in plain CTL. To do that, save a piece CTL code as a .ctl file somewhere in your project and then import it into other transformations using import construct like this:
//#CTL2
import "trans/filterFunctions.ctl";

function integer transform() {
    $out.0.field1 = filterChars($in.0.field1); // filterChars() is declared in filterFunctions.ctl
    return ALL;
}
From then, the code and functions declared in the .ctl file will be available in the scope the library was imported in.
Example Scenario
As an example, we’ll be implementing two functions:
string getWords()string getWords(integer count)
These functions will produce “Lorem Ipsum”—Latin-like bogus text for testing. For this purpose, we’ll use an external loremipsum Java library by Sven Jacobs (see, we already have external dependencies!).
Architecture & Extensibility of CloverDX
CloverDX is an open platform that can be extended by users in many ways. The core of CloverDX lies in its modular “engine”. This is the execution layer that takes care of running your data transformations and that sits at the center of CloverDX Designer (Runtime) and Server. CTL and all user extensions are treated as “engine plugins”. For our purpose, we’ll need to extend the engine with our own plugin (Java package) containing our Lorem Ipsum functions.
CloverDX Designer presents another layer, working rather independently of the engine/Runtime. Designer is built on Eclipse, and it comes with its own set of plugins that form the GUI. For Designer to recognize our new functions we’ll need to make it aware of our engine plugin by wrapping it with a separate “Designer plugin”. This will make the new functions available for context assist, correct syntax highlighting in editors, etc.
Brief Overview
Here’s what we’ll do:
- We’ll need our CloverDX Engine plugin first:
- We’ll implement the desired CTL functions as a Java class that will extend
org.jetel.ctl.extensions.TLFunctionLibrary. - Then, we’ll create a
plugin.xmldescriptor with ctlfunction extension definition. - And we’ll use
org.jetel.ctl.extensions.TLFunctionAnnotationannotation to mark “entry point” methods that will serve as the implementation of our CTL functions (as you may have some additional supporting private methods that you don’t want to turn into CTL functions).
- We’ll implement the desired CTL functions as a Java class that will extend
- Secondly, we’ll add a Designer plugin:
- For our functions to work in Designer, we’ll need another
plugin.xmldescriptor—this time with engineplugin extension definition. - Finally, we’ll import the engine plugin into this new Designer plugin.
- For our functions to work in Designer, we’ll need another
Once finished, the new functions will be available in Designer dialogs (e.g. Source tab in Transform Editor, Reformat code, etc.).
So, let’s get to it!
Step-by-step Guide to Custom CTL Functions
Initial Setup
- Download the external Lorem Ipsum Java library (http://loremipsum.sourceforge.net/).
- Download, install and run CloverDX Designer (http://www.cloverdx.com/download).
- Install Eclipse Plug-in Development Environment (PDE):
- Help ⇒ Install New Software…
- Select your Eclipse release update site named after the codename of your version
(e.g. “Indigo – http://download.eclipse.org/releases/indigo”)
- Search for General Purpose Tools / Eclipse Plug-in Development Environment.
- Once installed, switch to Java perspective (Window→Perspective→Open Perspective→Java).
Creating the Engine Plugin
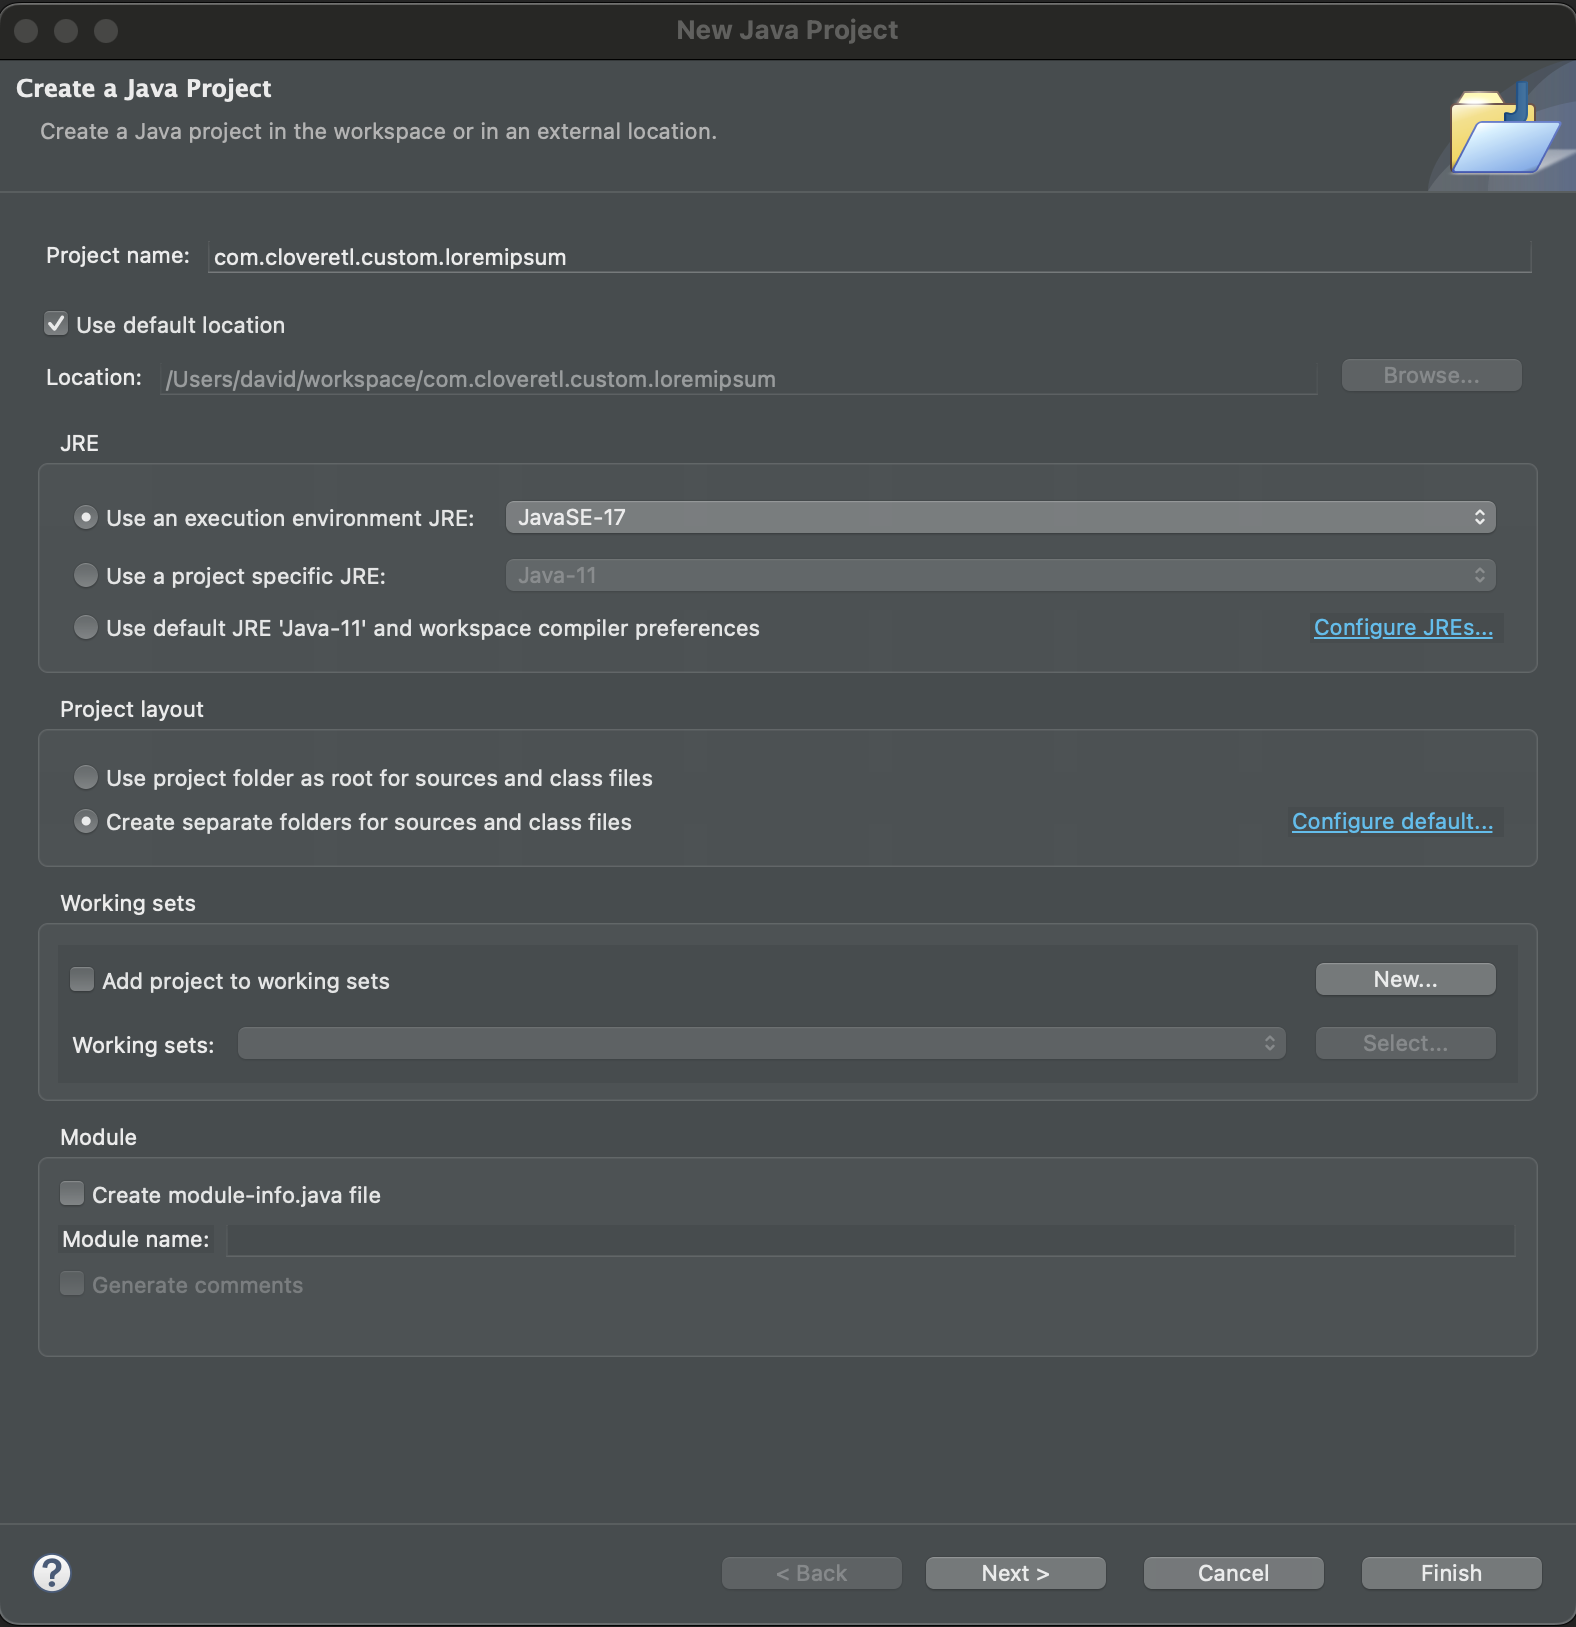
- Start a new Java project (File ⇒ New ⇒ Other ⇒ Java/Java Project) and name it
com.cloveretl.custom.loremipsum. Hit Next when done.
- Add CloverDX Engine to the project build path:
- Switch to the Libraries tab, click Add Library ⇒ CloverDX Engine.
- Click Next, then Finish.
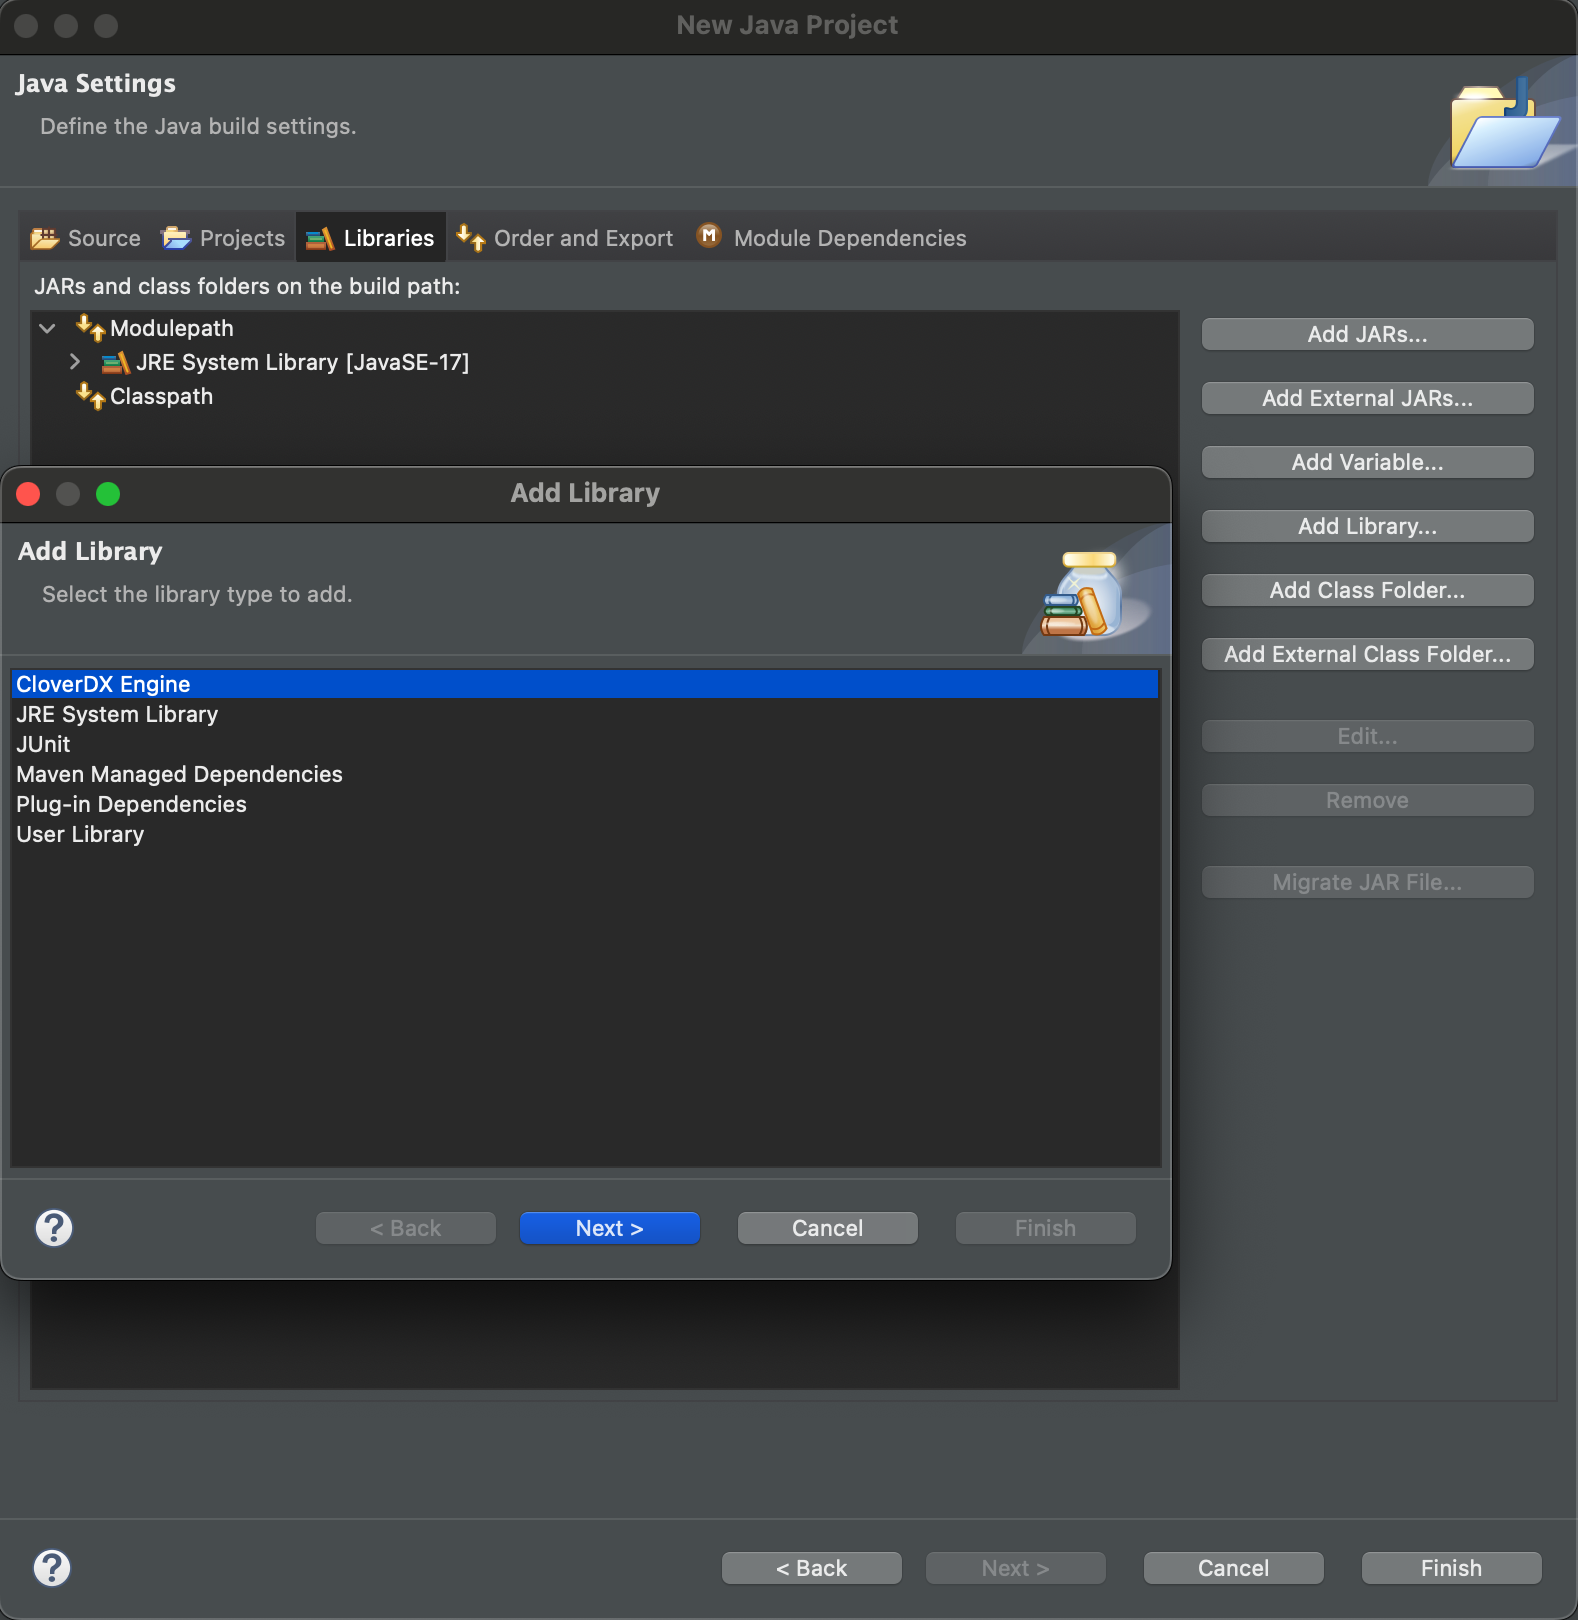
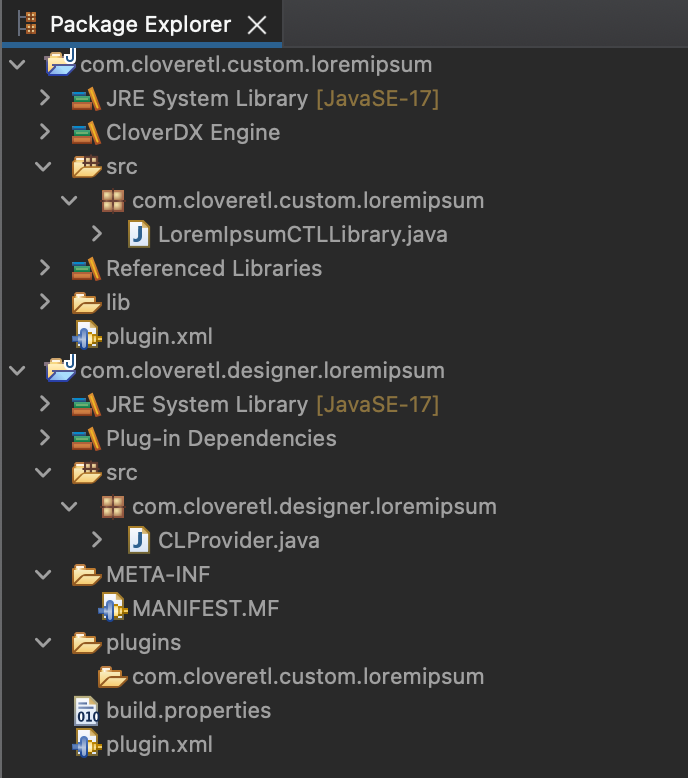
Note: If you don't end-up with CloverDX Engine added to the project (see picture below) then try to right-click on the name of your project in PackageExplorer then Build Path→Add Libraries and pick CloverDX Engine.
- Now that you’ve created the Java project, create a new folder named
libin the project root directory (right-click the project in Package Explorer or in Navigator to create that folder) - Put the “Lorem Ipsum” library into it (
lib/loremipsum-1.0.jar)
- Add the library to Java classpath (Project → Properties → Java Build Path section → Libraries tab → Add JARs… → Navigate to the
libdirectory → Chooseloremipsum-1.0.jar) and click OK.
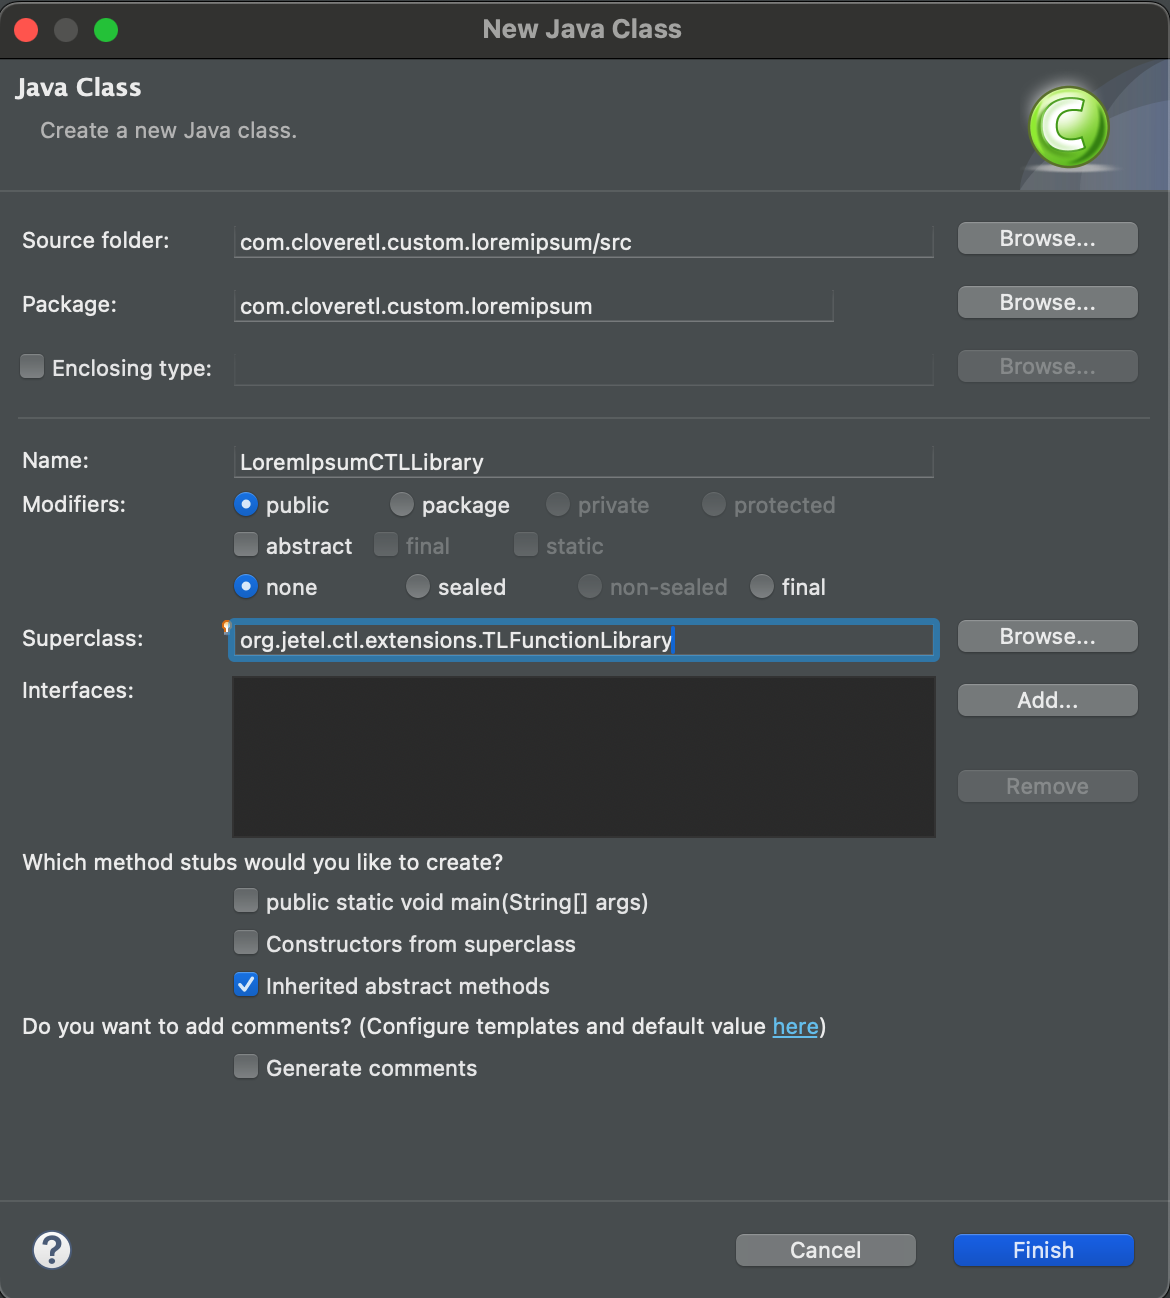
- Create the main Java class. We’ll call it
LoremIpsumCTLLibraryand it will extendorg.jetel.ctl.extensions.TLFunctionLibrary.Let’s put the class into a package called
com.cloveretl.customctl.loremipsum.TLFunctionLibrary comes from the CloverDX Library we added to the project earlier. However, you don’t need to worry about this for now, it is already a part of the code below).
You don't need to set anything else here—you will paste the full source code of this class in the next step anyway (will work only if you kept the same name and package, otherwise you’ll have to do a bit of editing).
- Copy & paste the following code. You can modify this later to suit your needs but for now this one class implements everything we’ll need for our two getWords() CTL functions.
package com.cloveretl.custom.loremipsum; import org.jetel.ctl.Stack; import org.jetel.ctl.extensions.TLFunctionAnnotation; import org.jetel.ctl.extensions.TLFunctionCallContext; import org.jetel.ctl.extensions.TLFunctionLibrary; import org.jetel.ctl.extensions.TLFunctionPrototype; import de.svenjacobs.loremipsum.LoremIpsum; public class LoremIpsumCTLLibrary extends TLFunctionLibrary { LoremIpsum loremIpsum = new LoremIpsum(); @Override public TLFunctionPrototype getExecutable(String functionName) throws IllegalArgumentException { TLFunctionPrototype ret = "getWords".equals(functionName) ? new GetWordsFunction() : null; return ret; } @Override public String getName() { return "LoremIpsumCTLLibrary"; } @TLFunctionInitAnnotation public static void getWordsInit(TLFunctionCallContext context) { //for now, no initialization needed //this is called only once //can be used to set-up/initialize included 3rd party Java libraries } @TLFunctionAnnotation("Generates Lorem Ipsum text") public String getWords(TLFunctionCallContext context) { return this.loremIpsum.getWords(); } @TLFunctionAnnotation("Generates Lorem Ipsum text") public String getWords(TLFunctionCallContext context, Integer count) { if(count==null) { return this.getWords(context); } return this.loremIpsum.getWords(count); } class GetWordsFunction implements TLFunctionPrototype { @Override public void execute(Stack stack, TLFunctionCallContext context) { if (context.getParams().length > 0) { stack.push(getWords(context, stack.popInt())); }else{ stack.push(getWords(context)); } } @Override public void init(TLFunctionCallContext context) { } } } - As the last step of this “engine plugin” part, let’s create the plugin.xml descriptor that the engine needs to properly load our code.
- Create a new file called
plugin.xmlin the root of the engine plugin project:
- Put the following code into plugin.xml:
<plugin id="com.cloveretl.custom.loremipsum" version="0.0.0.devel" provider-name="CloverDX"> <runtime> <library path="bin/"/> <library path="lib/loremipsum-1.0.jar"/> </runtime> <extension point-id="ctlfunction"> <parameter id="libraryName" value="LoremIpsumCTLLibrary"/> <parameter id="className" value="com.cloveretl.customctl.loremipsum.LoremIpsumCTLLibrary"/> </extension> </plugin> - Your engine plugin is now done!

Alright, you’re half way through! Now let’s get on to setting up the CloverDX Designer plugin, so this library can be installed and used inside Designer.
Moving on To the Designer Plugin
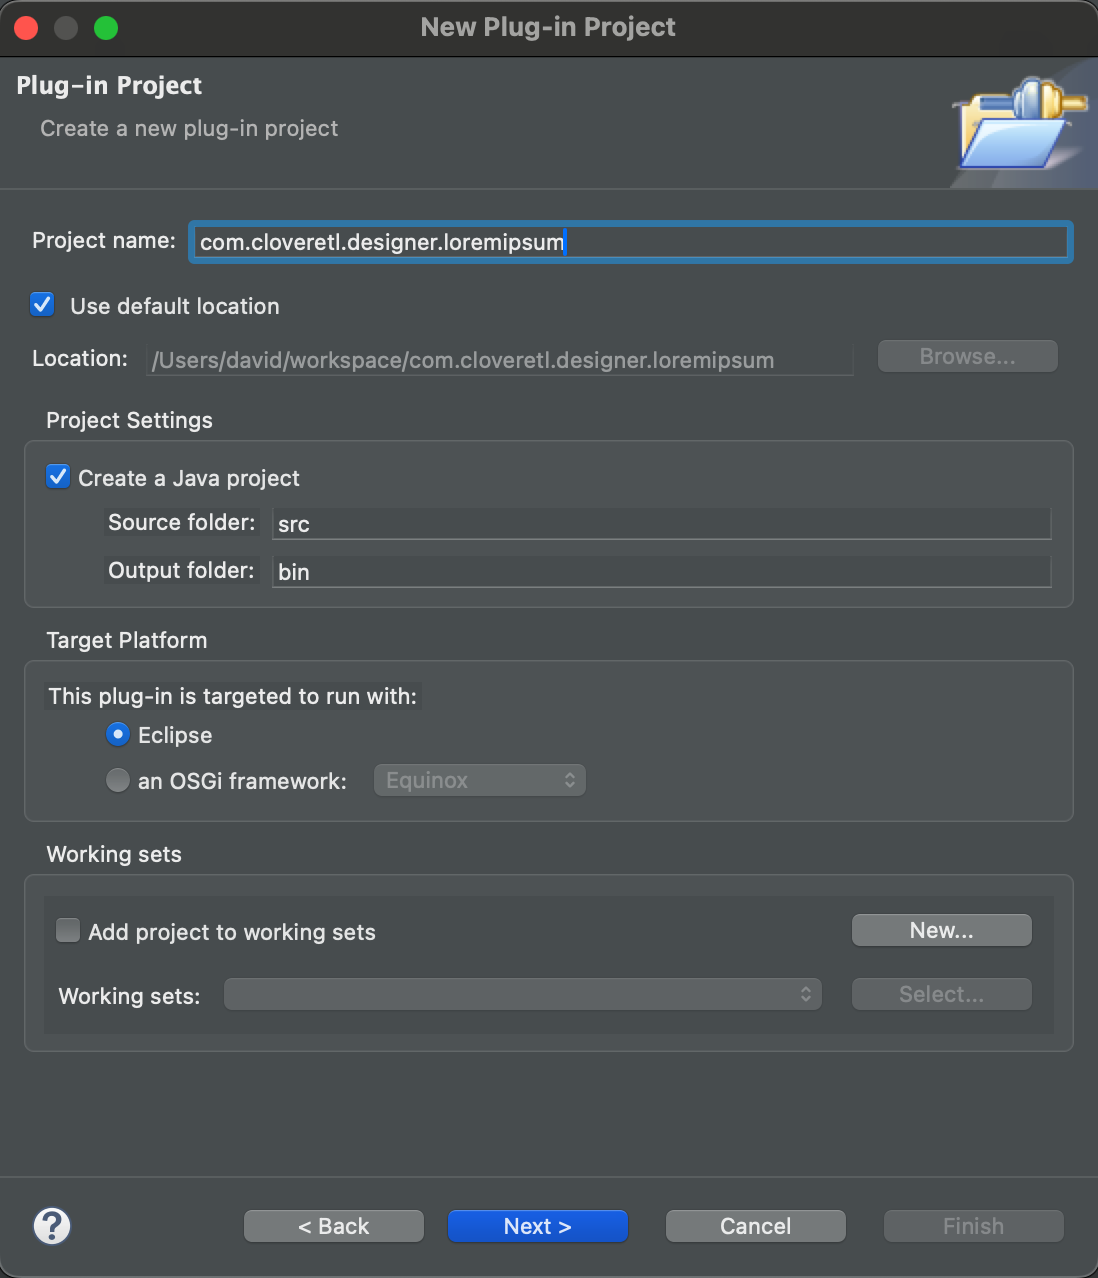
- Staying in the same workspace, create a new Plug-in project (not Java!) using File → New → Plug-in Development → Plug-in Project.

- Name the project
com.cloveretl.designer.loremipsum.
- Name the project
- Click Next

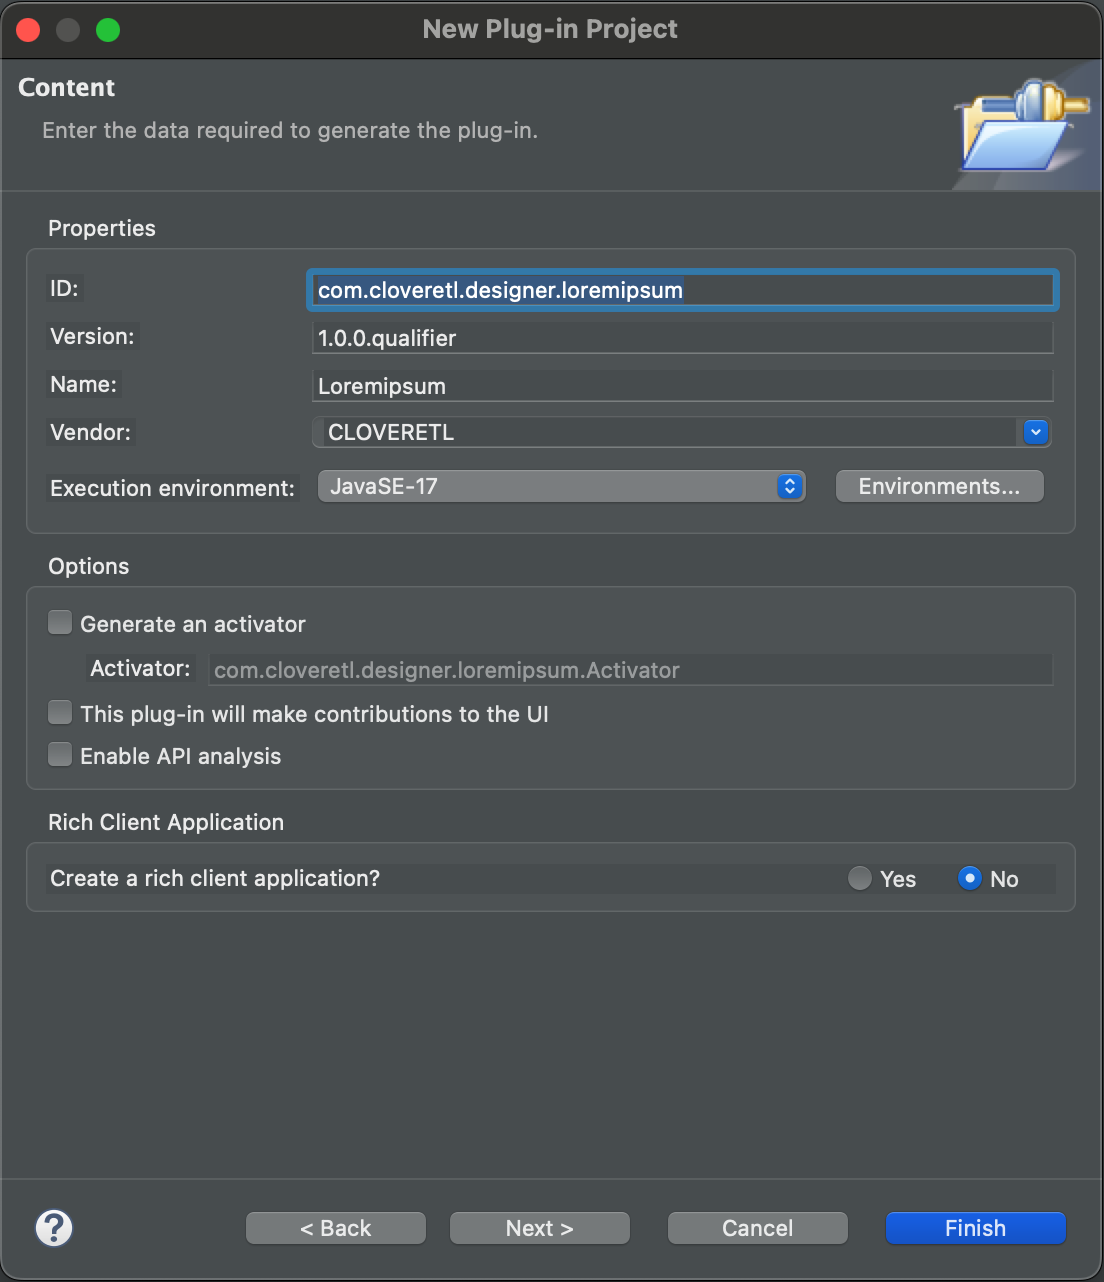
- On the second page of the project wizard:
- Uncheck Generate an activator, a Java class that controls the plug-in's lifecycle.
- Uncheck This plug-in will make contributions to the UI (just ignore what it says for now).

- After clicking Finish, choose No when Designer asks to switch to a Plugin perspective.

- Now we have our Designer plugin project ready. Let’s put some classes in.
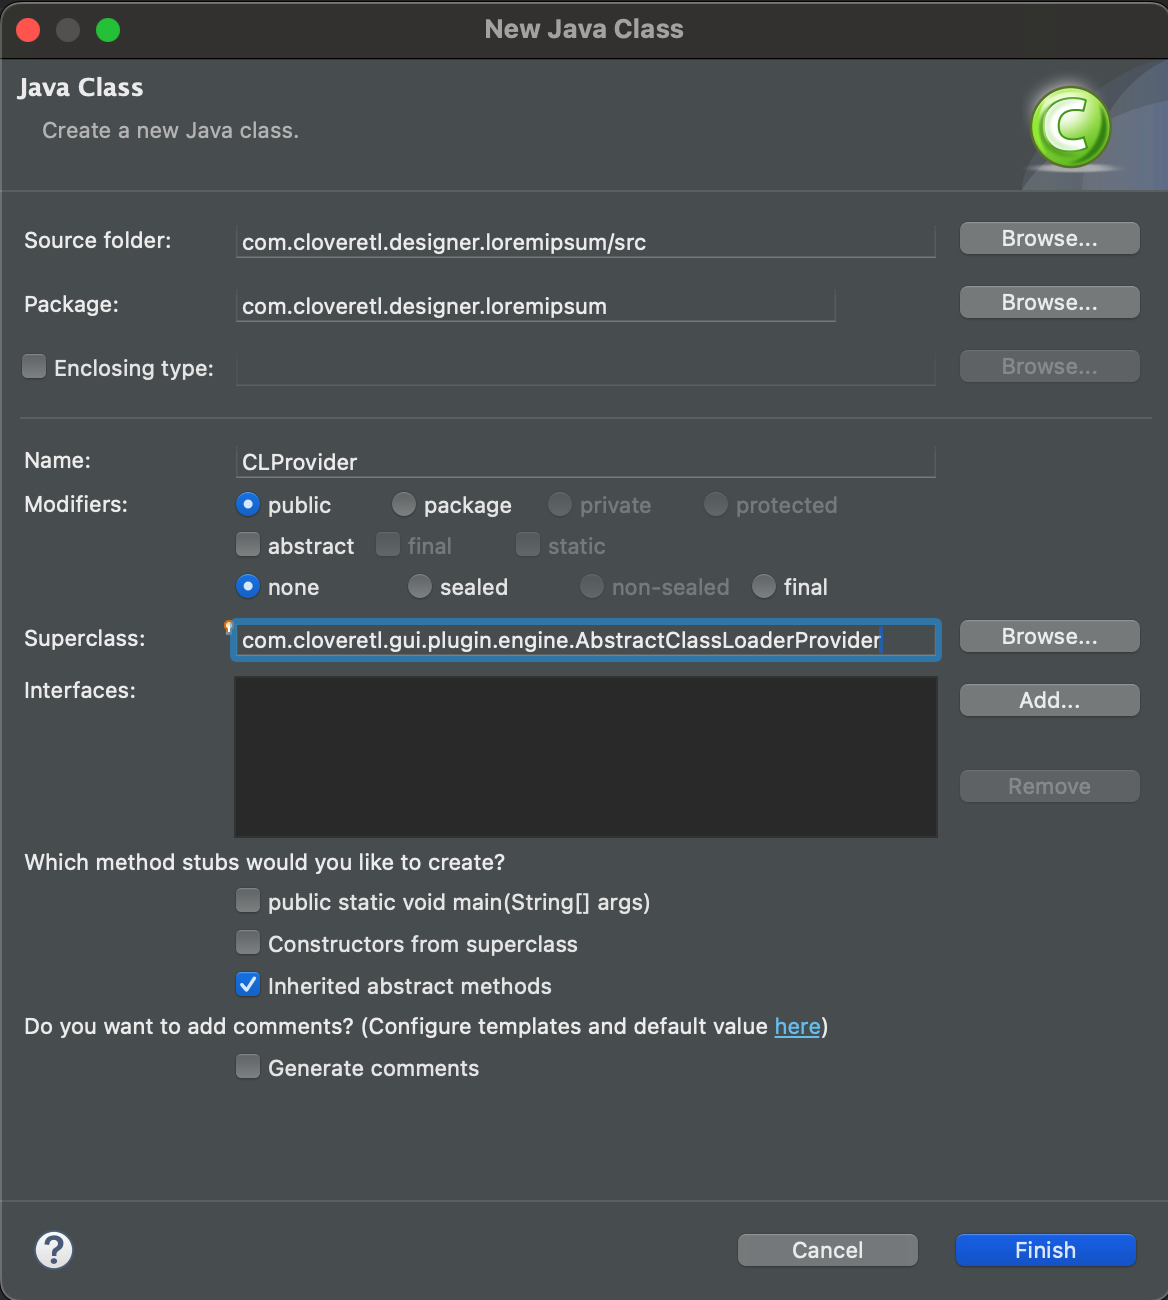
- Create a “Class Loader Provider” Class
- File ⇒ New ⇒ Class
- Class name:
CLProvider - Package is automatically prefilled to com.cloveretl.designer.loremipsum (you can leave that)
- Superclass:
com.cloveretl.gui.plugin.engine.AbstractClassLoaderProvider

- Click Finish.
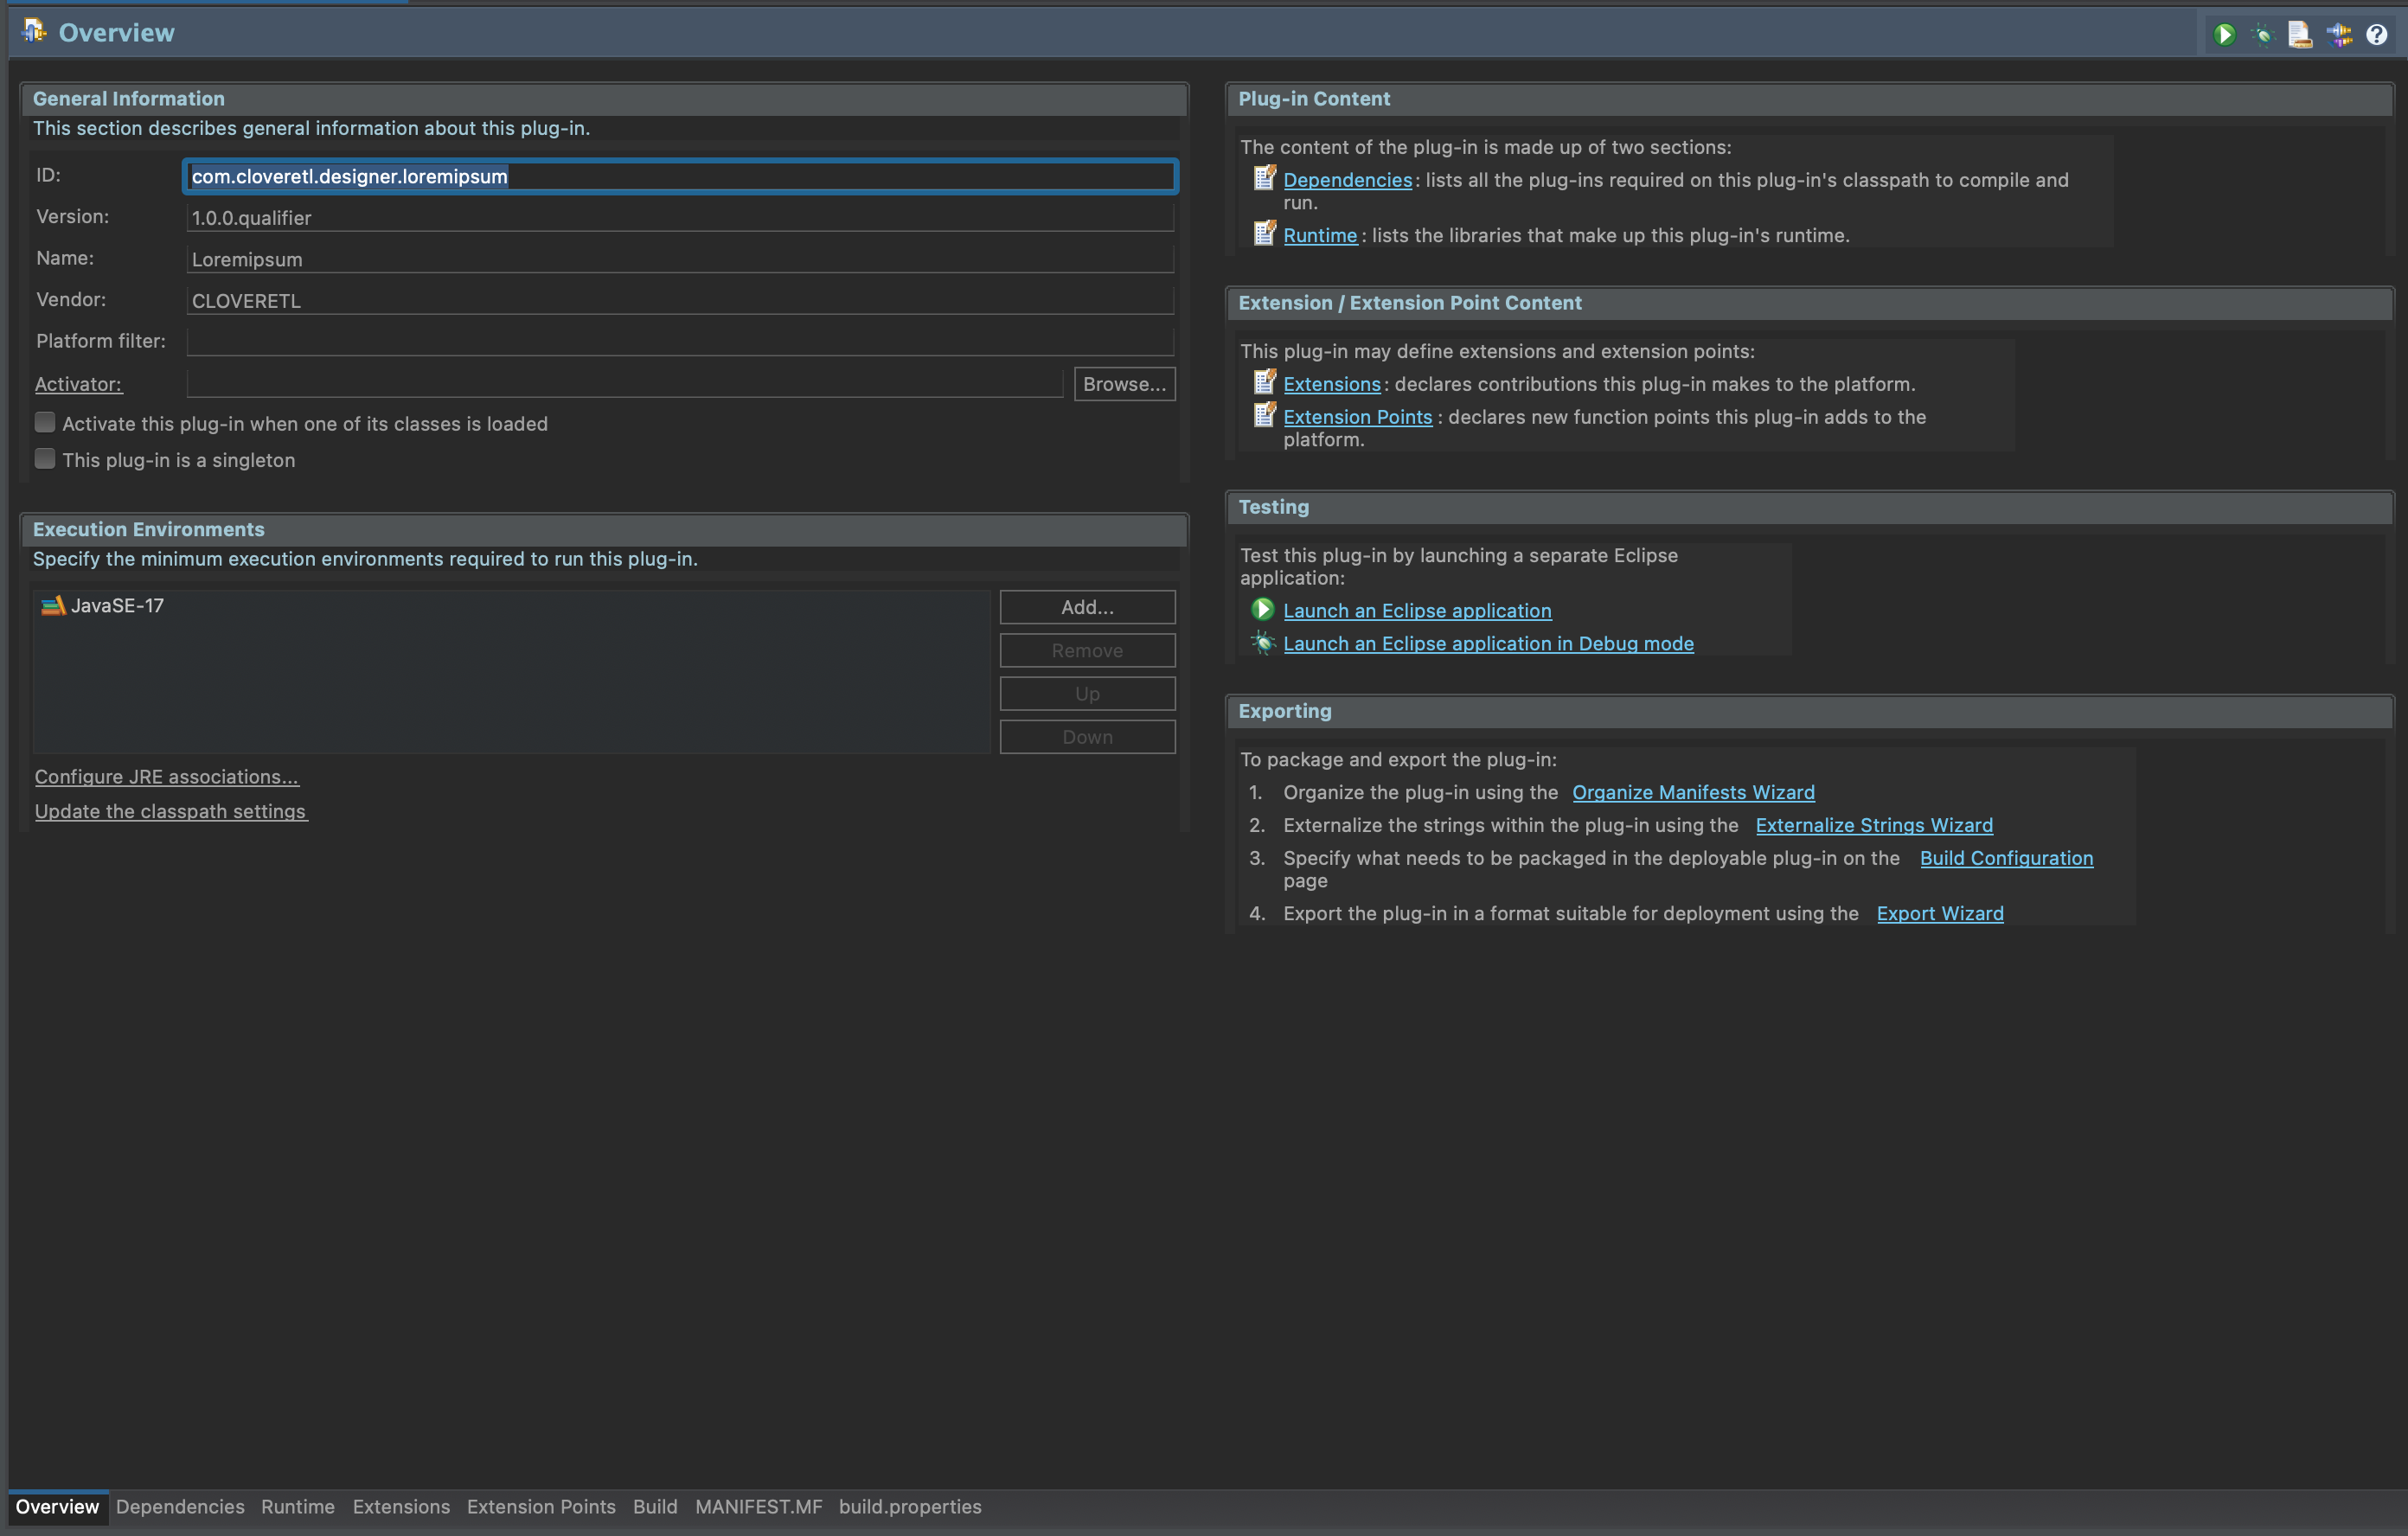
Don’t worry that the AbstractClassLoaderProvider cannot be resolved in the code yet, we’ll fix it later. - Now double click META-INF/MANIFEST.MF (in the Explorer on the left).
This will get you to Overview tab of the Plugin screen.
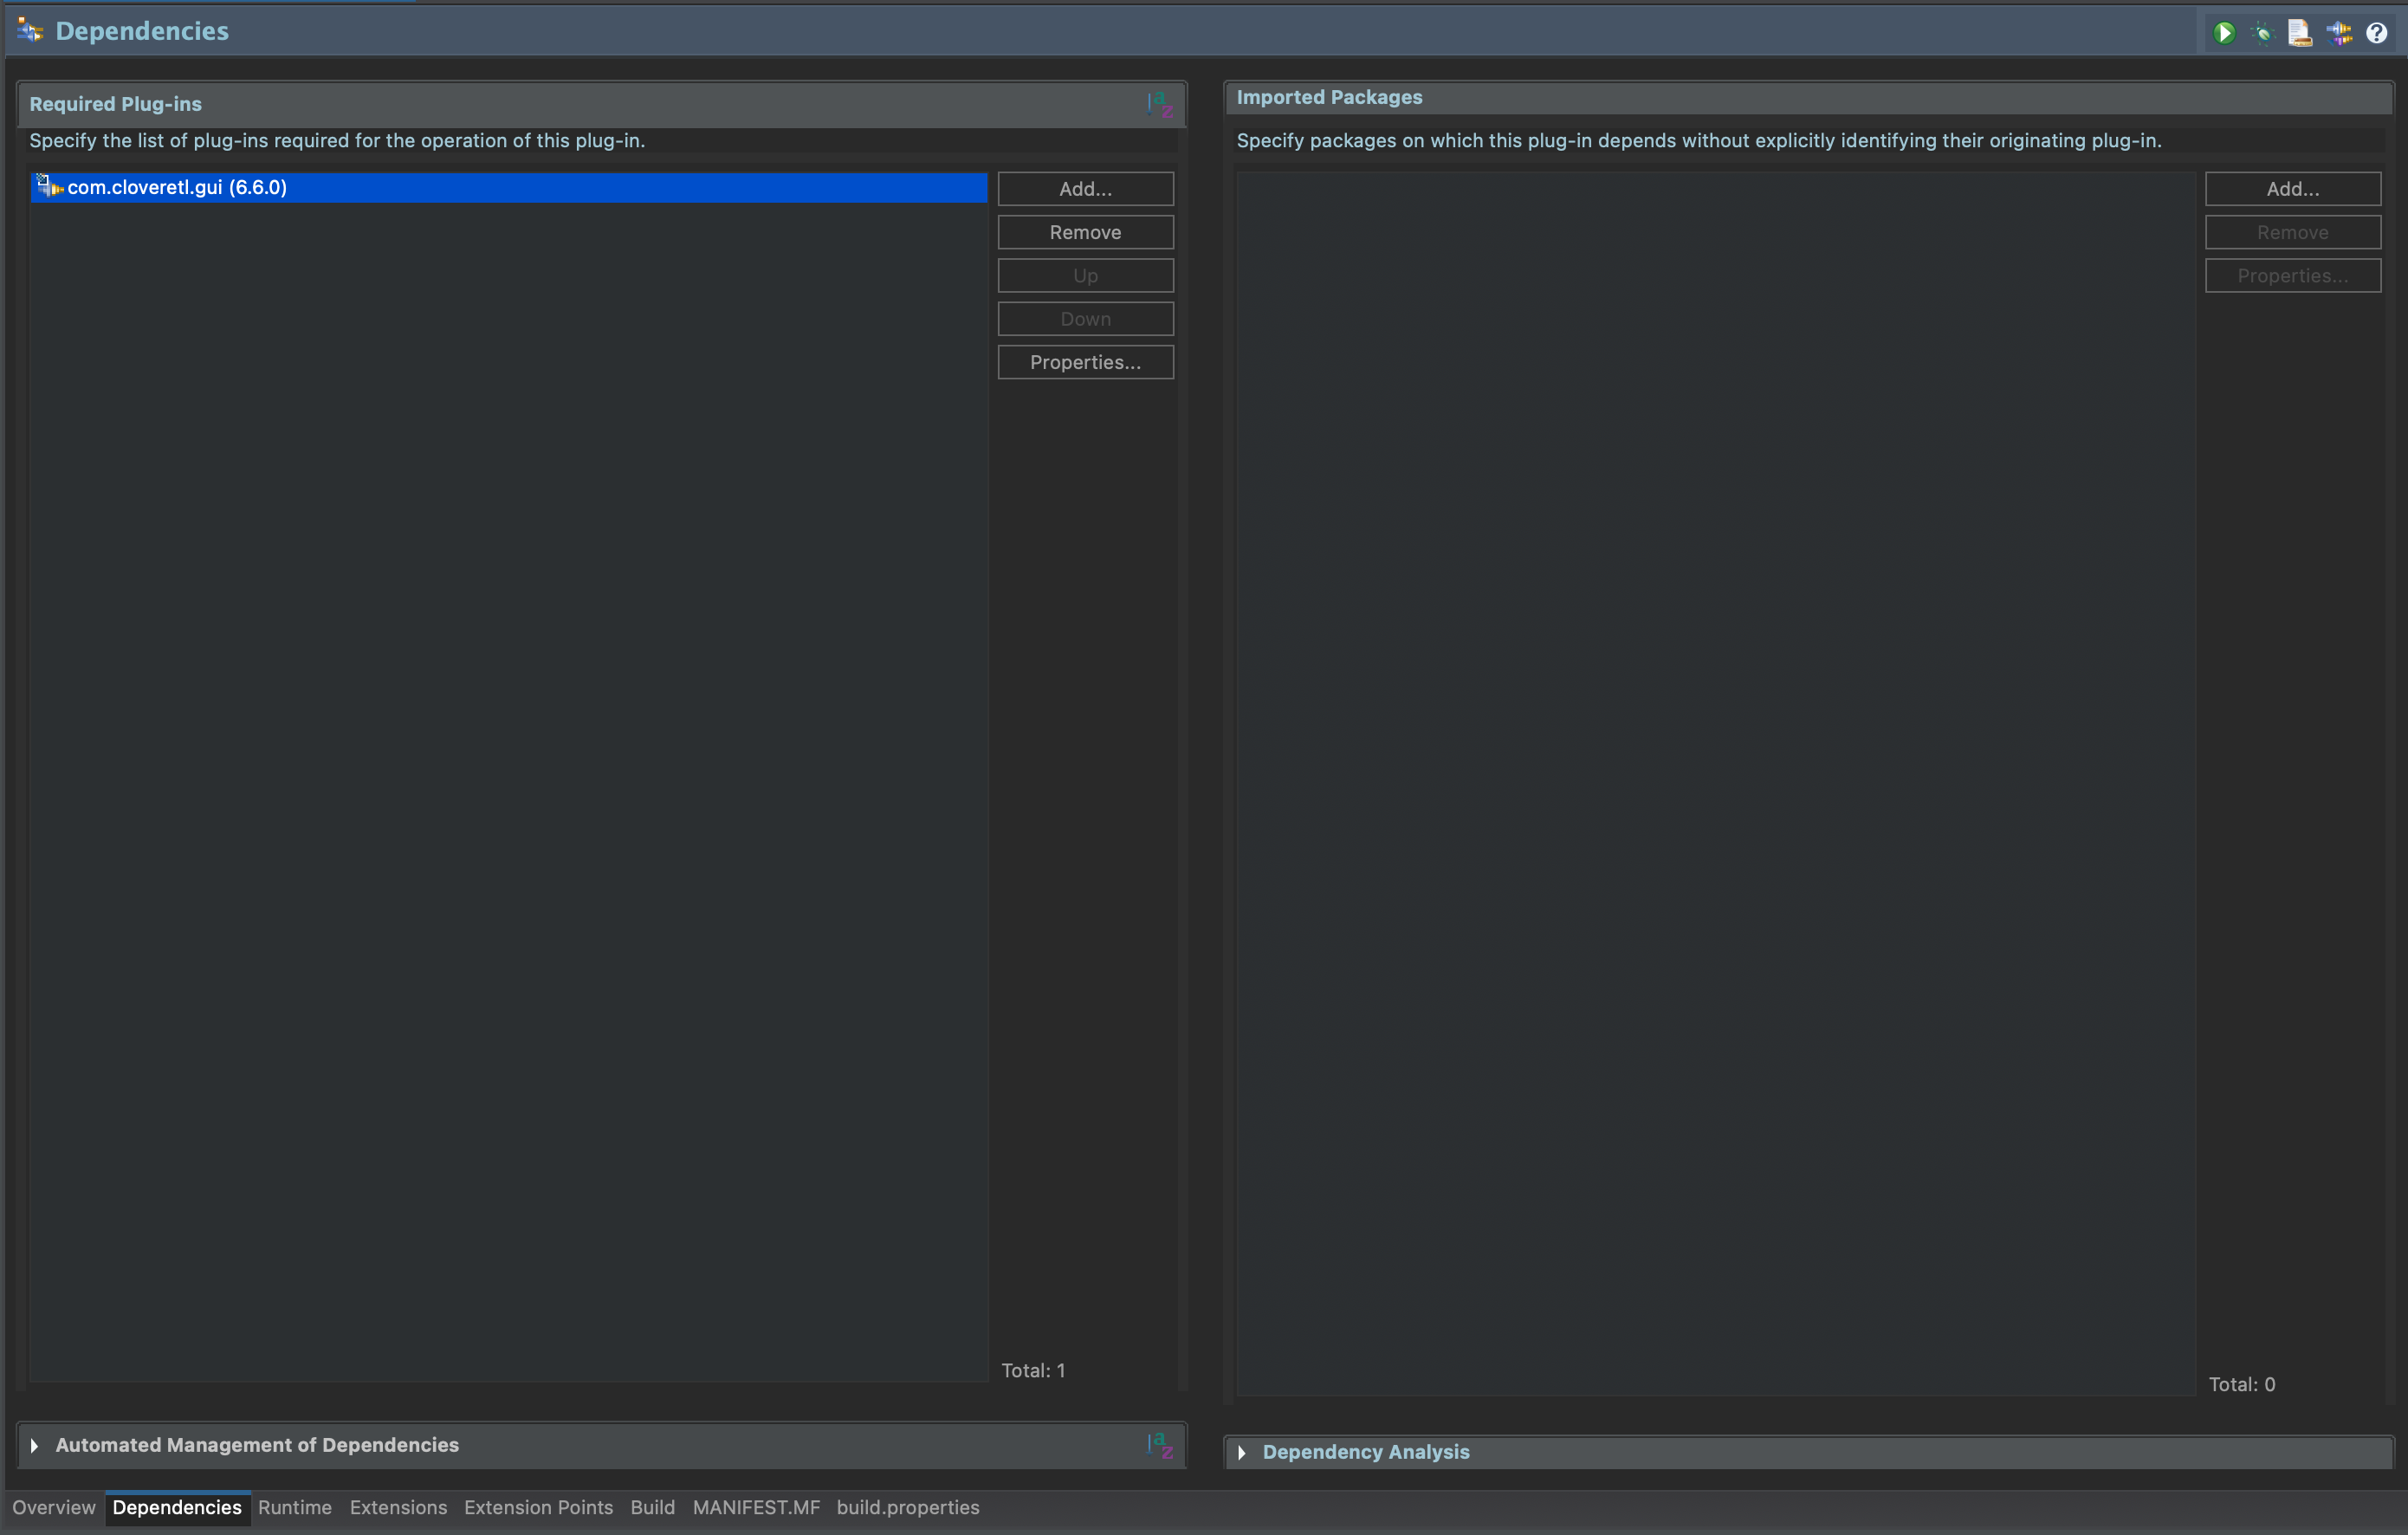
- Switch to the Dependencies tab (bottom tabs)
- Add
com.cloveretl.guiplugin to the list of Required Plug-ins
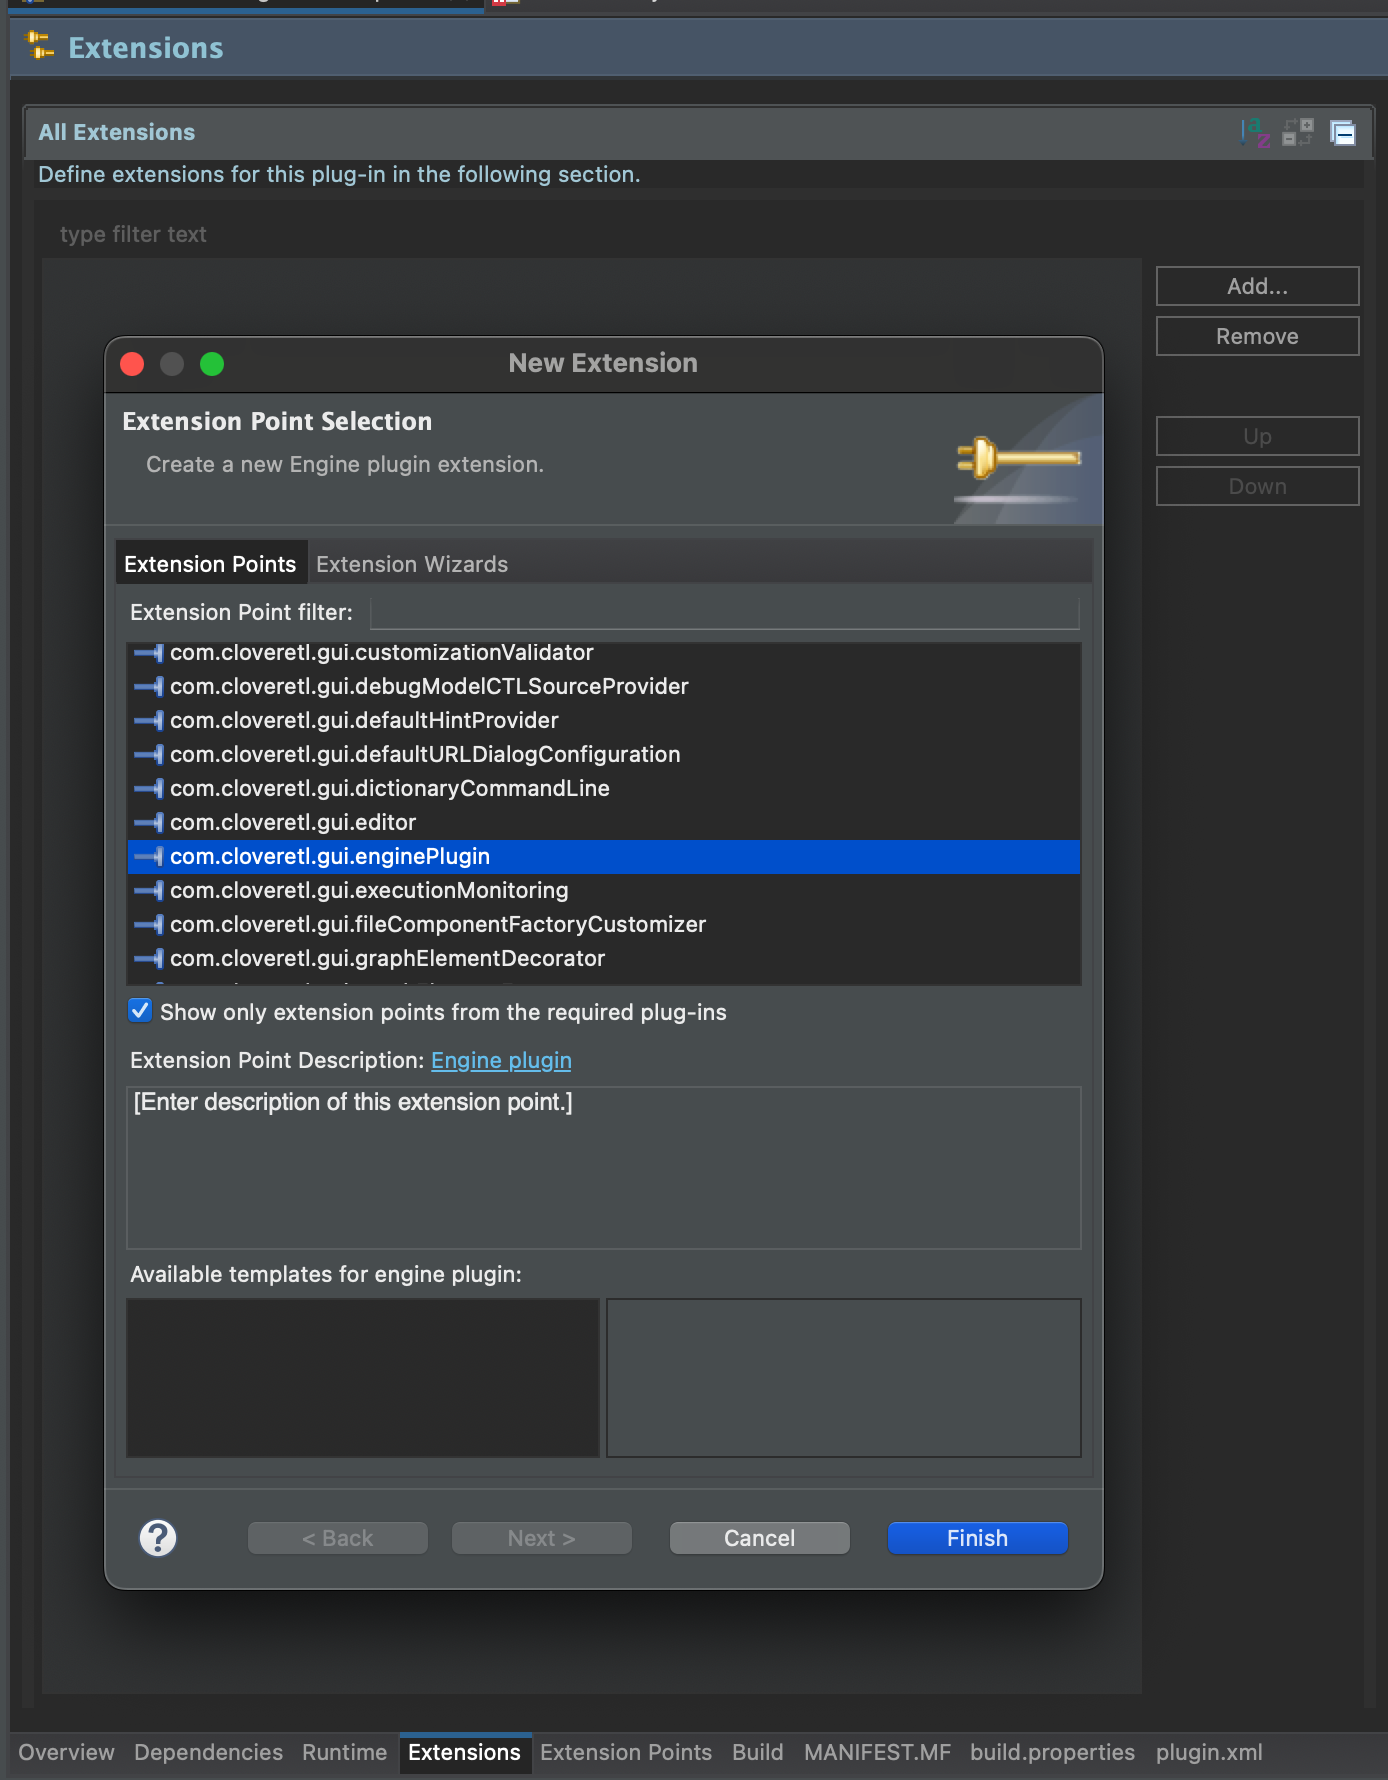
- Switch to the Extensions tab
- Add
com.cloveretl.gui.enginePluginto Plugin extension

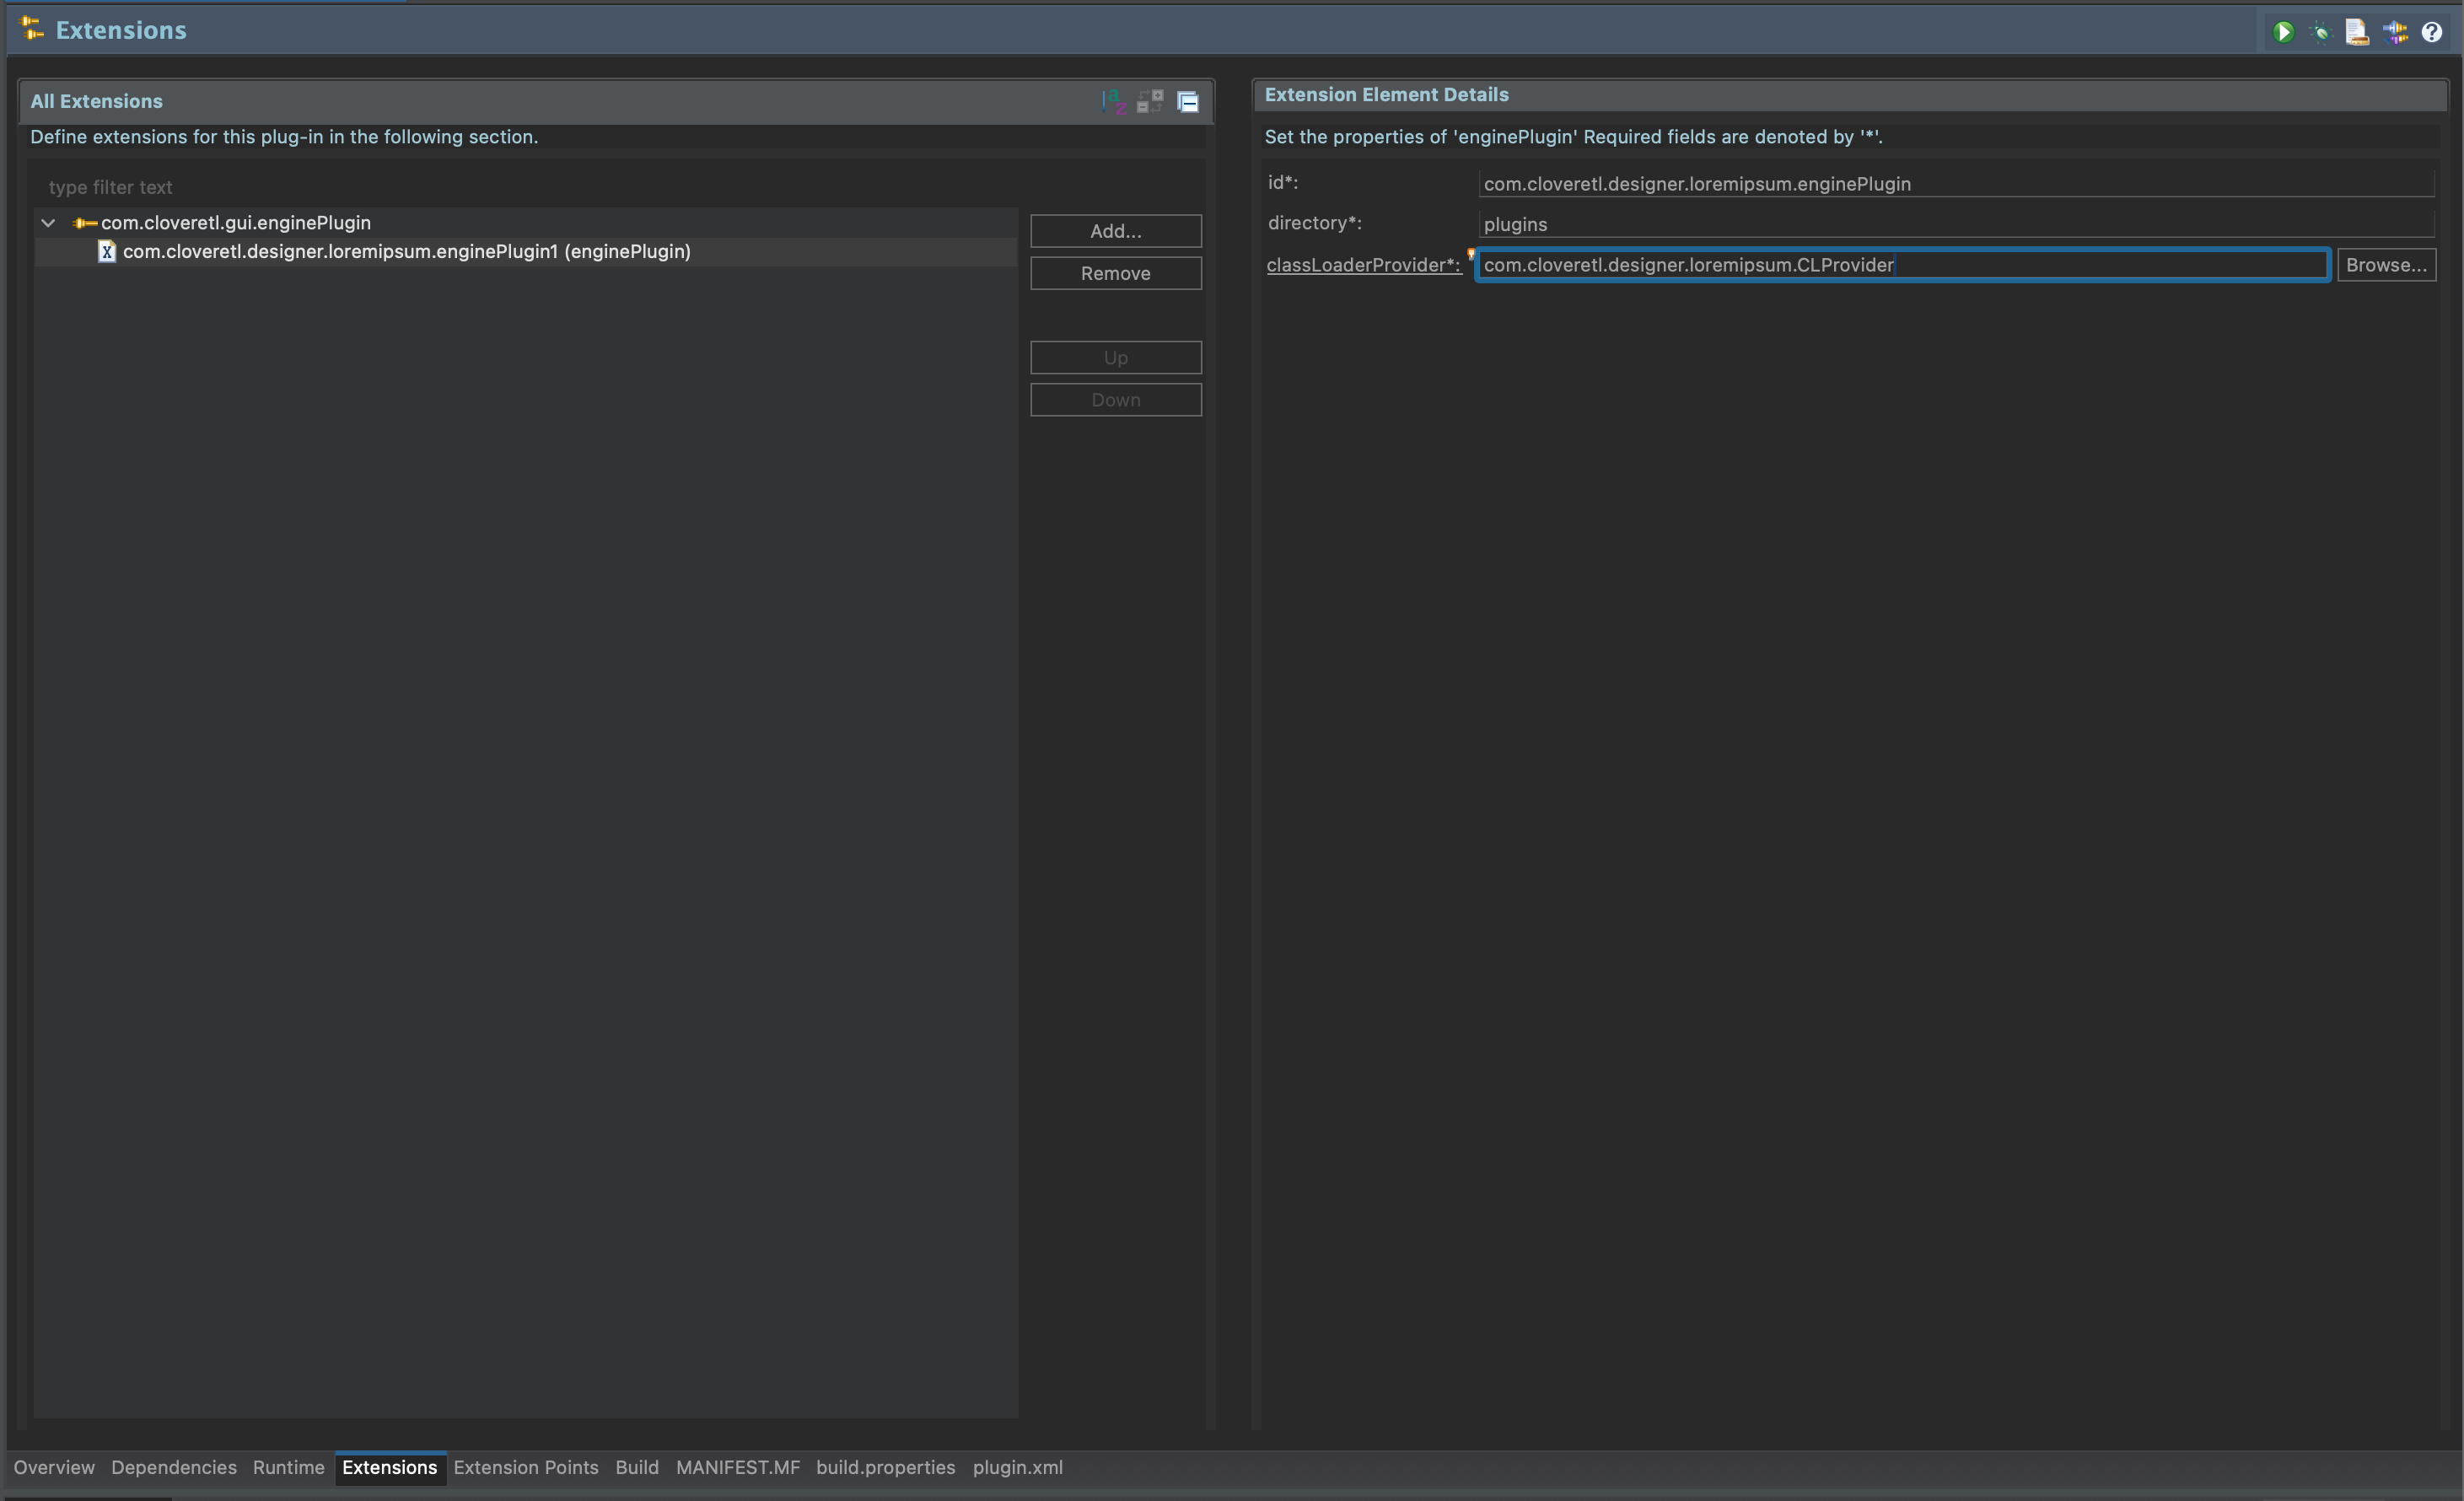
- On the same screen, set the following:
- Directory:
plugins - classLoaderProvider:
com.cloveretl.designer.loremipsum.CLProvider
- Directory:
- Save all your changes (Ctrl-S) and review the previously created class (CLProvider.java). The missing dependencies should be resolved now.

- Go back to the Designer plugin ("com.cloveretl.designer.loremipsum" in main tabs).
- Switch to plugin.xml tab (bottom tabs).
- Add the following lines to the enginePlugin section:
<exportedPlugin
      pluginId="com.cloveretl.custom.loremipsum">
</exportedPlugin>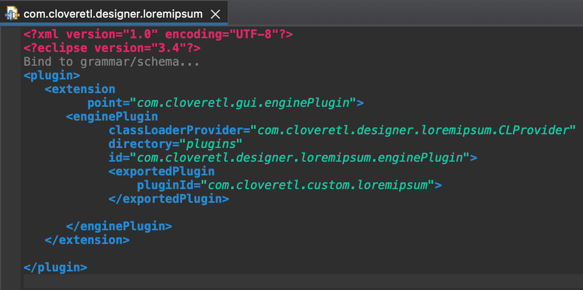
- Now we’ll import our engine plugin we created earlier into this Designer plugin.
- Create a new directory called
pluginsunder thecom.cloveretl.designer.loremipsumproject folder. As best practice, put your engine plugins into folders named after the plugin IDs. - Create a sub-directory called
com.cloveretl.custom.loremipsum(see image below):
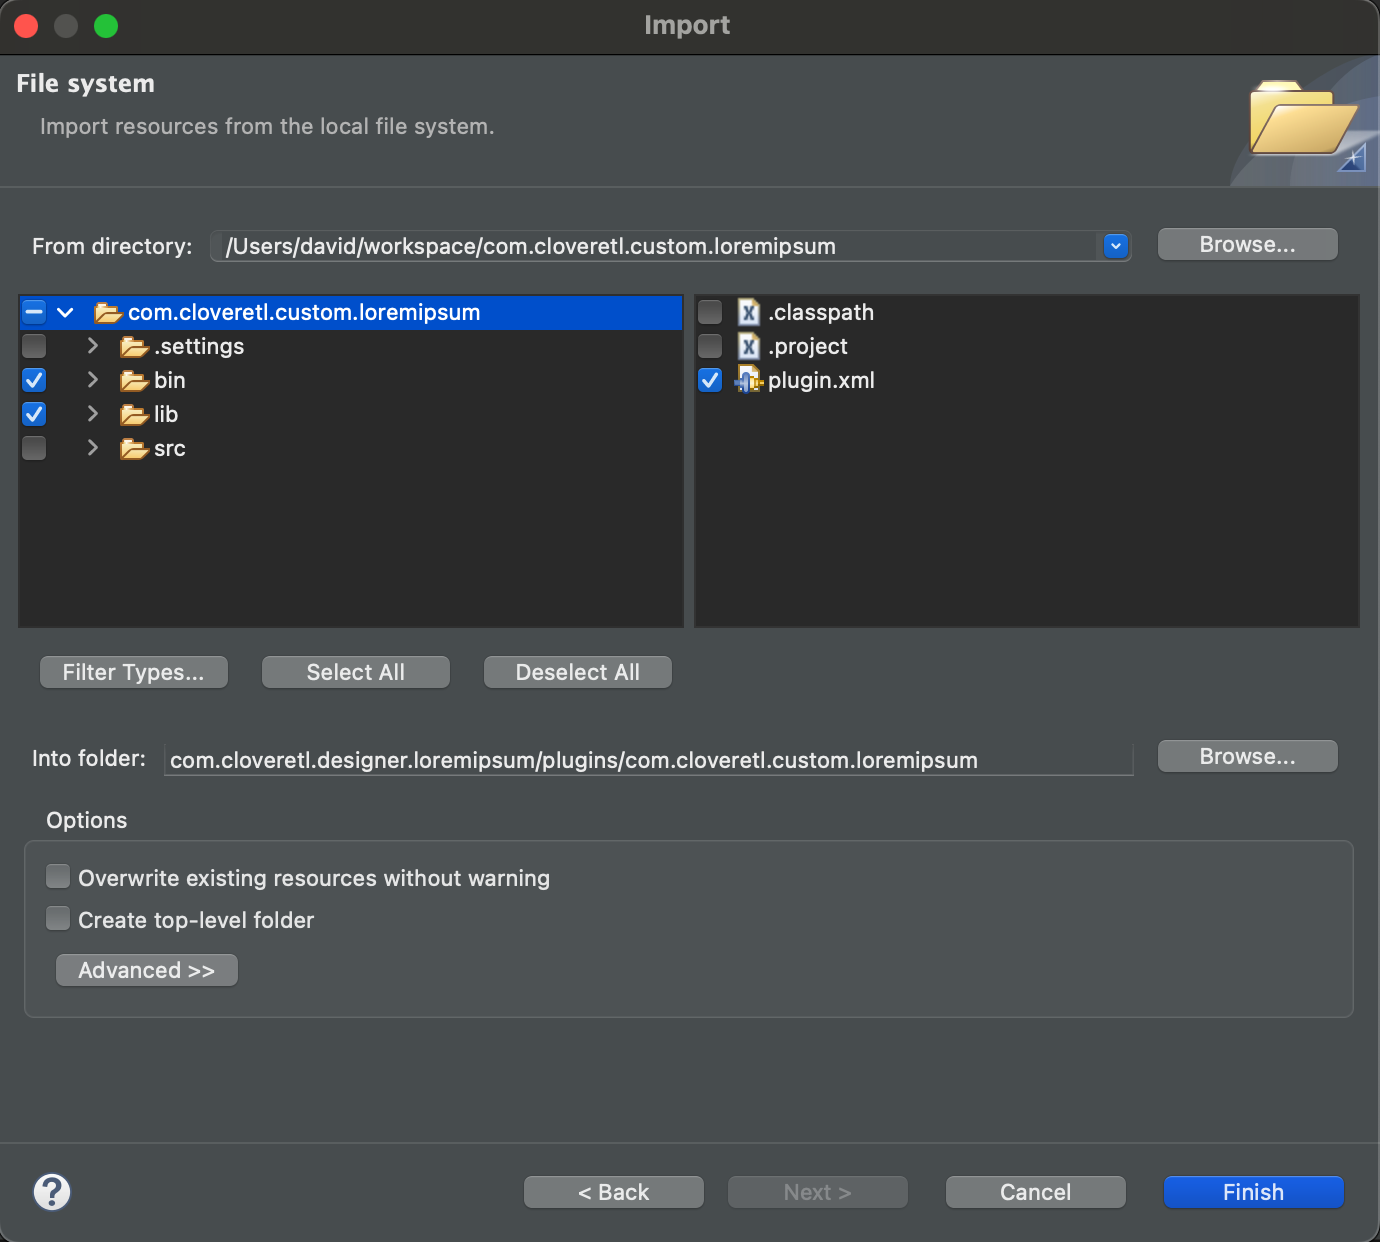
- Right-click
plugins/com.cloveretl.custom.loremipsumfolder and select Import... → General → File system.- Set From directory to
com.cloveretl.custom.loremipsumproject location (the engine plugin project). - Check
plugin.xml(in the right panel). - Check
bin. - Check
lib.

- Set From directory to
- Click Finish and verify that files have been copied to the desired folder:

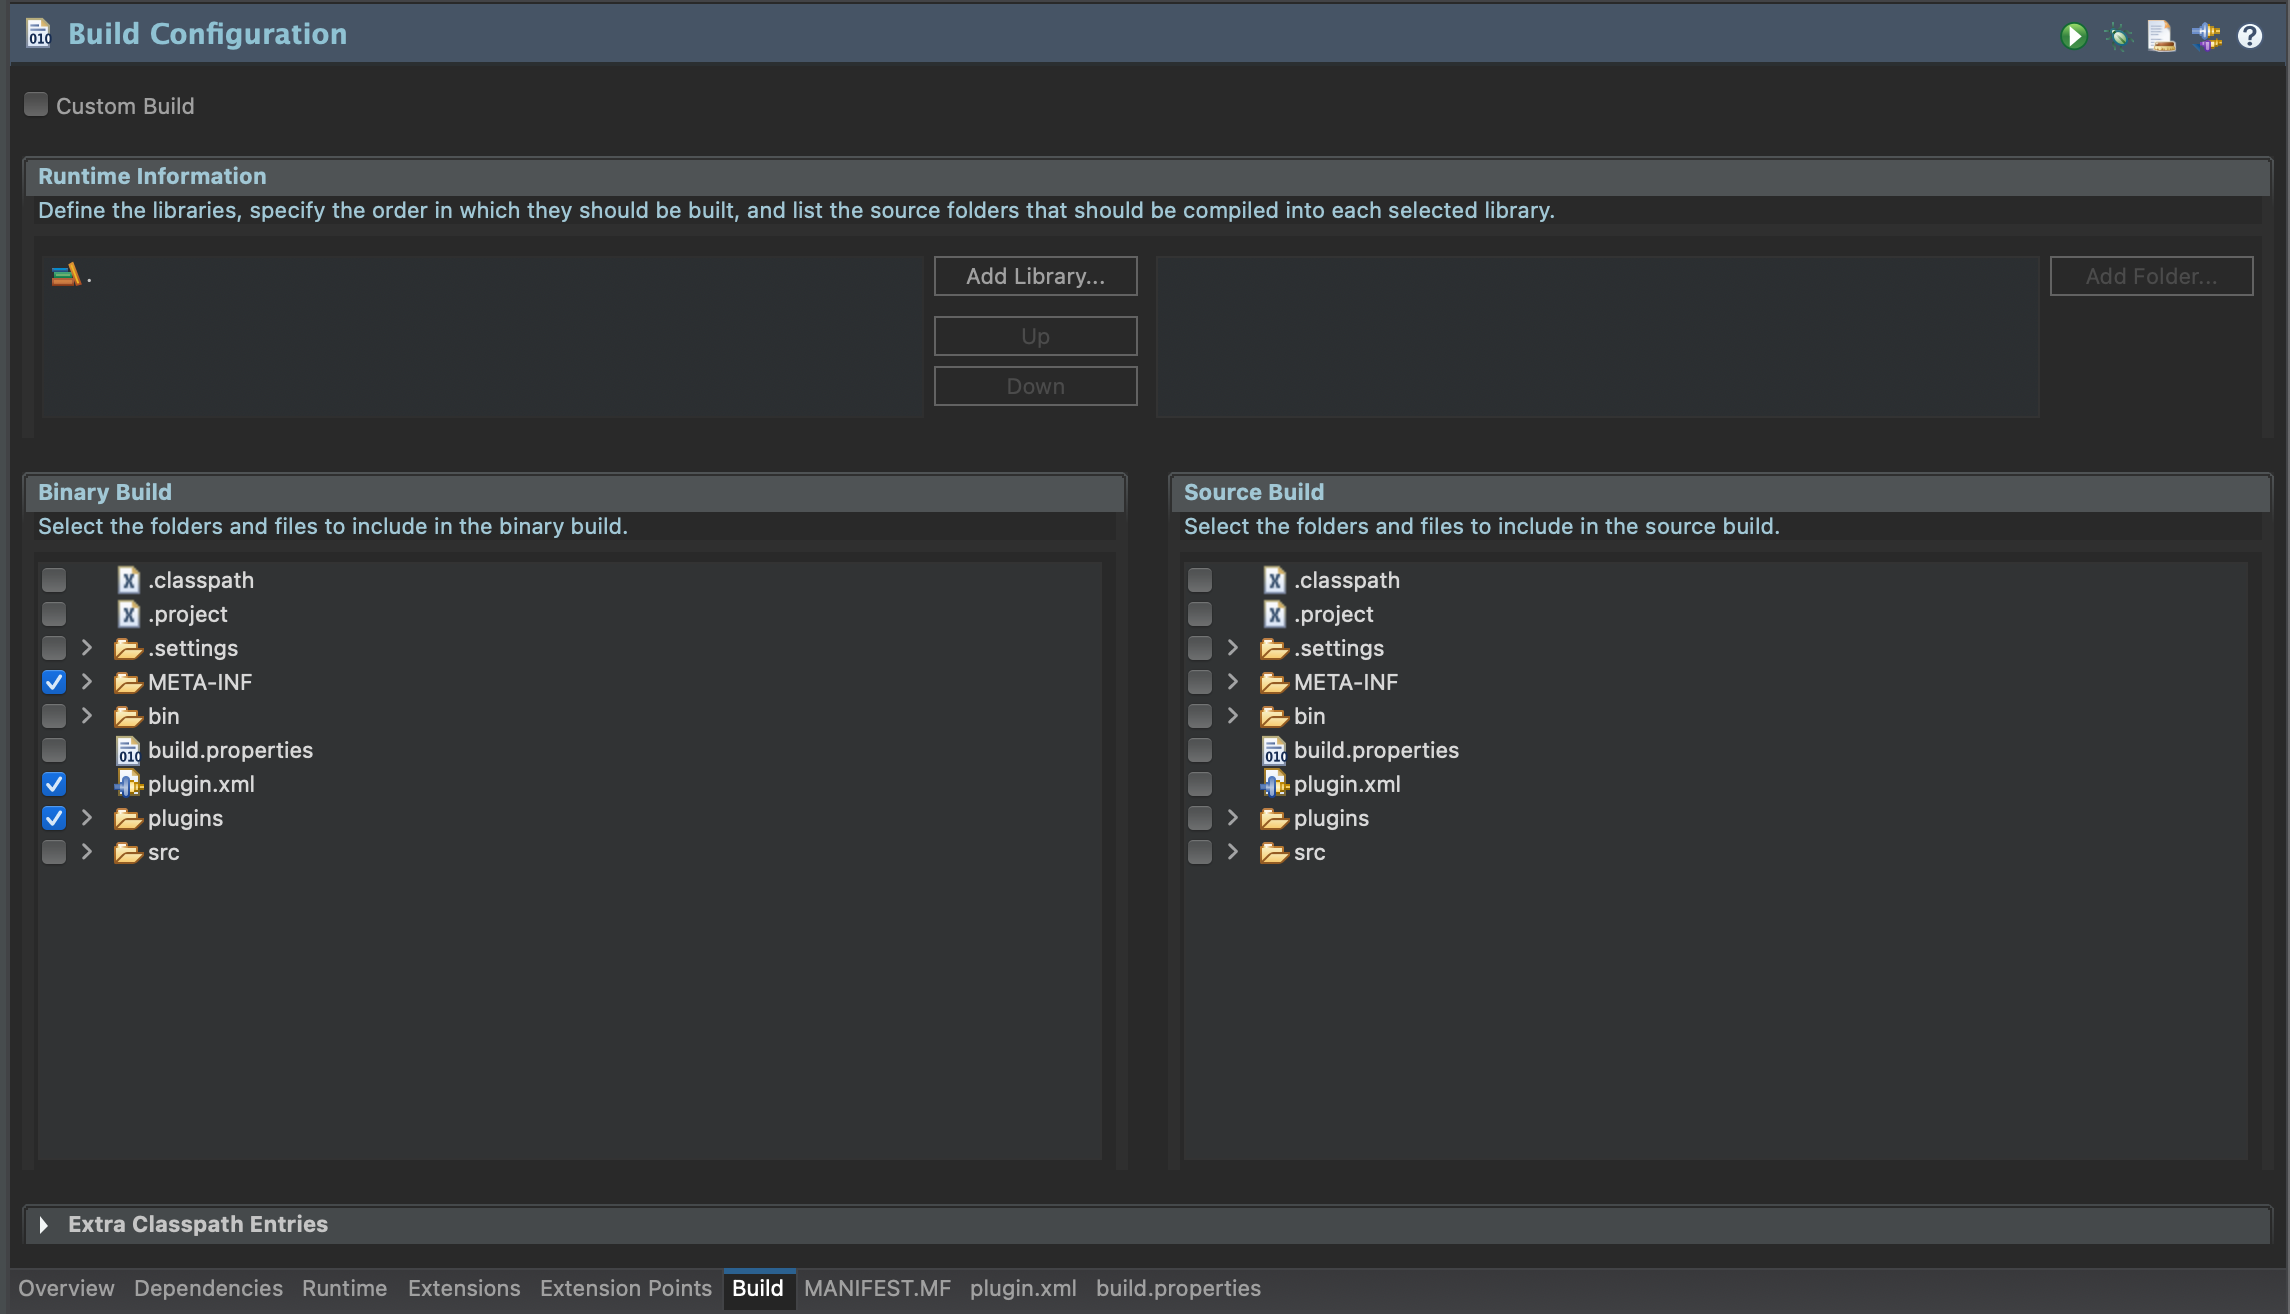
- Open plugin.xml in the
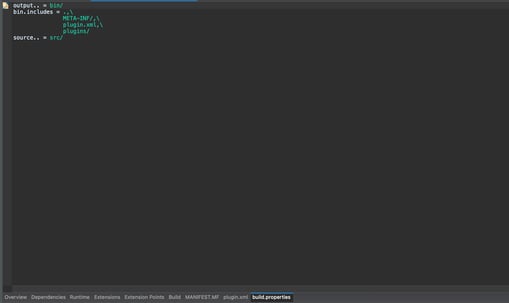
com.cloveretl.designer.loremipsumproject—the one in the main directory, not the one that we have just imported to plugins folder!.- Switch to Build tab (bottom tabs).
- Make sure the following items are checked in the Binary Build section:
META-INFplugin.xmlplugins

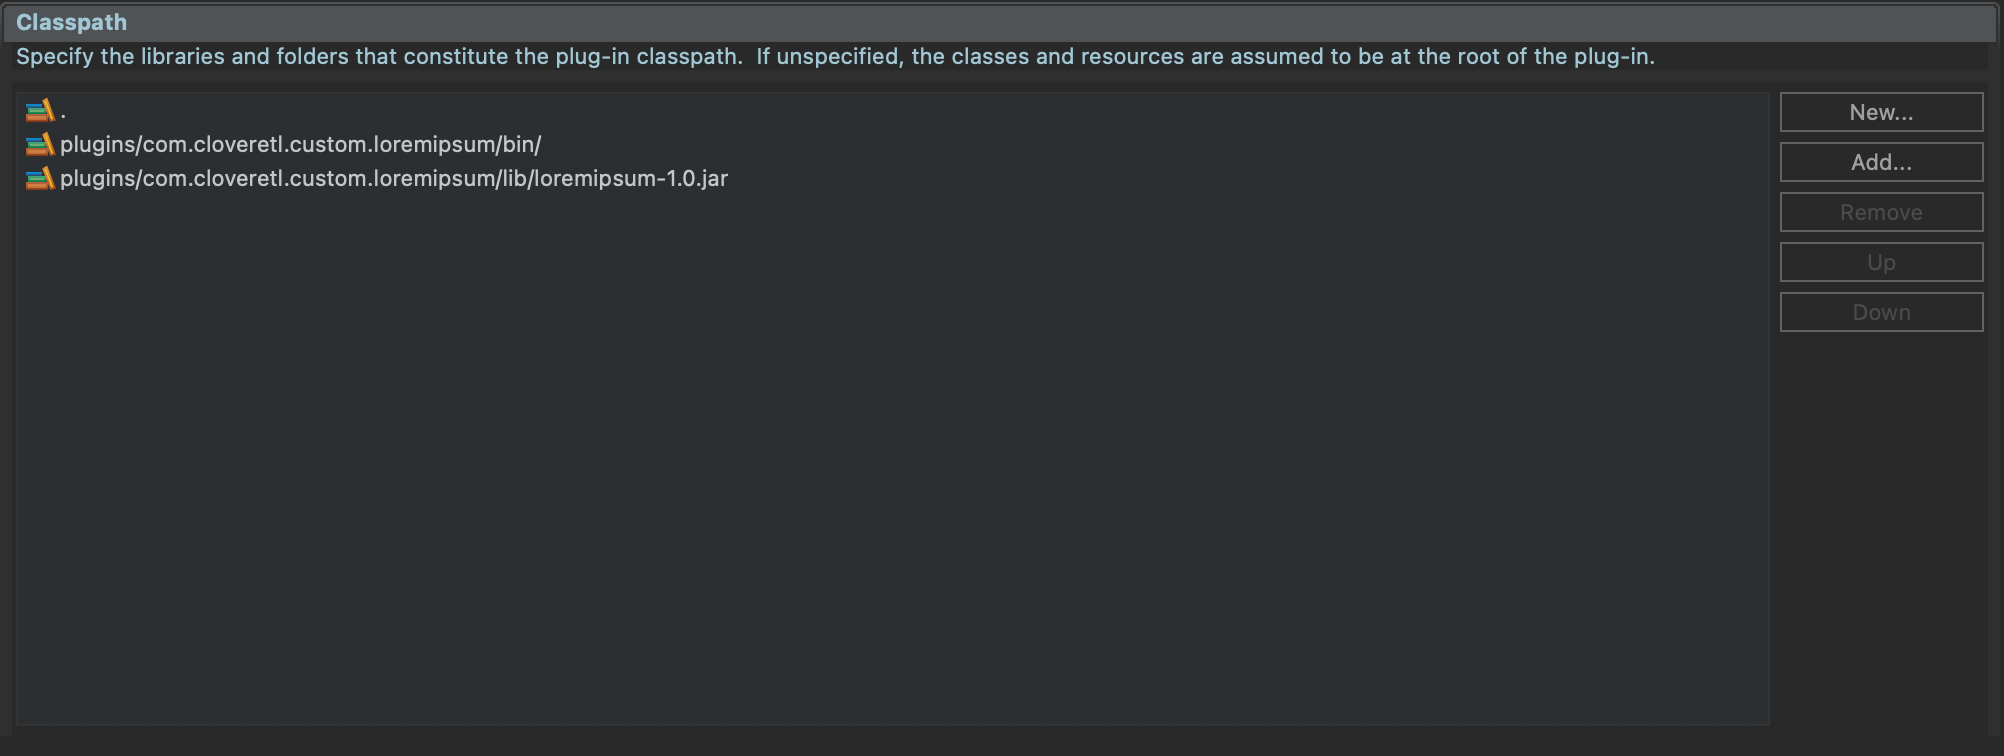
- Switch to Runtime tab and add the following folders to the classpath:
.(the Designer plugin folder)plugins/com.cloveretl.custom.loremipsum/bin/plugins/com.cloveretl.custom.loremipsum/lib/loremipsum-1.0.jar

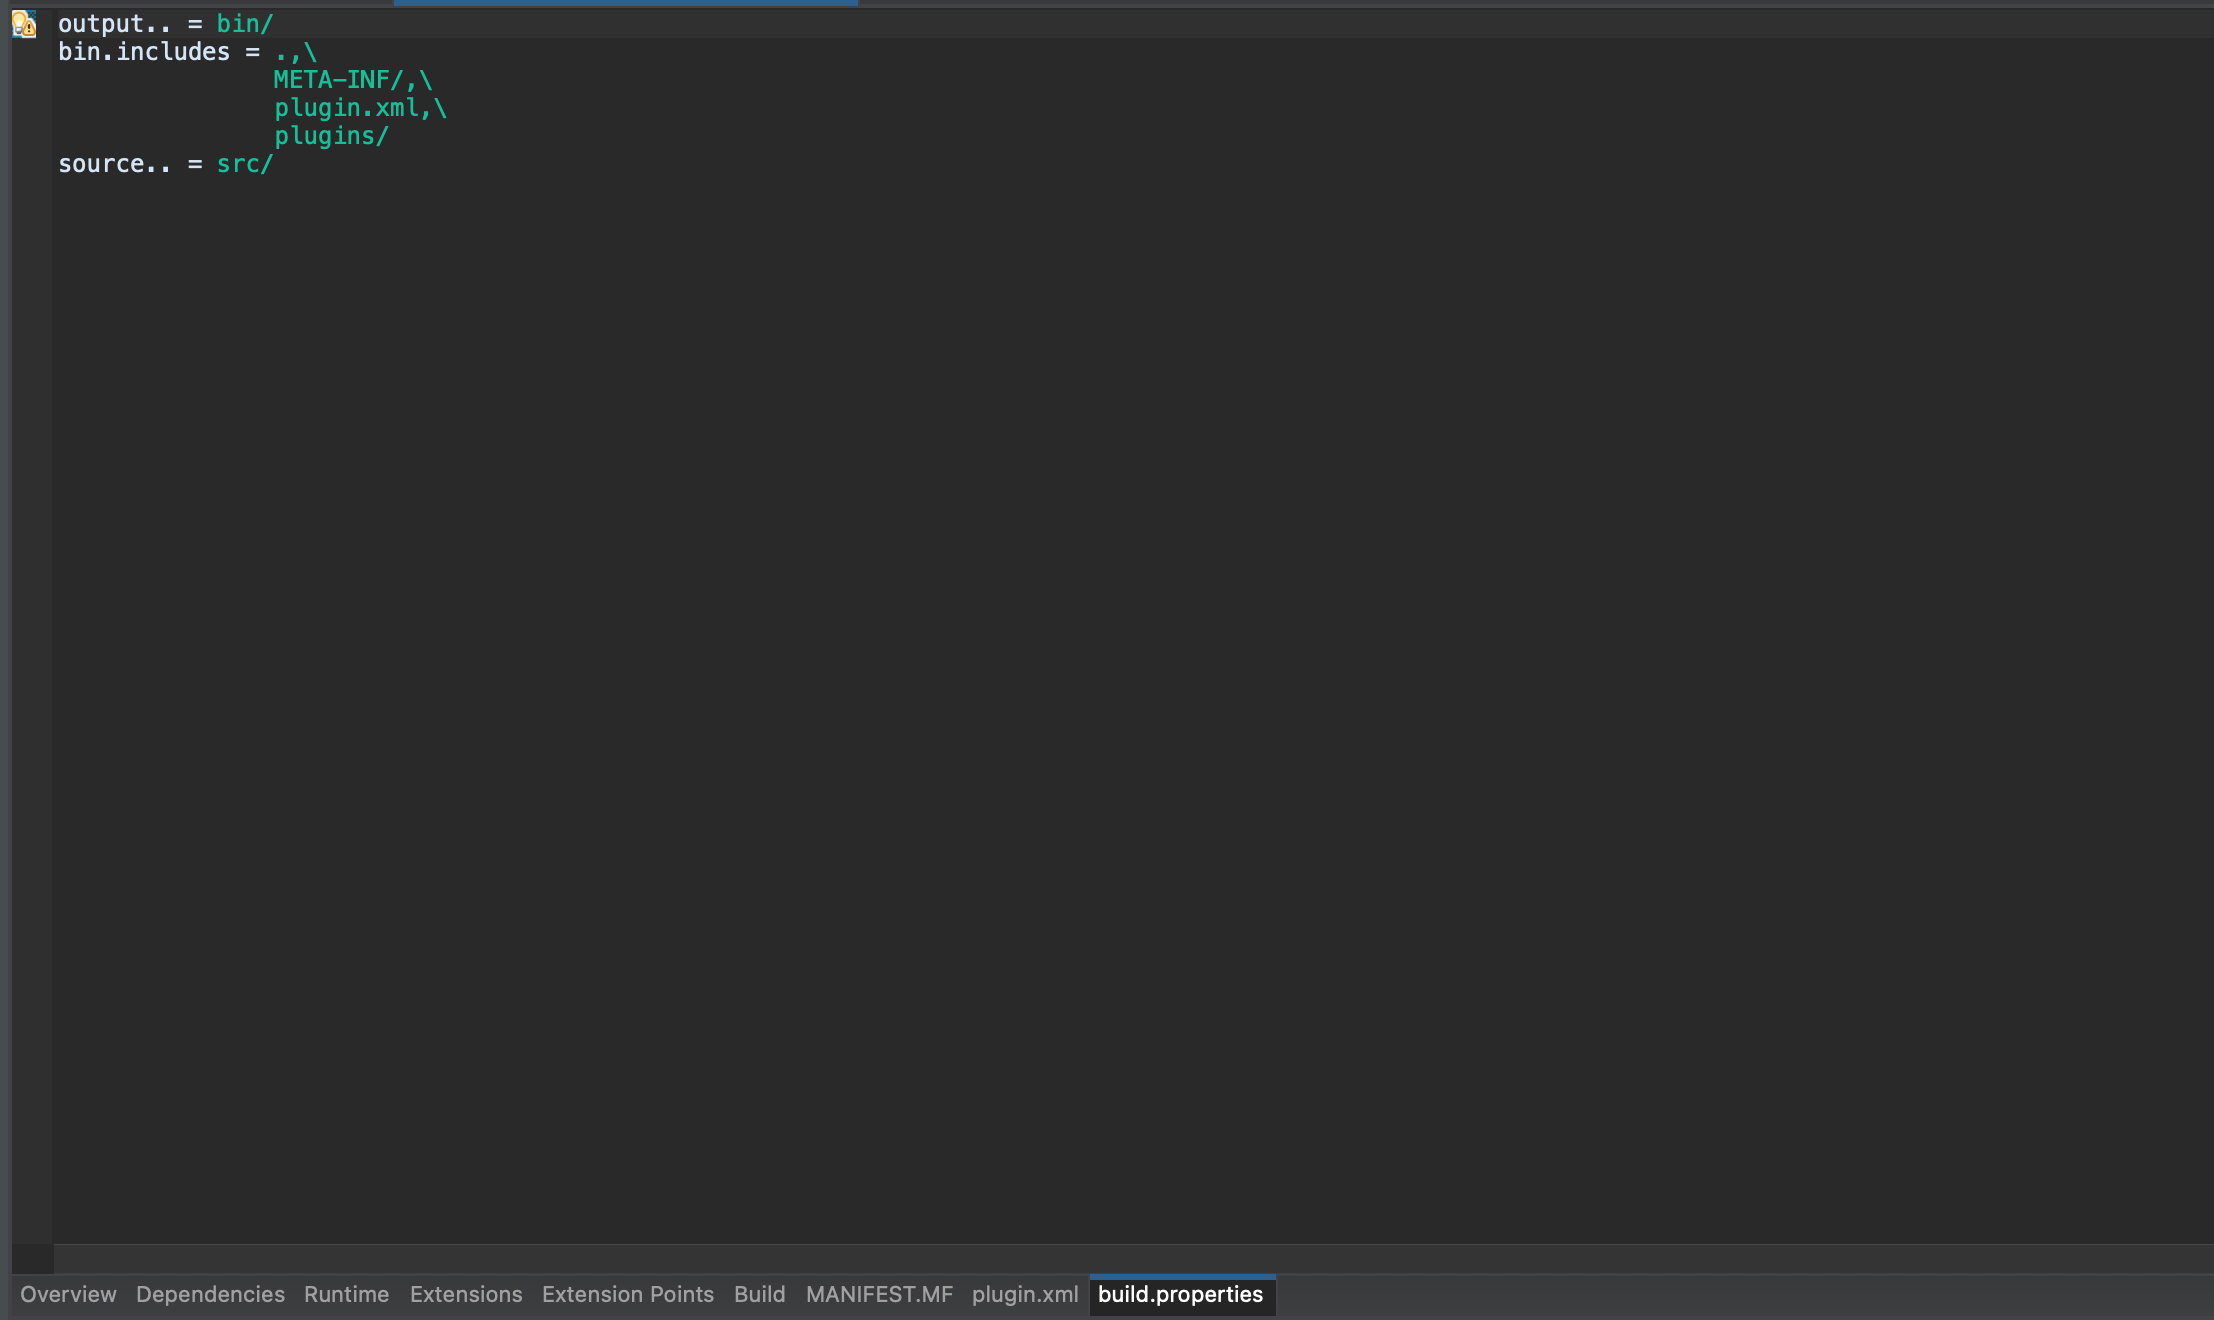
Note: you can use New button and just copy & paste the values from above. - Switch to build.properties tab and verify that the content is similar to this:
- You are very close to victory now!
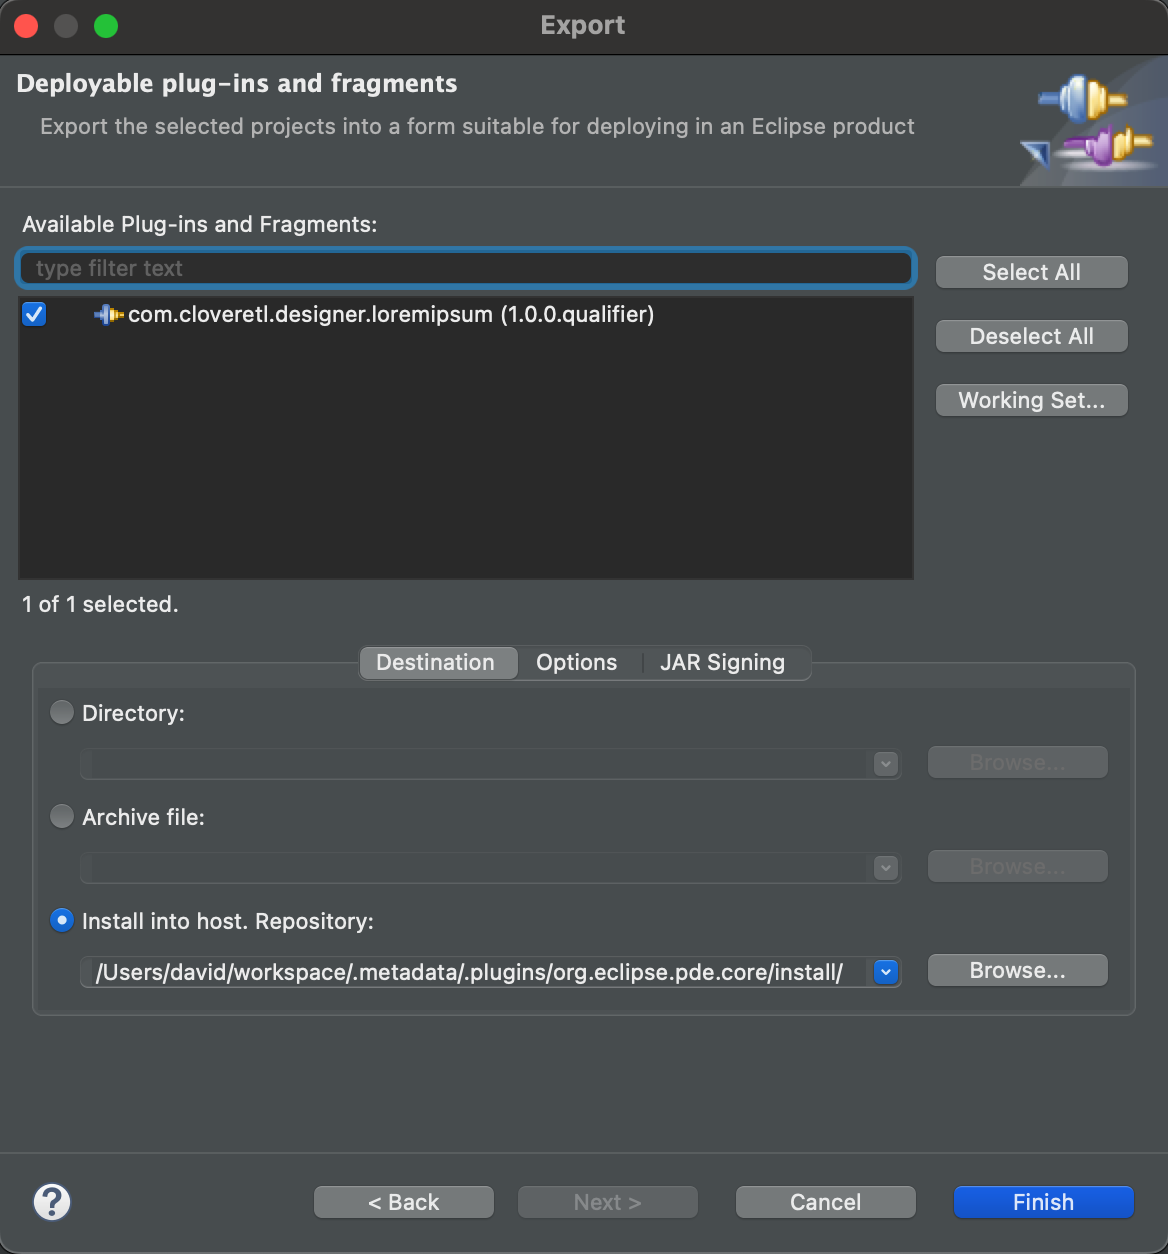
- Right click
com.cloveretl.designer.loremipsum(the Designer plugin) project and select “Export…” from the context menu.- Select Plug-in development → Deployable plug-ins and fragments.
- On the Destination tab select
Install into host. Repository:(no need to change anything else)

- Click Finish.
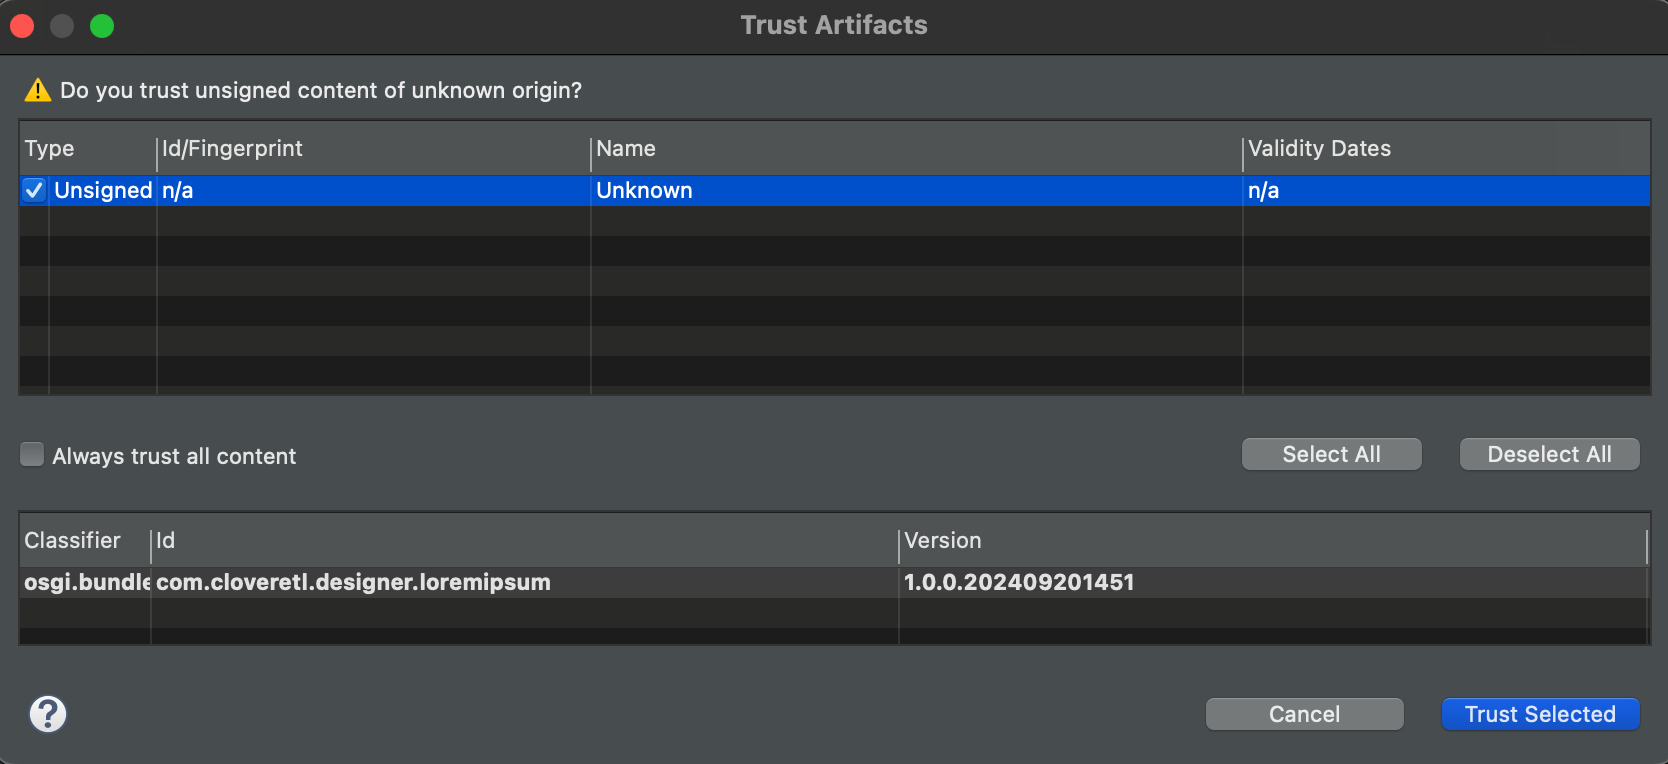
- In the dialog asking whether you trust your plugin, check the plugin and click Trust

- Congratulations! After restarting the Designer application, all your projects will be able to use your magnificent new CTL functions!
Now you can try your new functions anywhere in CloverDX, let's see it in DataGenerator's Source tab:

Troubleshooting
If you foolowed this how-to, you should end-up with the new functions present/available in your CloverDX Designer. However, if you experience issue during building or installing, you may look at the attached projects source code .zip archive. It should be enough to import into your Designer workspace and deploy/export as mentioned in step 27 above.
The archive also contains ready to use Eclipse/Designer Update Site: com.cloveretl.designer.loremipsum.updatesite - this may be used to install the plugin via Help → Install New Software and then adding local repository (note: copy the content of the updatesite to some local directory). For more details, consult Eclipse's manual).
Deploying to CloverDX Server
Well, you sucessfully deployed and tested your new plugin with CTL functions implementation in CloverDX Designer. Now is time to add this plugin to CloverDX Server, so transformations using your new functions also work in server environment.
- First, locate file
clover.properties. It should reside incloverconfsubdirectory of the main directory where your CloverDX Server is installed into. - Add configuration property
engine.plugins.additional.srcinto the file (unless it is already there). This property should be set to a value which denotes a full path to the directory where CloverDX should look for your additional plugins. So make sure this is accessible (at least for reading) to whatever user CloverDX Server process runs under.
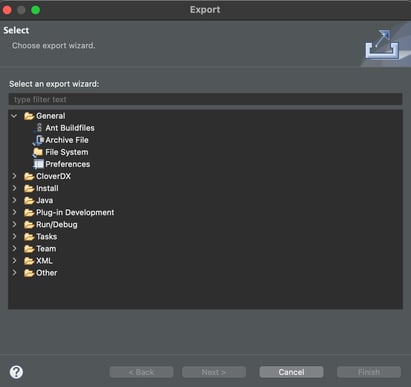
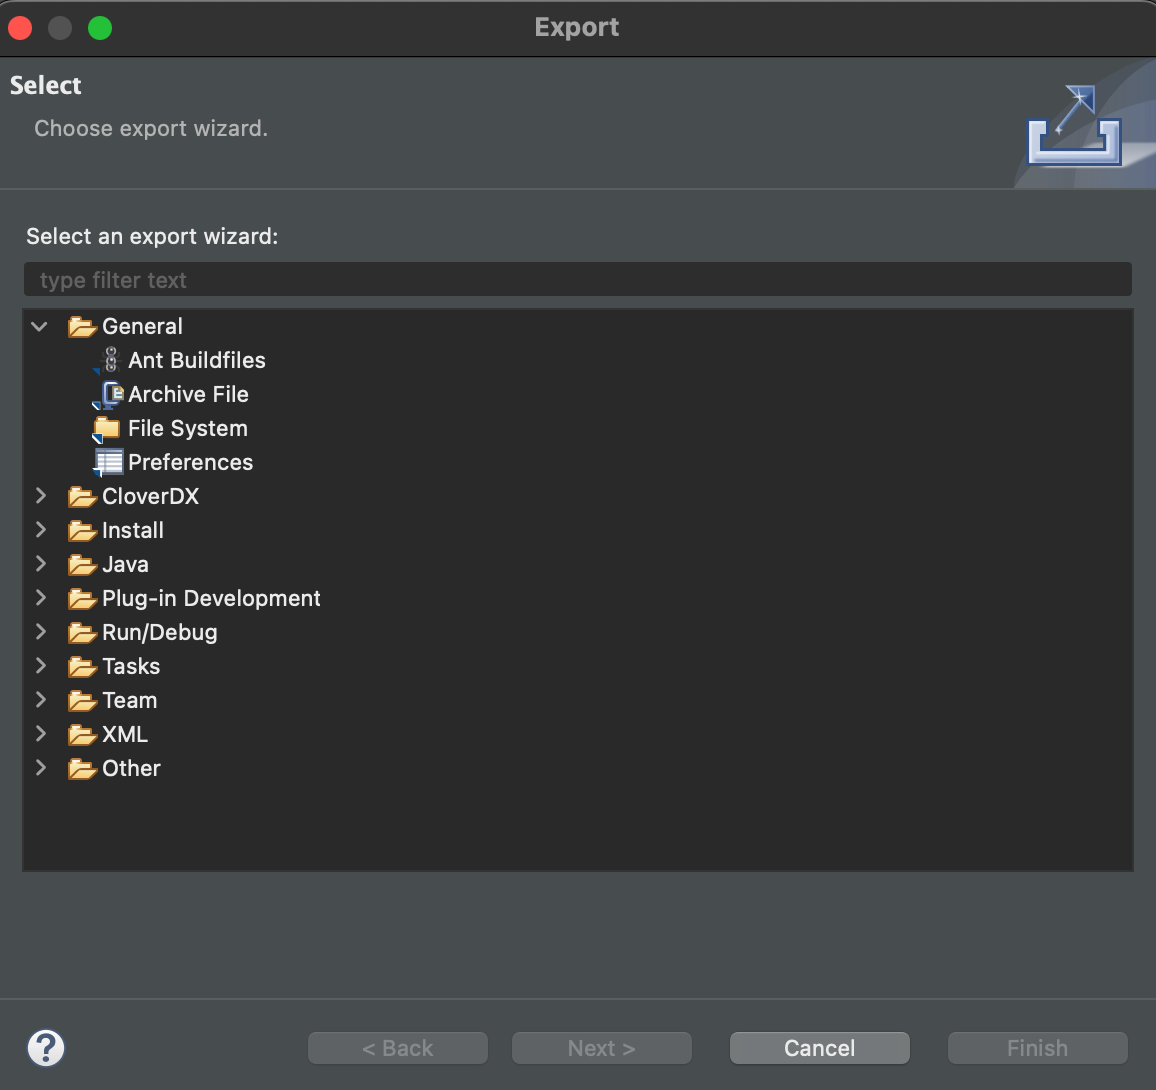
Example: engine.plugins.additional.src=/opt/cloverserver/myplugins - Go to CloverDX Designer, right click your com.cloveretl.custom.loremipsum project and select Export. Choose General → Archive File
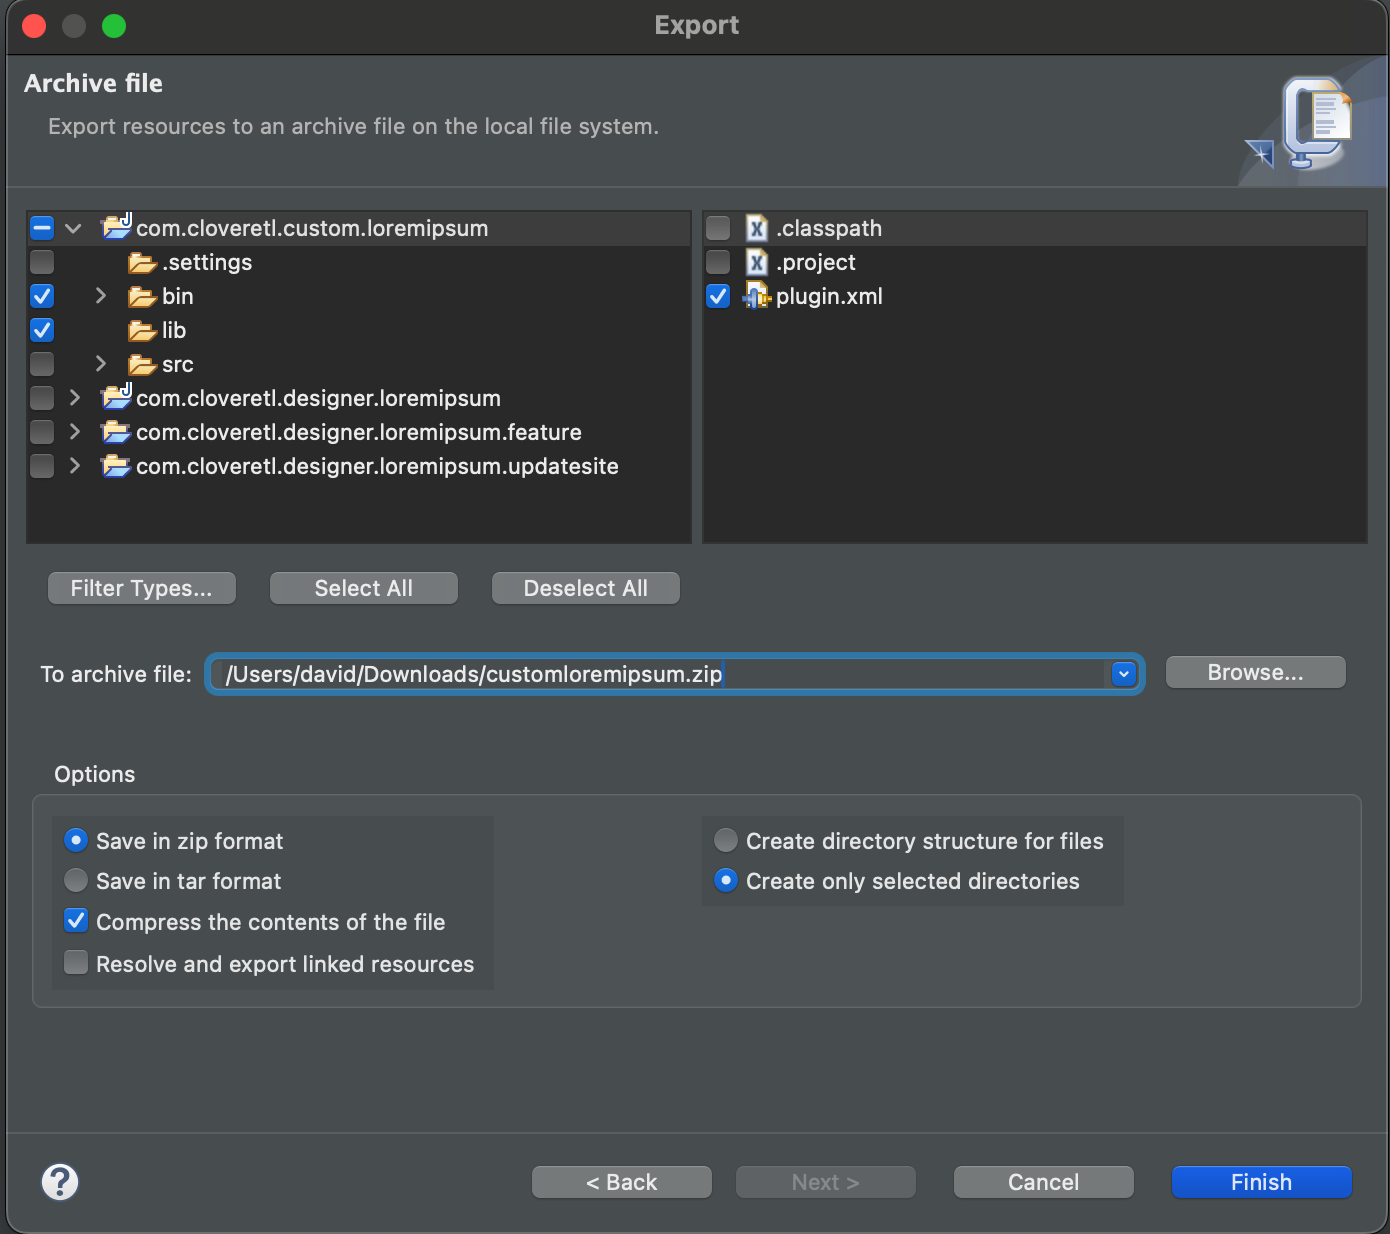
- In the Export Archive file dialog, unfold com.cloveretl.custom.loremipsum and make sure you have only these folders and files checked for export:
- bin/
- lib/
- plugin.xml
You may name your archive file whichever name you like. In our case, we usecustomloremipsum.zip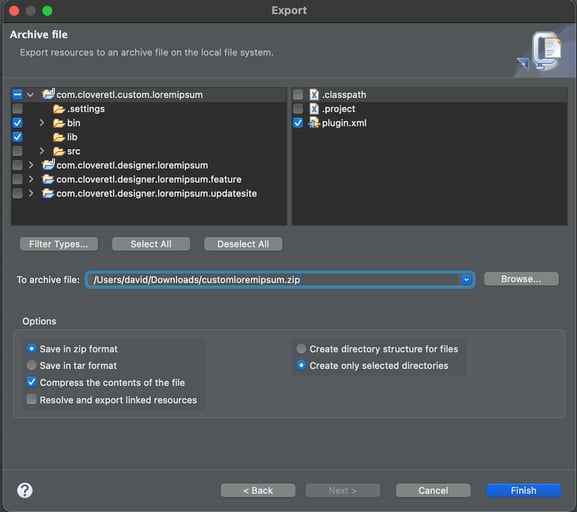
- After clicking Finish, copy/move the newly created archive file into wherever your
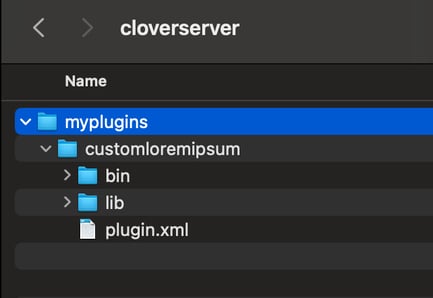
engine.plugins.additional.srcpoints to. In our case, it is /opt/cloverserver/myplugins. - Extract the content of the archive into the directory. Make sure it resides in its own subdirectory, in which plugin.xml file is located.
- Restart CloverDX Server so it picks up the newly added plugin.
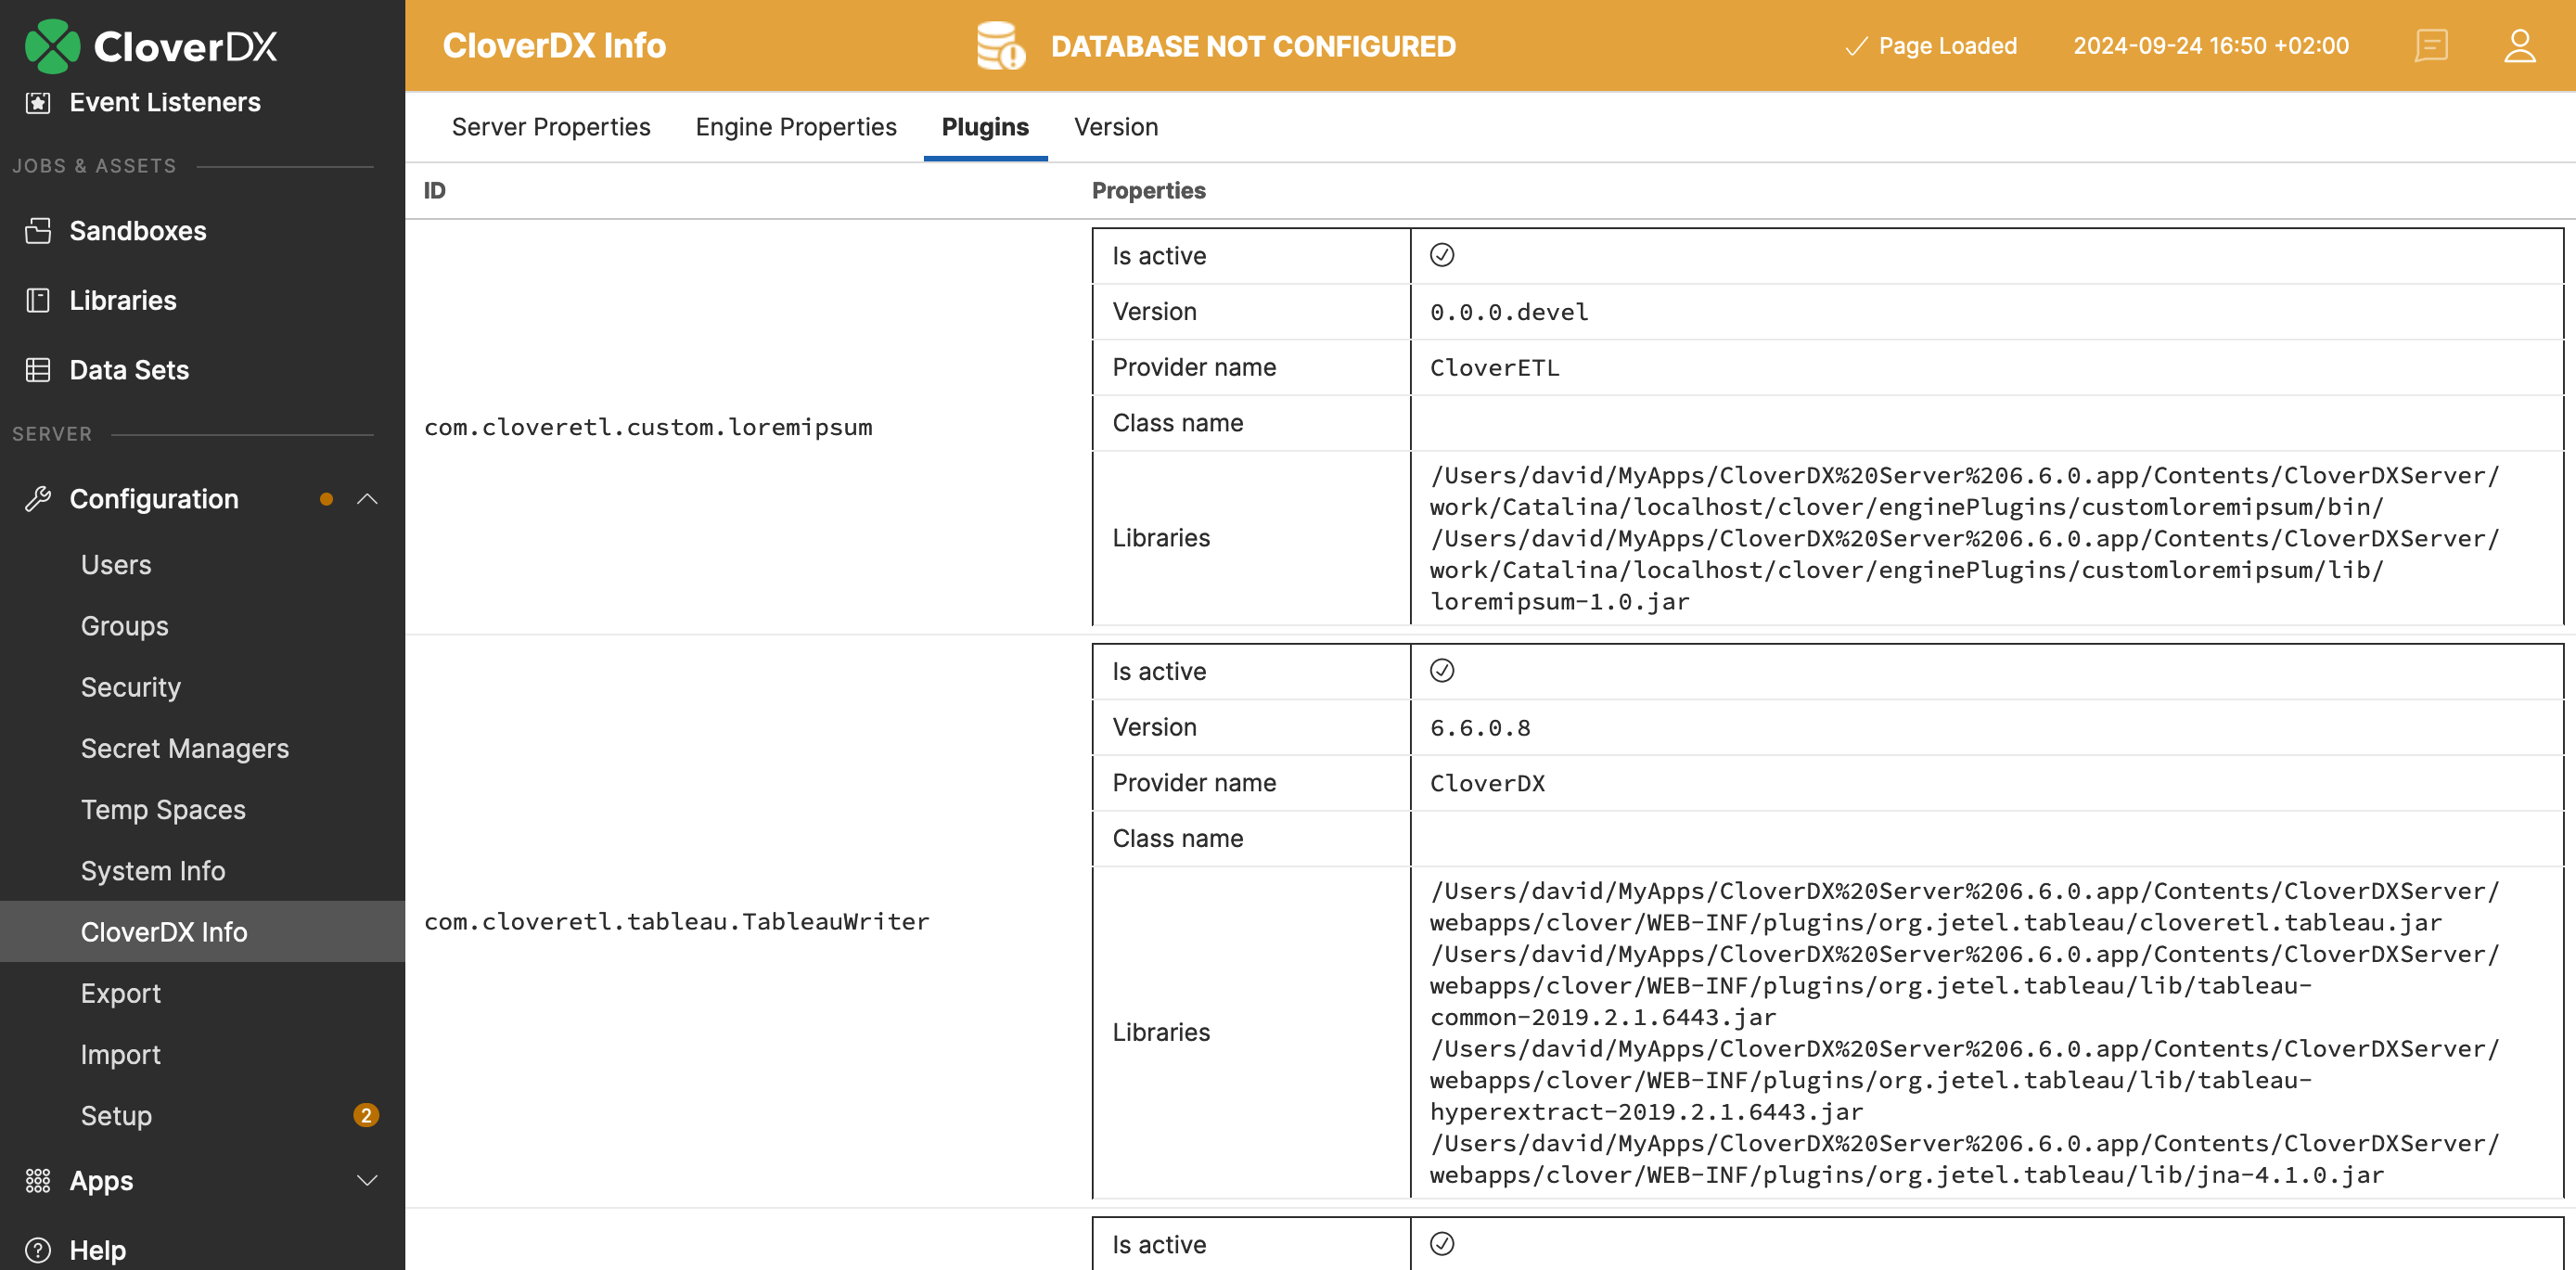
- Go to you CloverDX Server console, select Configuration → CloverDX Info → Plugins. You should see your plugin picked up & loaded by the server.

- Congratulations ! Your plugin is now used by CloverDX Server and all transformations executed by it will be able to benefit from your newly created CTL function.
Source code
More from Tech Blog
-
CloverDX Server diagnostics with ChatGPT or Claude via MCP
Administrating a healthy CloverDX Server usually means correlating information scattered across performance logs, job tracking tables, execution logs,... AI -
Data Quality Examples on GitHub
As our first set of examples, we published a project called DataQualityExamples which demonstrates how users can address their data quality issues with... CloverDX How-To -
Introducing CloverDX Examples on GitHub
We’re excited to introduce the CloverDX Examples repository on GitHub. The repository is a growing collection of helpful and practical examples designed to... CloverDX How-To -
Sending emails via Azure Communication Services SMTP
There are many situations where it is helpful to get a message from your active pipelines. These may include logs, summaries of successful completion, or... Cloud -
Connecting to REST APIs (OpenAPI)
Connecting to REST APIs is a crucial aspect of modern data integration, and the REST Connector in CloverDX provides a streamlined approach. The video below... RESTConnector -
Performance tuning: How to troubleshoot database-related performance issues in CloverDX
Performance is undoubtedly one of the key factors when running data transformations. In this article, we will look at how to troubleshoot database-related... Performance
Visit CloverDX Blog
-
How financial services firms use automation to cut reporting from days to half a day
-
Data integration after an acquisition: How fast-growing companies stay in control
-
Boomi vs CloverDX for enterprise data integration
-
Boomi Alternatives: A Complete Guide (2026)
-
Why SaaS engineers are stuck doing manual customer data onboarding – and how to fix it