Subgraphs are one of several new, exciting abilities in CloverDX 4.0. You may have already read some articles about them. To better illustrate the usage and benefits of subgraphs, let me guide you through one detailed example.
I was working on one presentation for one of our new customers and part of the presentation was a graph that generated data. The specific request was:
- to generate a data sample that looks like real people's contact information
- to show how to use the data sample for testing purposes
I started to build a graph to generate imaginary contacts. It takes the most common first names and surnames from a web source and then combines them randomly together. Afterward, it generates an email address for each of them.
Here is what the graph looks like:
Although for simple task, graph is already quite complex.
The graph consists of 3 different jobs:
1. It reads a list of first names and puts them into lookup
2. It reads a list of last names and puts them into lookup
3. It generates random combinations of first and last names
I realized that I can easily demonstrate subgraphs' functionality to the customer as well, as downloading and parsing names is used twice in the graph and it is almost same in both cases. The only thing that differs is the HTTP request URL and the regular expression pattern used for the extraction of the data. This sort of duplicity in a graph is typical for a good subgraph candidate; the only difference between those two will be in the subgraph parameters. Also creating a subgraph now will save me a lot of work in the future, because I will be able to create any graph with lookup data in just a few minutes.
So how can I create a subgraph from an existing graph?
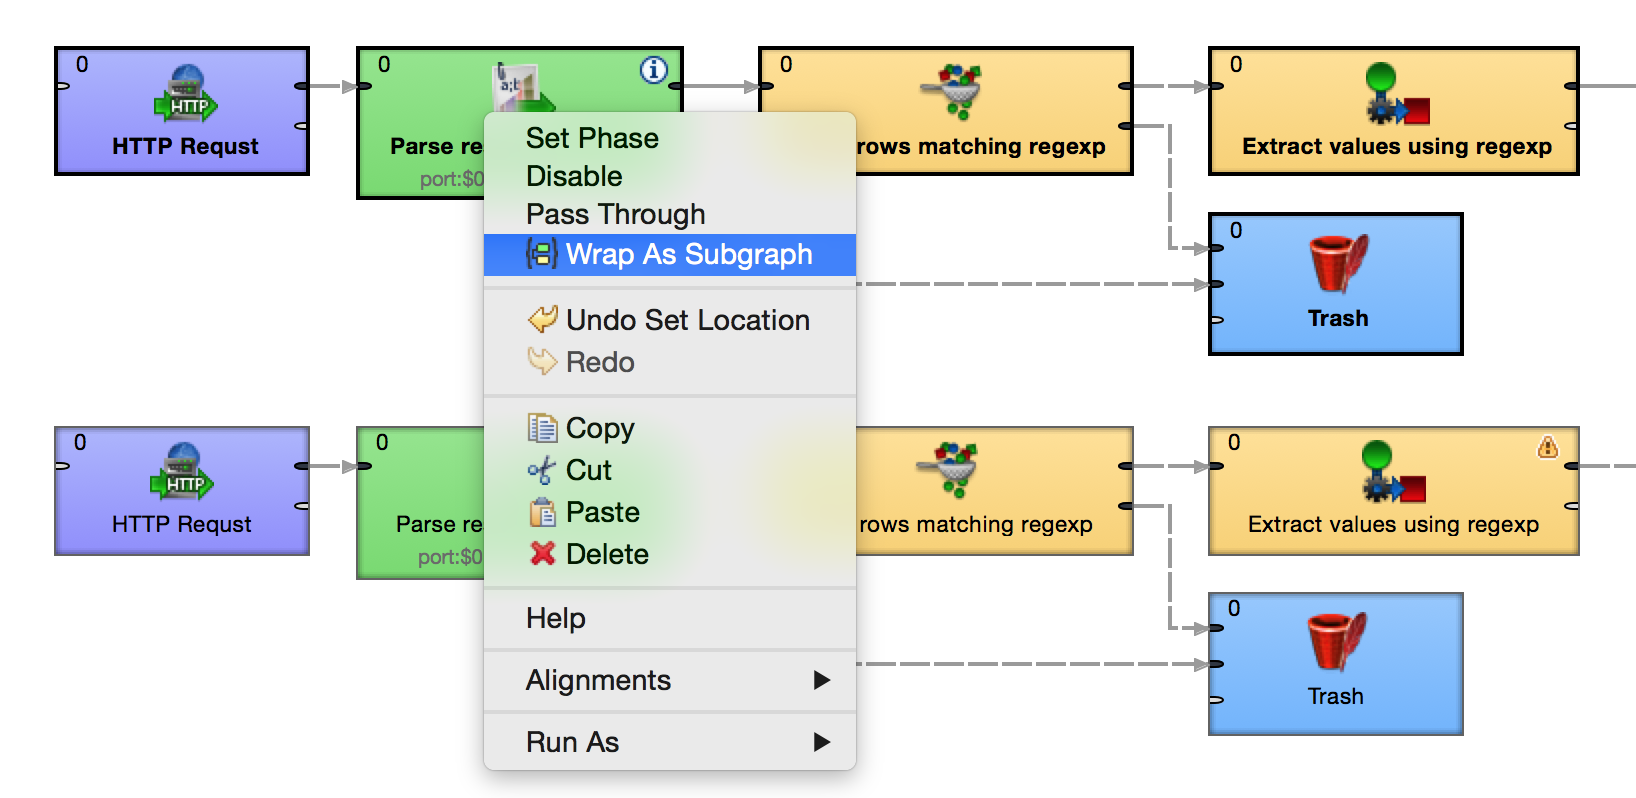
As I want to reuse part of the existing graph, the “Wrap as subgraph” functionality was exactly what I need. I select five components that are supposed to be in the graph, and then right-click to open the menu.
Selected components are highlighted
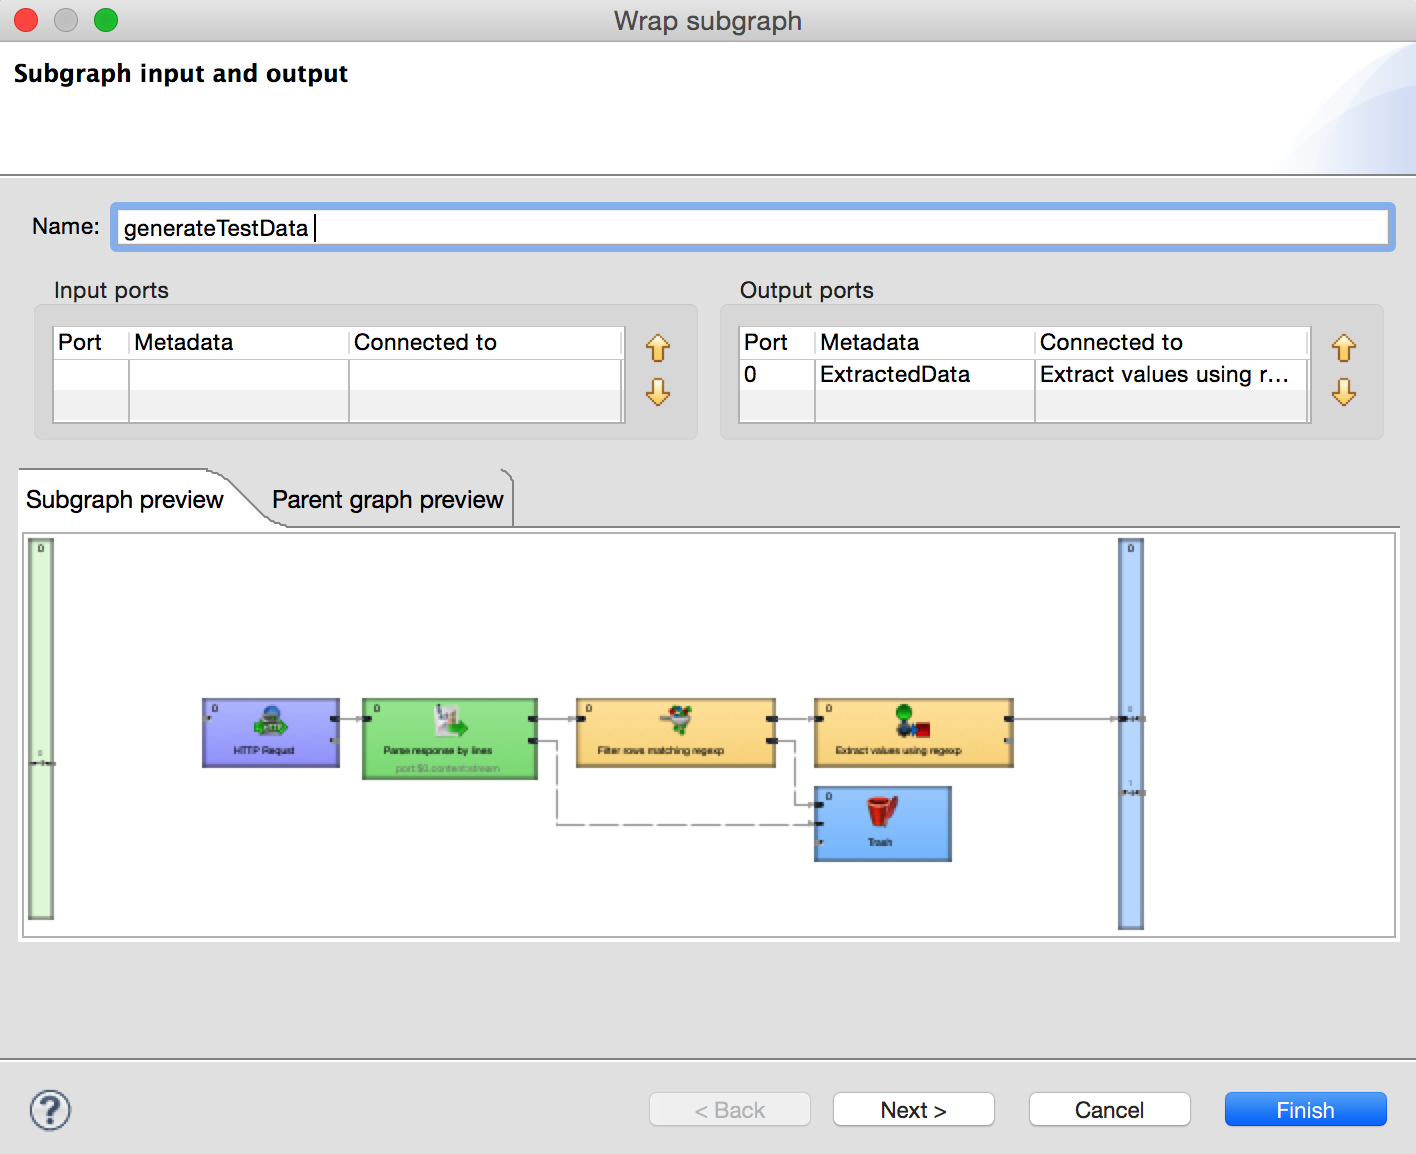
CloverDX shows a dialogue window with the subgraph wrapping wizard. You can change the name of the subgraph, configure the input and outputs ports, and check a preview of the wrapped subgraph.
The basic setting of a subgraph––changing the name and configuring ports.
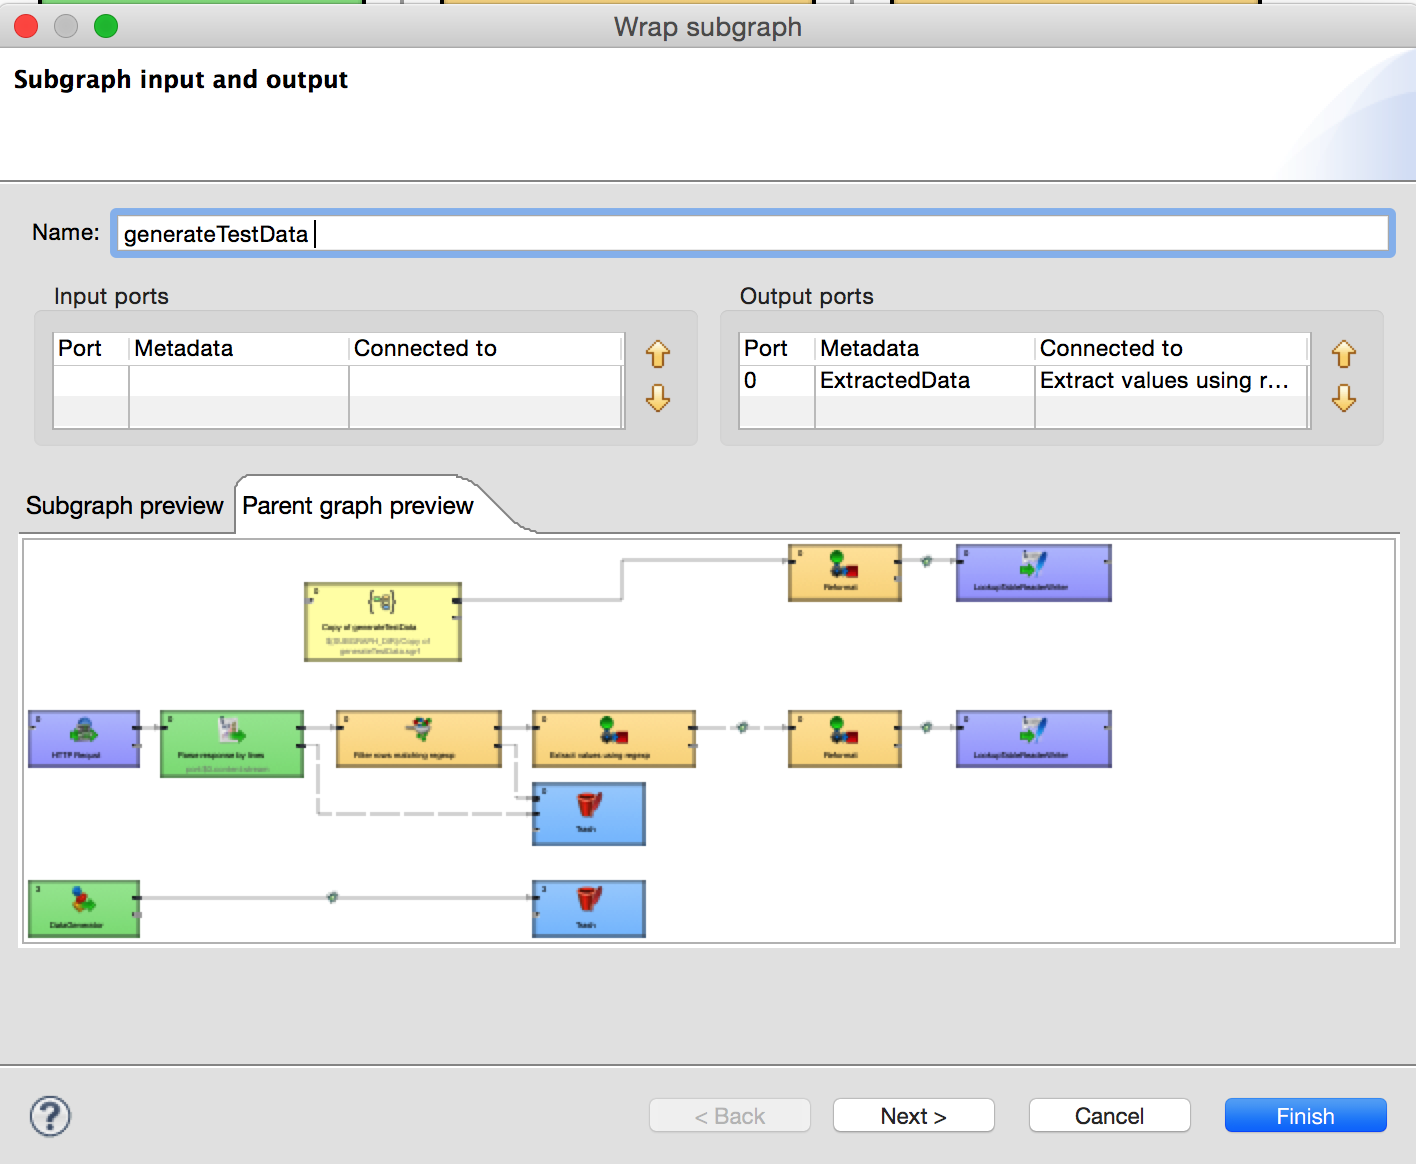
Or you can preview what the original graph will look like after you wrap its parts into a subgraph.
Preview of parent graph after wraping up subgraph.
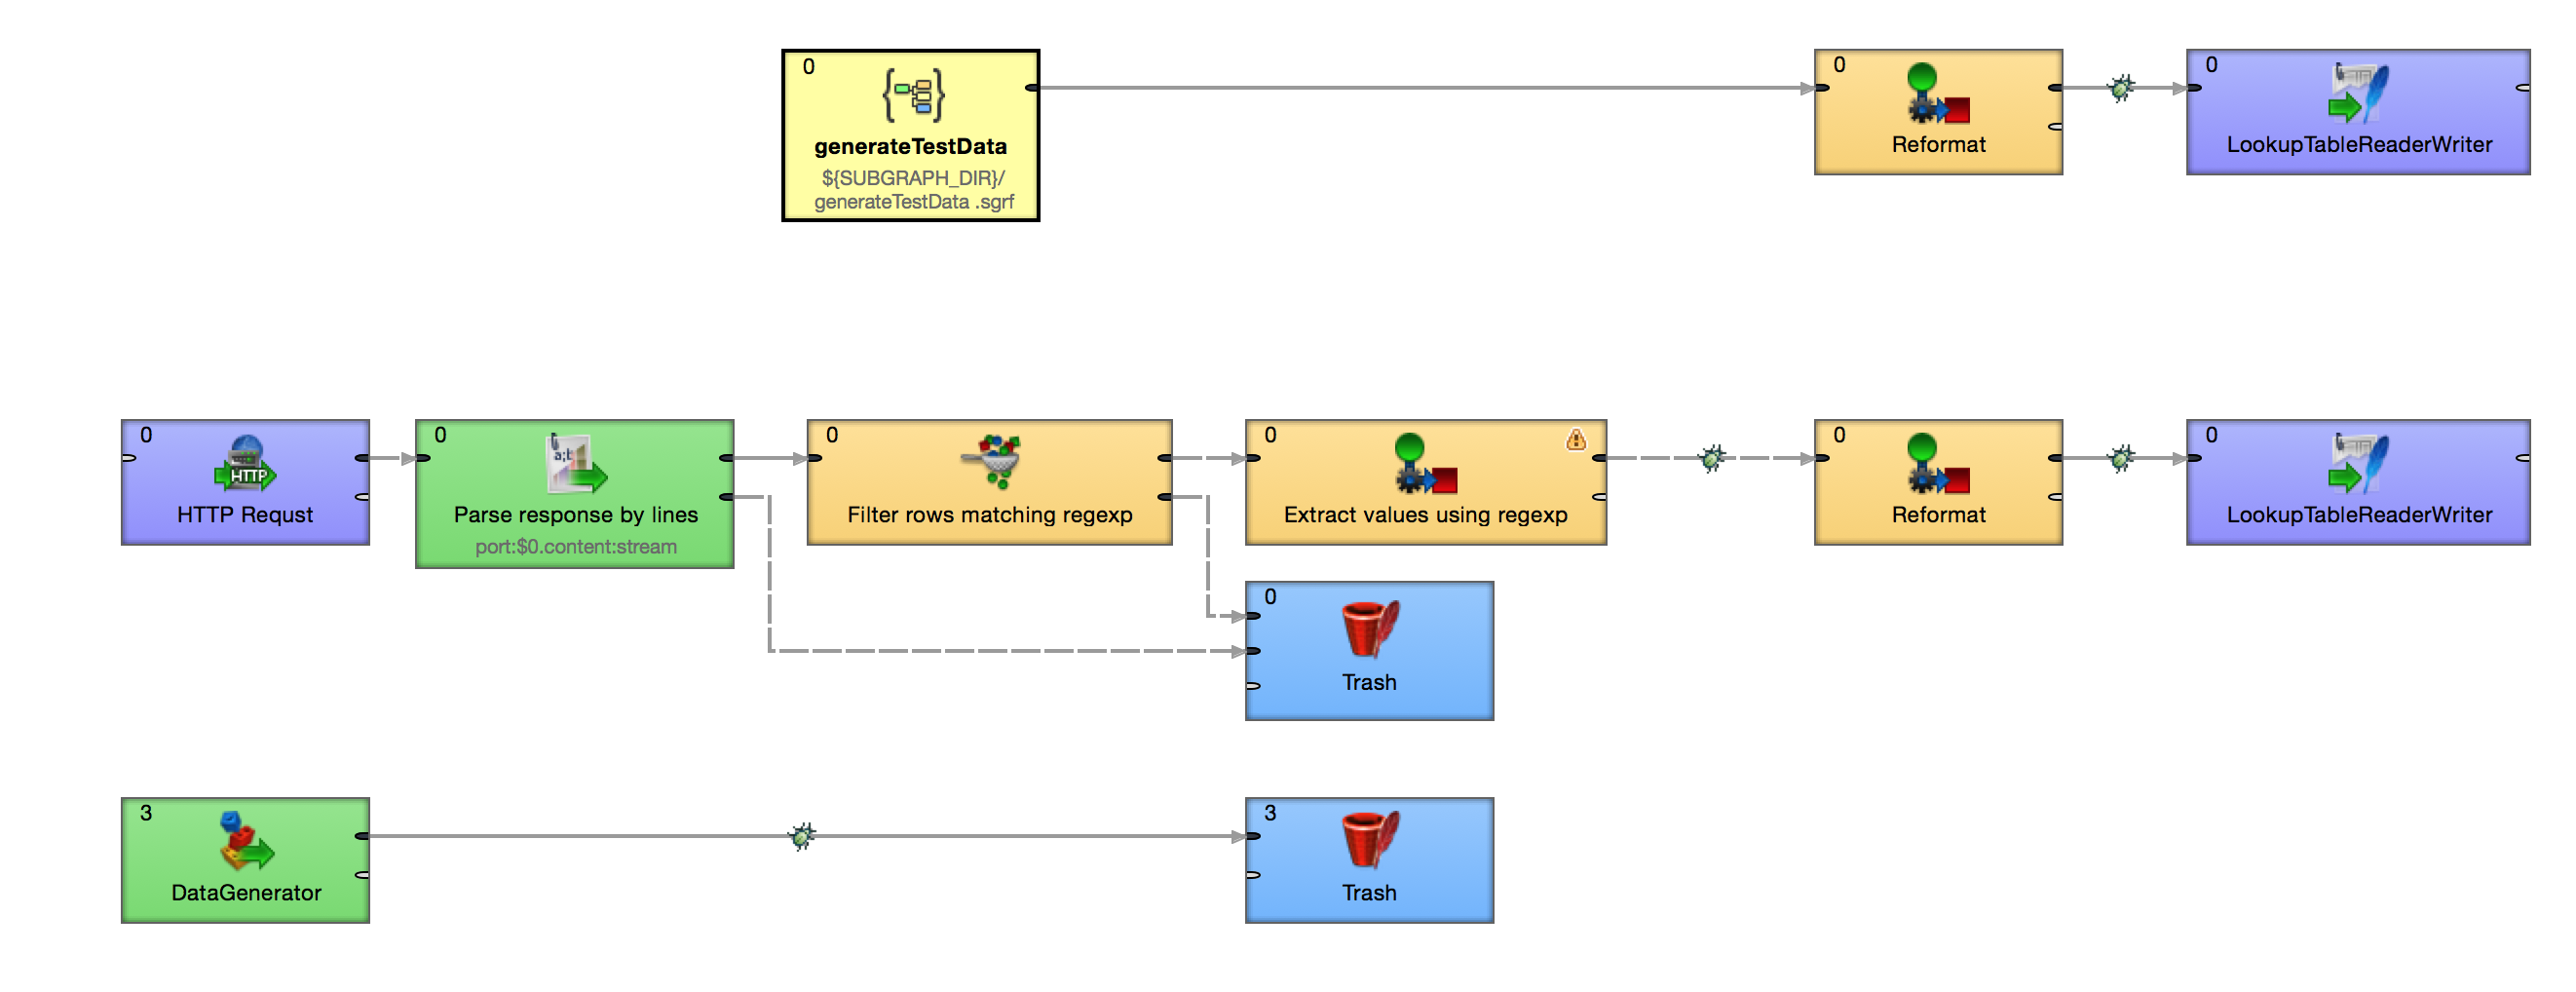
I was fine with the default name and input/output configuration, so I don't change anything. Clicking on "Finish" at this point closes the wizard, and a new subgraph will be created and the parent graph will be changed. You can see that the wrapped components are now gone and the subgraph component has replaced them.
Graph after finishing wrapping wizard.
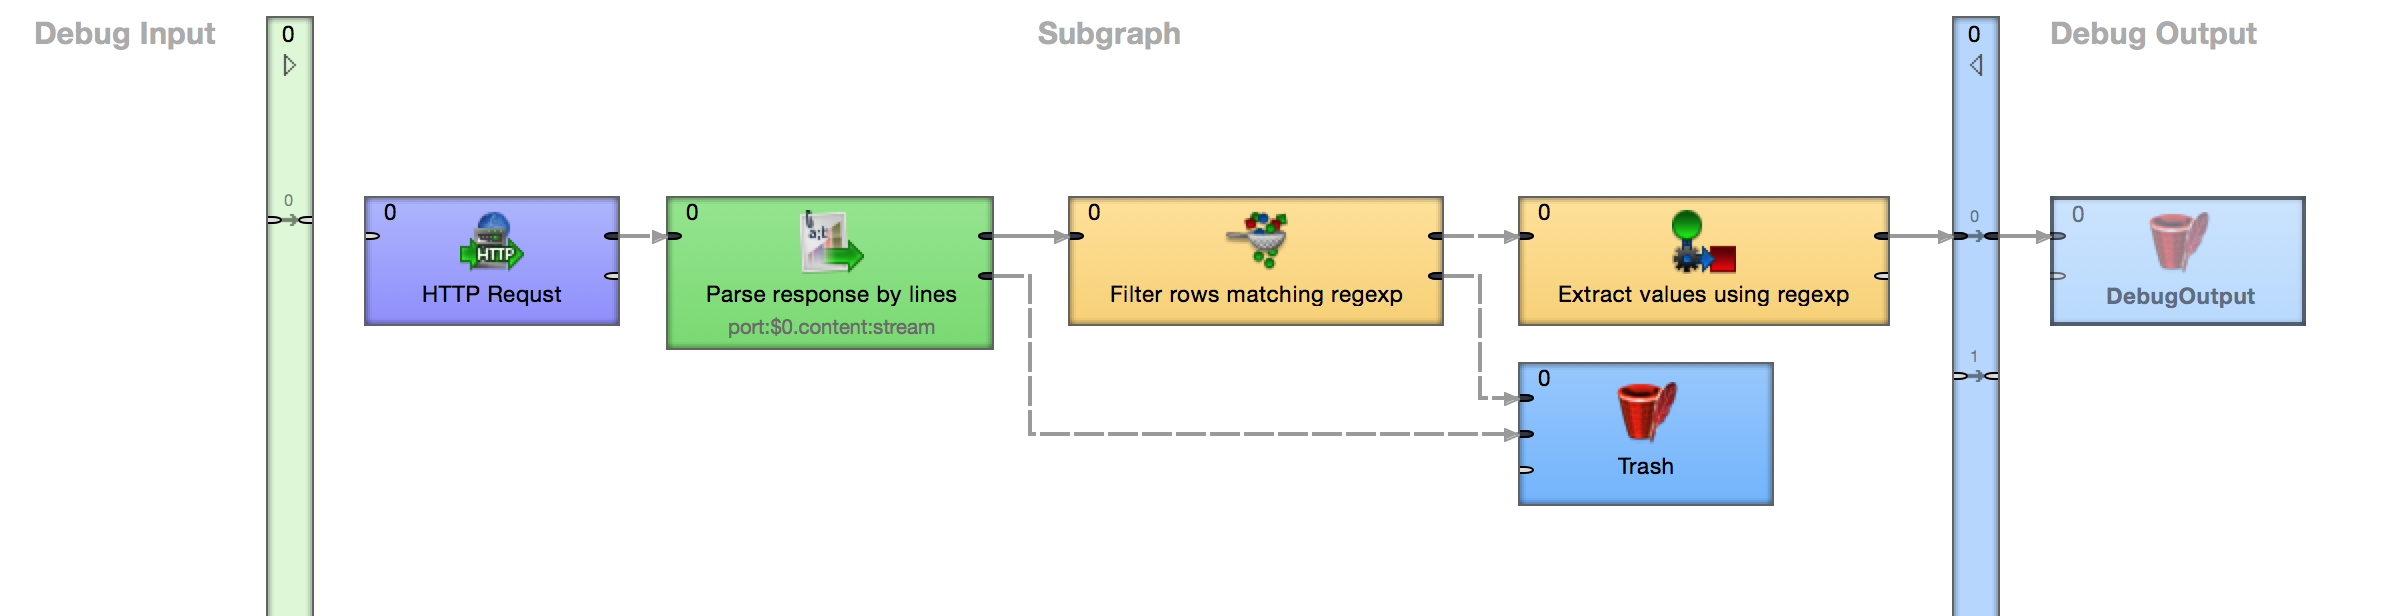
After clicking on the subgraph component, CloverDX opens the subgraph's content.
Complexity is hidden in the subgraph.
Note the green and blue bars that represent the inputs and outputs of the subgraph component in the graph. In this case, this mean that there is one input and two outputs. The area on the right and left, behind the bars, allows you to debug the subgraph without messing with the graph. You can add any components behind those bars without affecting the parent graph at all.
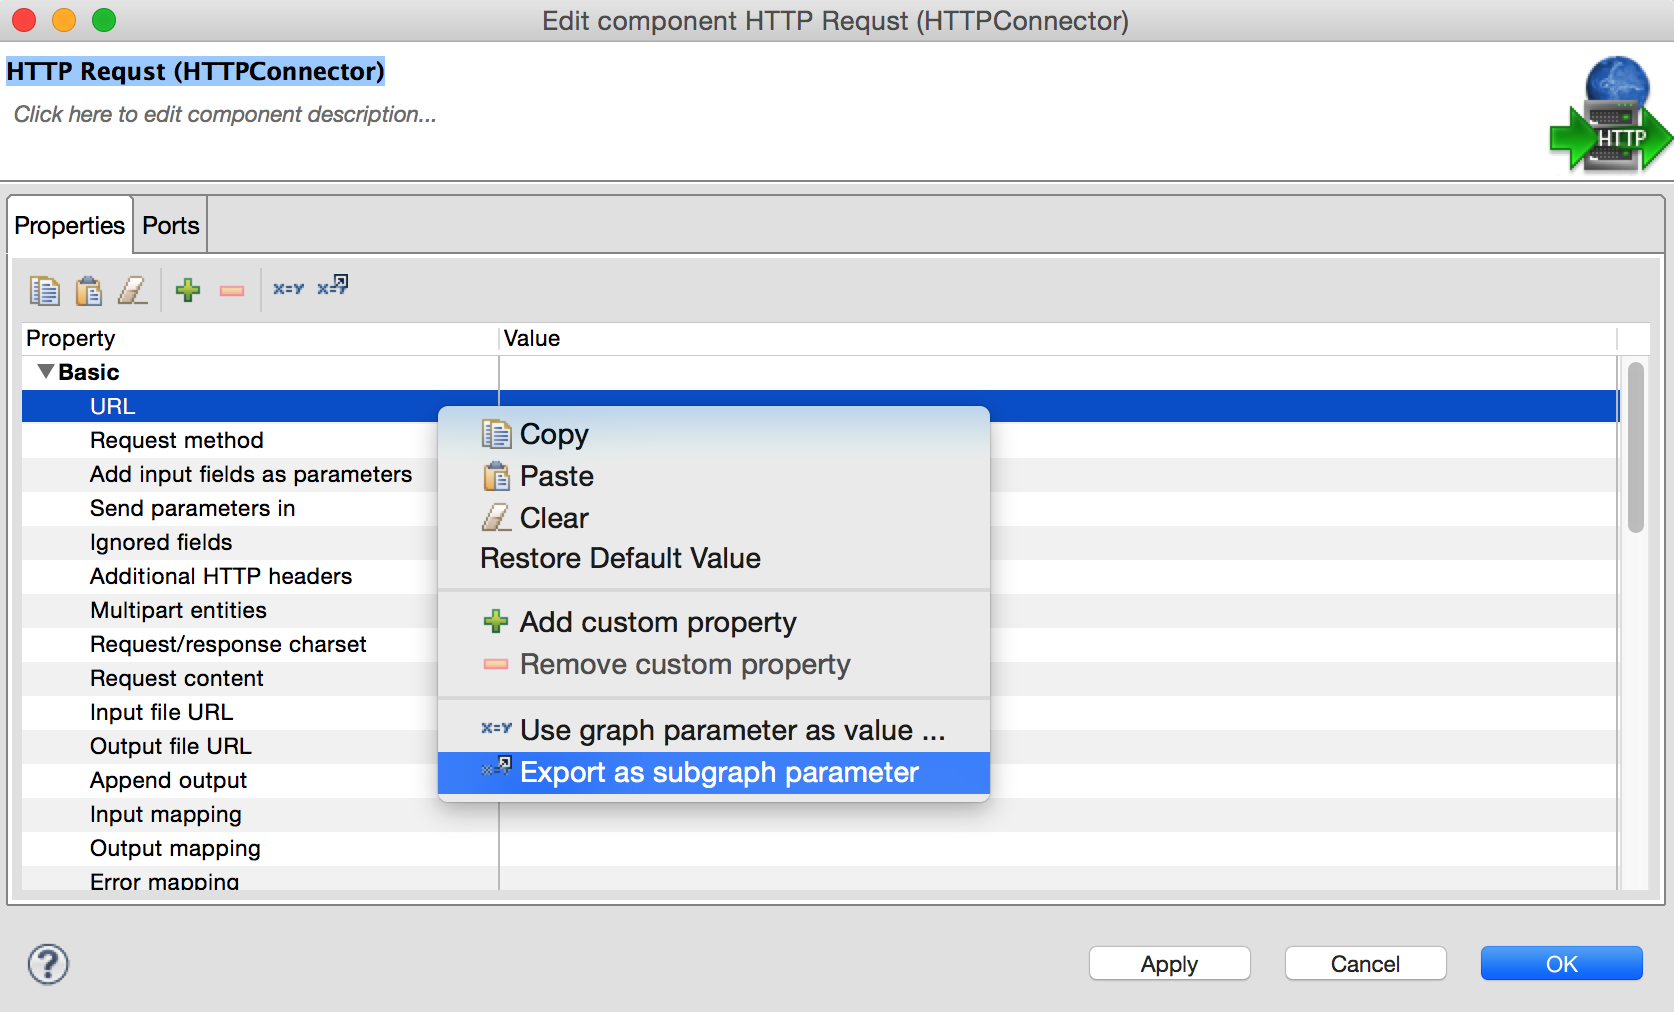
In order for subgraphs to work and to relieve additional work from graph creation, it is important to parametrize their functionality so they can be used in different situations. To do this, you can use public parameters in subgraphs and set their value in the parent graph. I want to use a URL as a parameter for our subgraph. It's pretty simple. Just use "Export as subgraph parameter" for the attribute you want to export. And now you can update this parameter directly in the graph, without ever opening the subgraph.
Choose parameters, that will be visible from parent graph.
The final step is to use the subgraph to create the graph again. Here, I will create this graph from scratch, using a subgraph.
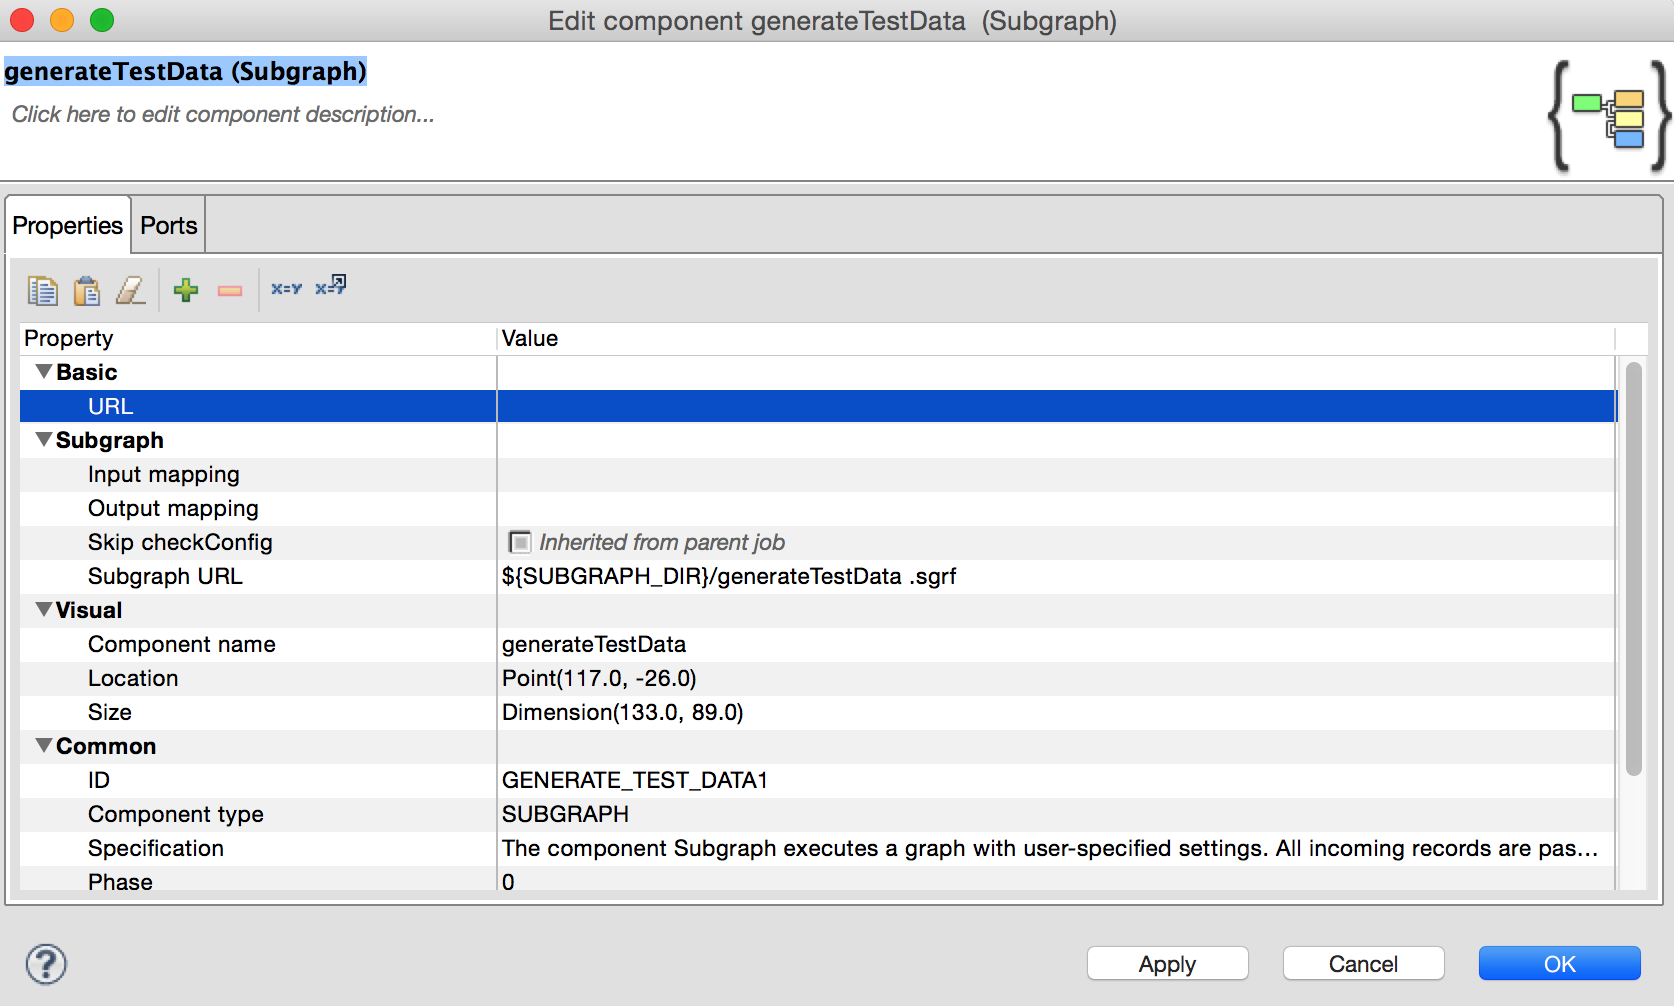
You can set the value of parameters as an attribute of the subgraph component in the parent graph.
Parameters are propagated to a subgraph properties.
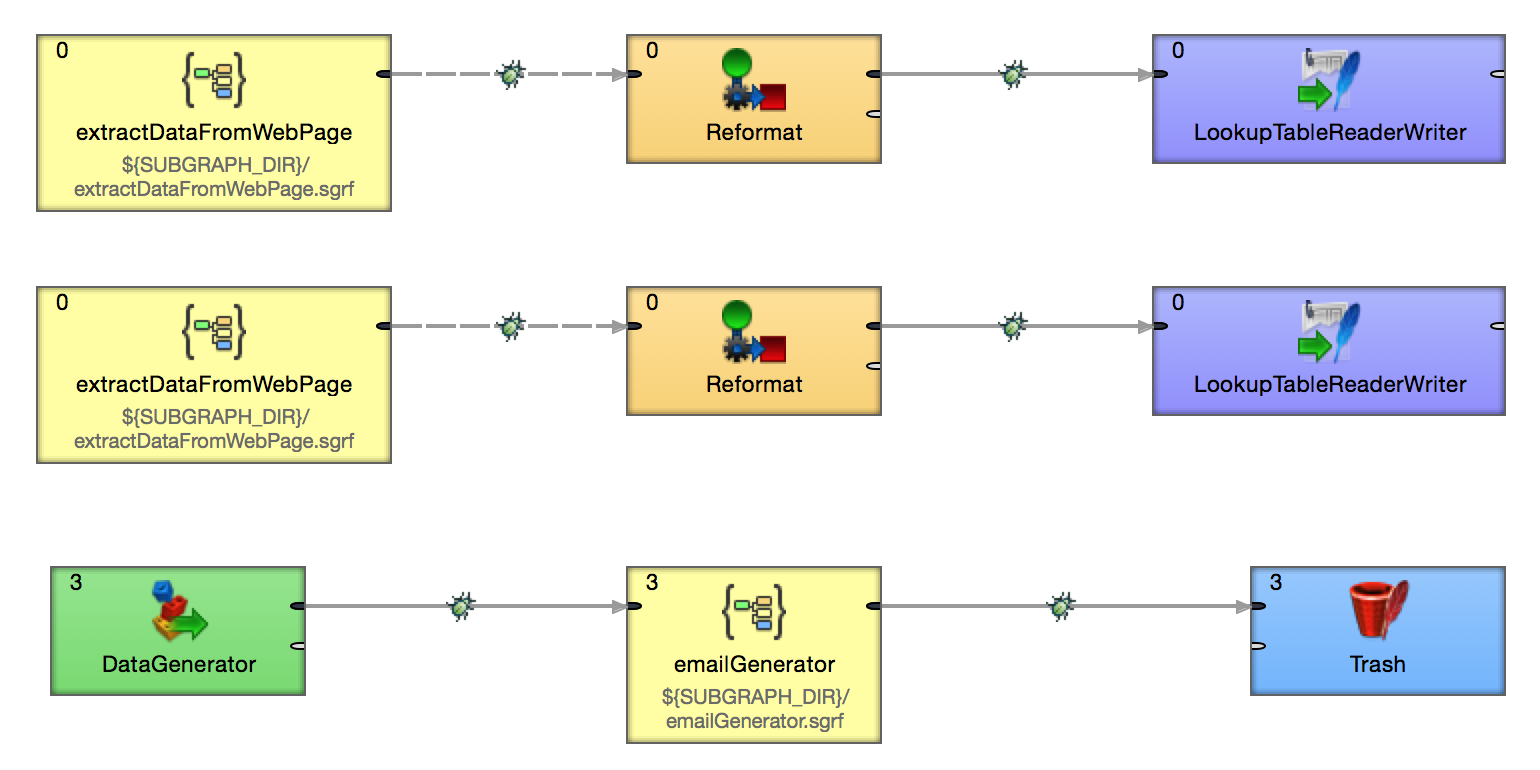
The final graph looks like this:
Simplification is visible immediately,
The original graph contained 16 components and was quite hard to understand. The new version, using a subgraph, now contains only half the number of components and is much easier to understand and navigate.
Also with the utilization of the subgraph, you will be able to reduce the time needed to create a new graph. And this is because of the new features available in CloverDX 4.0.
There are many other features, like metadata propagation and the execution view. We will get to these functions later, but for now, let's stick with these basic concepts. I encourage you to download CloverDX now and try subgraphs for yourself. Start with wrapping subgraphs from existing graphs, as it is the easiest way to learn how to use them; you can immediately see how powerful they can be.