As time marches on, the functionality and features of CloverDX only get better and better. Here’s a brief list of handy CloverDX features we consider to be very helpful, but that you might not be aware of. Below the video is a written guide for additional support.
At first glance, it might not be completely obvious what each of these features entails. Let’s take a walkthrough each of these features in more detail…
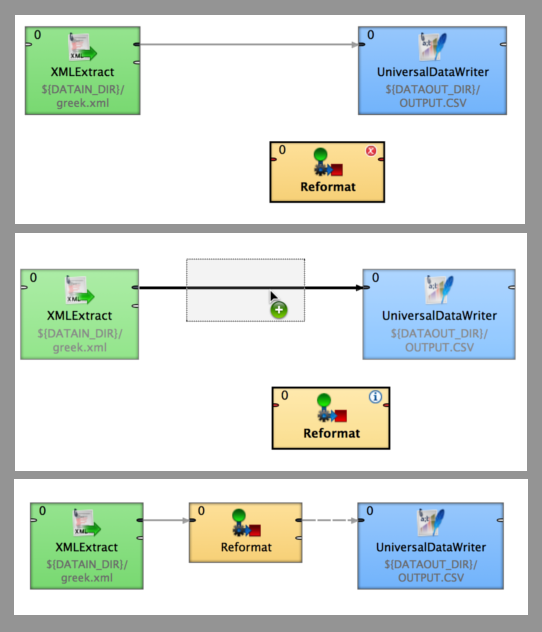
This is an extremely useful feature when you have two components connected to an edge, and you want to put a new component between them. Dropping a component directly on the edge will split the existing edge. Remember though: dropping is allowed only for components with at least one port (input or output)!
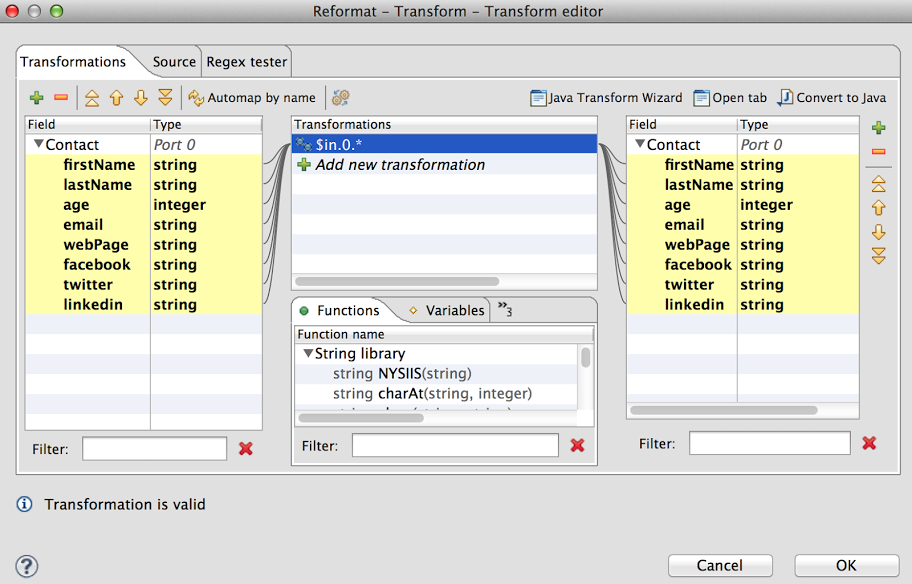
When you are performing dozens of similar transformations, star mapping in CloverDX is a valuable tool. Instead of manually copying your input field to output fields, just use this shortcut. In the CTL source code, write:
$out.0.* = $in.0.*All fields in output port 0 will now be filled with values of input fields with matching names and data types.
Wildcard mapping can be also created in the visual mapping editor by dropping the metadata name from input to the metadata name in output.
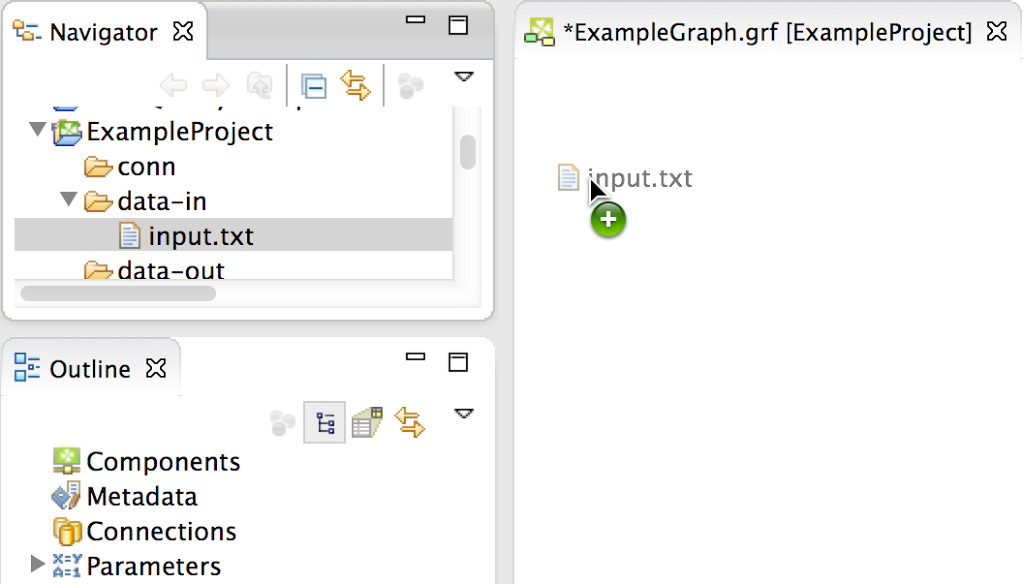
Simply dragging and dropping files onto the graph is a nifty function in CloverDX. When you drop a file on a component, it invokes the setting of the file URL property. For example, the source file for the readers, or the target file for the writers.
Dropping file directly onto an empty space on the graph, tries to guess the most suitable component for processing that dropped file, and then place that component onto the graph. For instance: for an XML file, it will create an XMLExtract component; for a JSON file, JSONExtract. If no special format is recognized, the CloverDX Designer defaults to the UniversalDataReader component. NOTE: Dropping a file on an existing component automatically sets its File URL property, e.g. the source file for readers, etc.
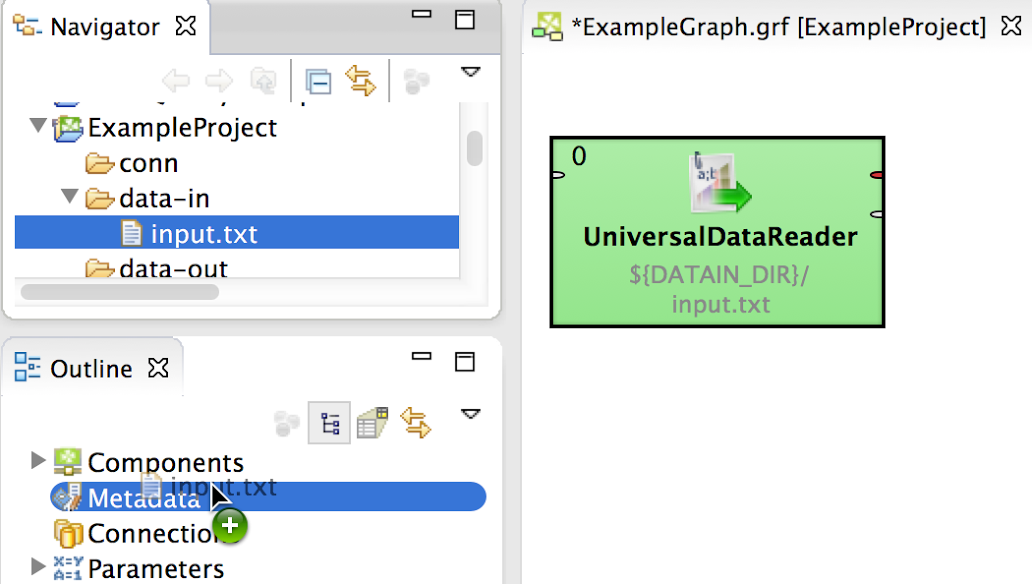
Dragging and dropping can be also used for creating metadata. Drag and drop your file to metadata in the outline. It will open Extract metadata wizard and you will be able to create new metadata from the dropped file.
To speed up setting the phase number for a component or set of components, you can just select and use the number keys 0-9 to set it. For higher phase numbers, you will need to use the standard Set phase dialog.
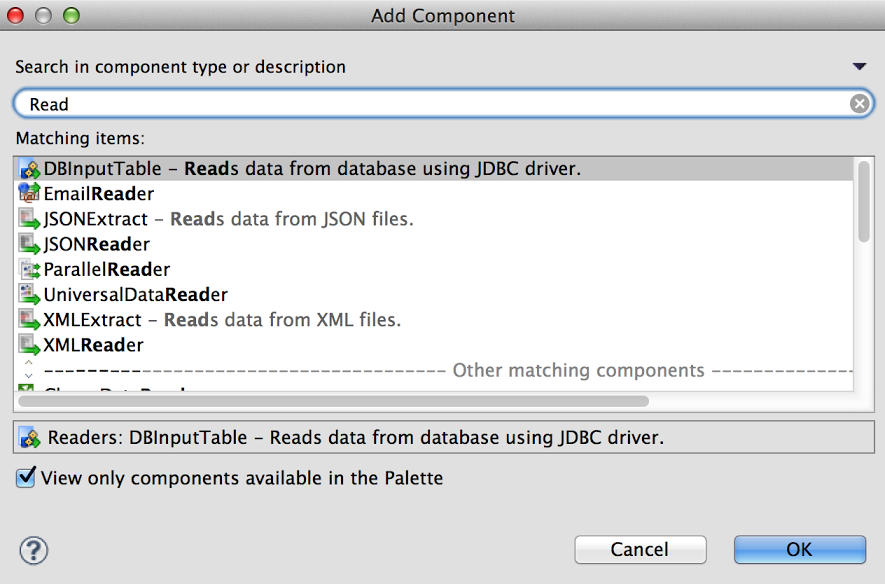
When you add components to the graph, there is a faster method than by selecting the component in the graph editor palette: by using the “Add component” button. It can be found in the context menu of the graph editor, and also through the keyboard shortcut “Shift + Space”. Also, the “Add component” button allows you to quickly find needed components in a list, or by using a filter or a camelcase search.
If you create lot of edges with the same metadata, it is very helpful to preselect metadata for the new edge. But how to do it? First, right click on the Edge tool in the editor’s palette and choose an edge tool with specific metadata. From now on, you create new edges in the graph with metadata selected until you stop using the edge tool.
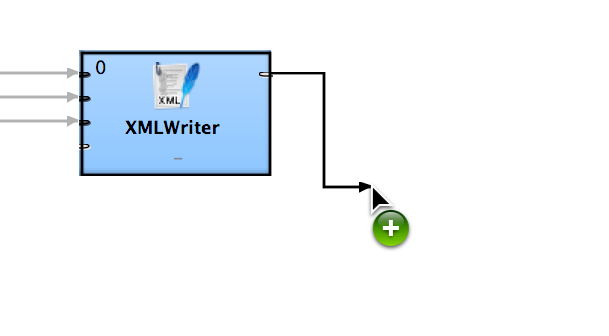
Among the many ways to add a component, CloverDX also has a quick new method for working quickly in a flow (just added in our milestone version of 4.0). By simply dragging an edge onto empty space on your graph, you can quickly add graph components into the flow.
One more tip to speed up metadata manipulation in your graph: you can perform copy (Ctrl+C) on an edge with metadata and then paste (Ctrl+V) on another edge. The second edge should have same metadata selected as the first one, with no need for tedious manual copying.
You can use notes to visually group component’s together, in order to highlight their relationship with one another, or to easily move them into a graph together. If you want to move a note without components in it, hold the Alt key (Command key on OSX) while moving the note. This will leave components in their original positions.
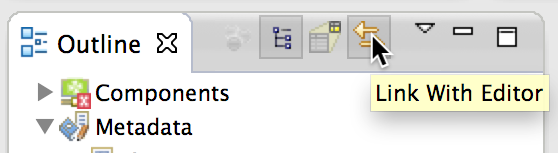
By activating the “Link with Editor” button, you can keep your selection in your graph editor in sync with the outline selection. After this, if you select a component in the graph editor, it will be automatically selected in the outline and vice versa. The same concept works in Navigator and Package Explorer views. This is great, for example, if you want to quickly find where in your project the graph is that you’re working on.
This is only a small sample of the countless useful features that CloverDX has to offer. Next time you are using the platform, try out some of these new tips and see how they work for you.
Do you have a favorite CloverDX feature, trick, or shortcut? Let us know below in the Comments section!