Dropbox is a powerful service. It doesn't matter whether you‘re looking for cloud storage, a way to share a large file with a friend, or a multiplatform synchronization tool, Dropbox will always find its way onto your list of suitable candidates. Can CloverDX connect to Dropbox? Of course with a little help from Dropbox Core API.
Are you interested in sharing the result of your CloverDX graph with colleagues? Would you prefer to have a local directory synchronized with Dropbox without having to install the official Dropbox application? Let's take a look at how CloverDX can assist you with these tasks. Also, be sure to download our example project to try things out for yourself.
Get into it: Try the example while you read.
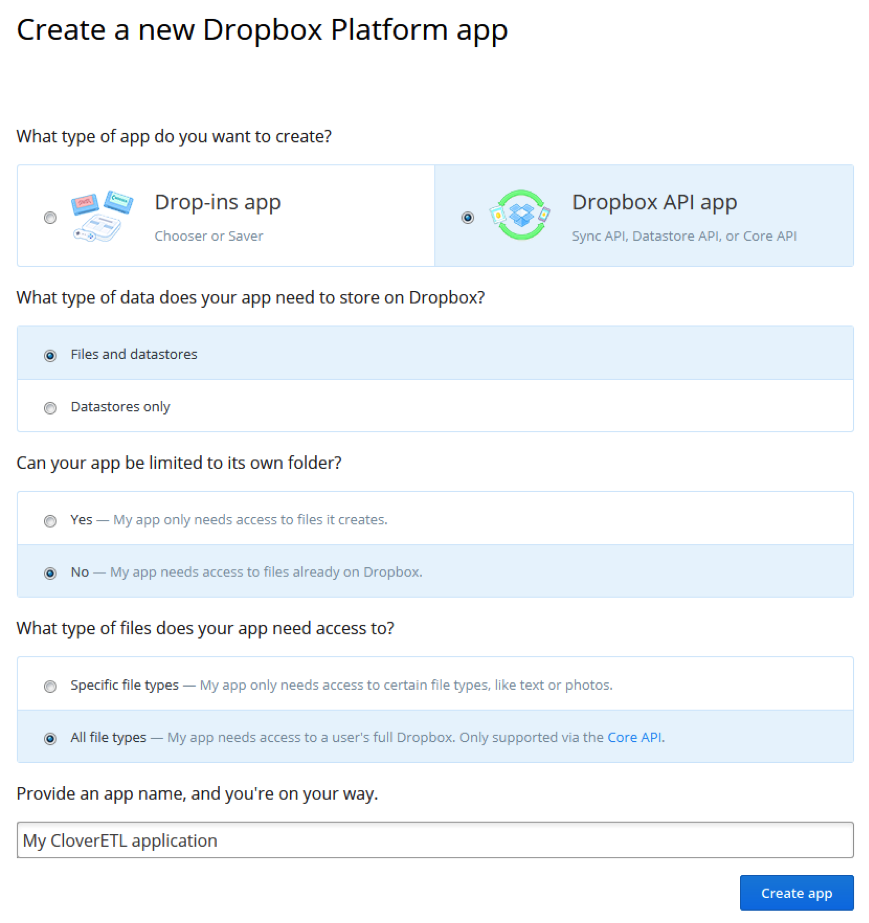
The first thing you need to do is register a new Dropbox application. You can do so in the App console. From the given options, choose the ones below:
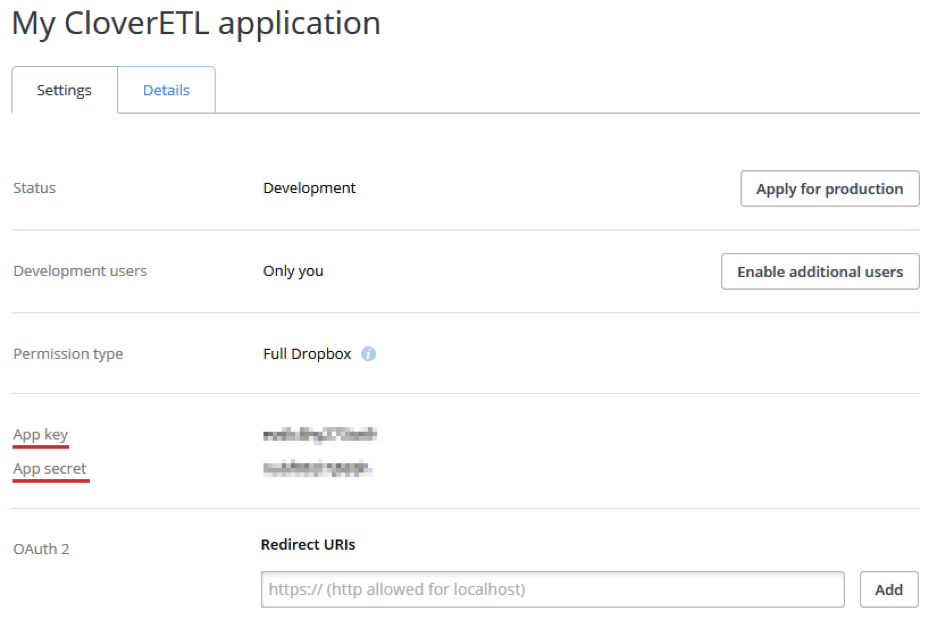
The most important information you'll get on the following screen is both the App key and App secret. You'll need these two values in a request for OAuth access token.
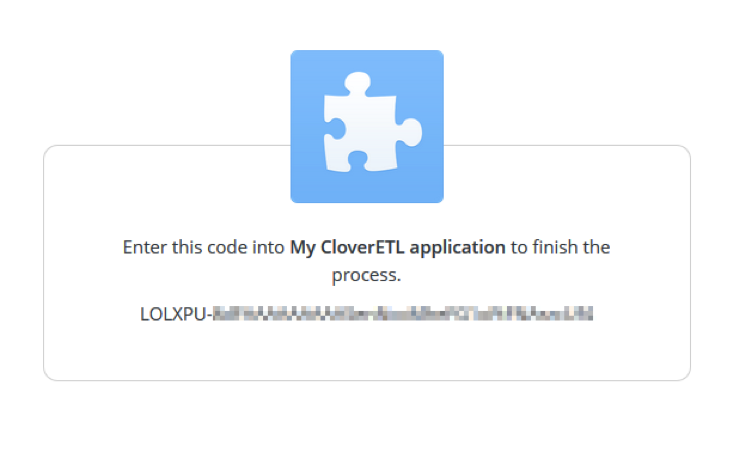
Dropbox grants access tokens based on an authorization code. To get this code, visit the following URL where <App_key> is supposed to be replaced by the App key you got in the previous step:
https://www.dropbox.com/1/oauth2/authorize?client_id=<App_key>&response_type=code
Allow access to your application and the authorization code appears.
The code has very short period of expiration, so be sure to use it immediately. The graph below sends the following request:
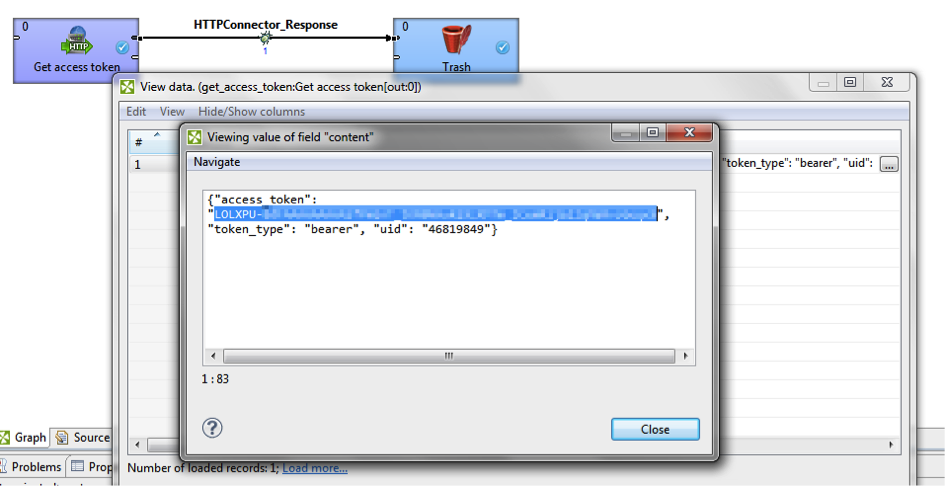
https://api.dropbox.com/1/oauth2/token?code=<Authorization code>&client_id=<App key>&client_secret=<App secret>&grant_type=authorization_code
<Authorization code>, <App key> and <App secret> are again supposed to be replaced by the real values.
The highlighted part in the response is the access token you'll use to authorize in every further request you send. The recommended storage for your App key, App secret, and Access token is an external file with Secure parameters.
You don't have to worry about the token expiration. It doesn't expire and the only way of disabling it is by manual revocation.
Now that you have your access token, what can you do with it? Dropbox API documentation will be your guide.
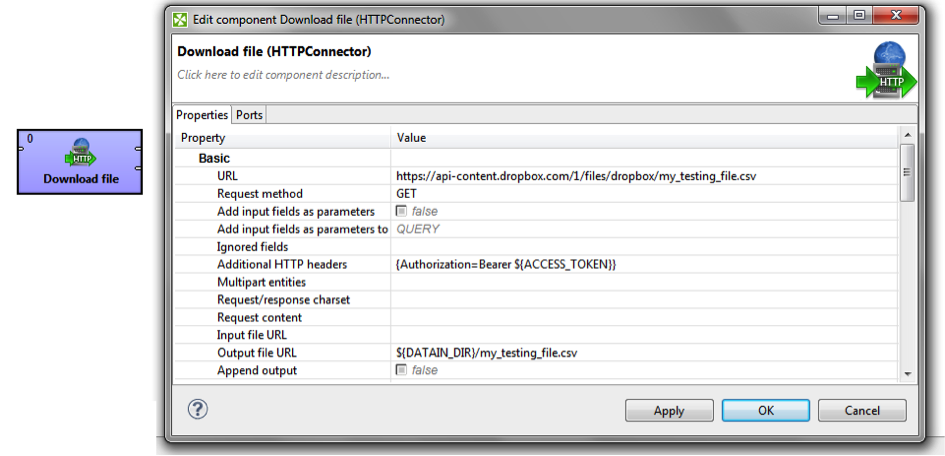
Let's start with something easy. For instance, how can you download a file from your Dropbox storage? To accomplish this task, you need only one component, HTTPConnector.
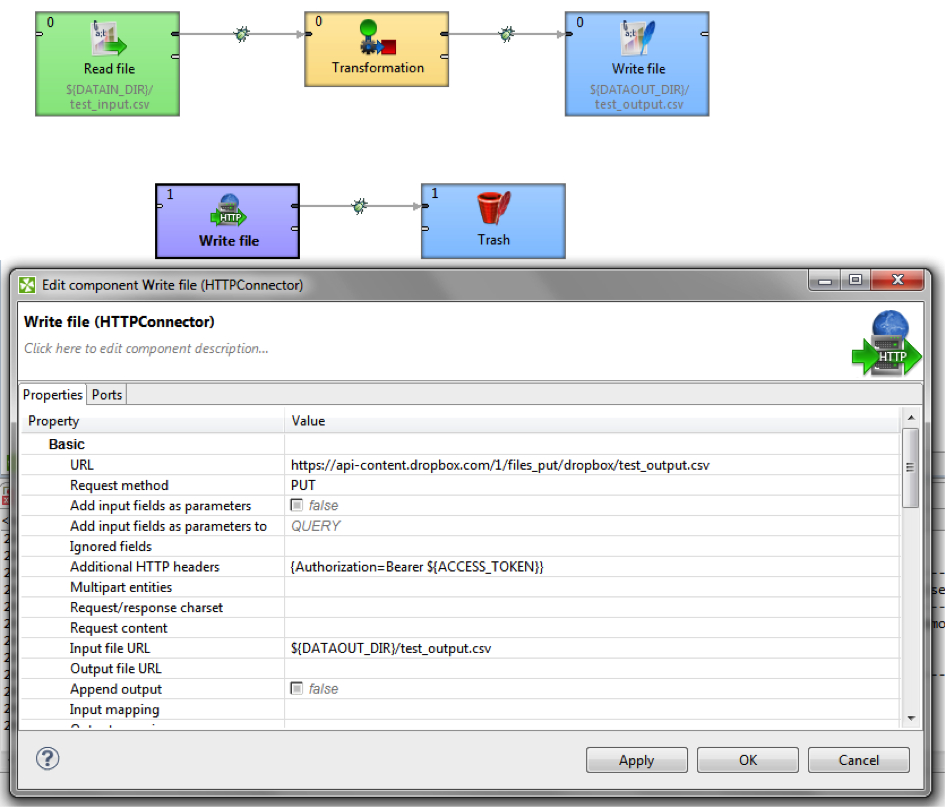
What about the other direction? Perhaps you need to process a file (graph phase 0) and save the output into Dropbox (graph phase 1).
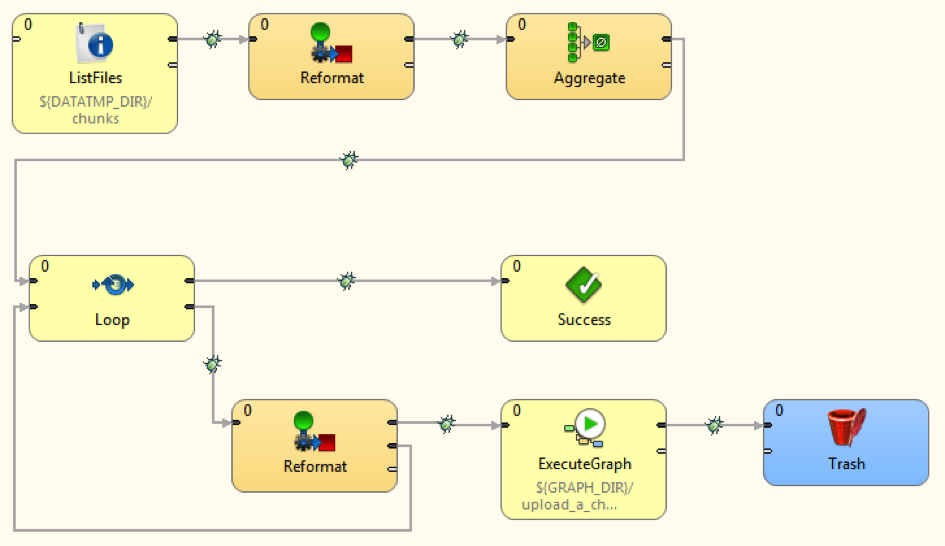
Dropbox supports the upload of files up to 150 MB per request, but what if you’d like to upload a file exceeding this limit? The solution is Chunked upload.
You can divide the file into smaller chunks (with the size of a typical chunk being 4 MB) and send them in a sequence of mutually linked requests.
When all chunks are uploaded, a commit is sent and the upload is done.
Do you want a local directory to reflect changes made in Dropbox storage? Use a one-way synchronization process using the Scheduling feature of CloverDX Server.
First, create a master jobflow.
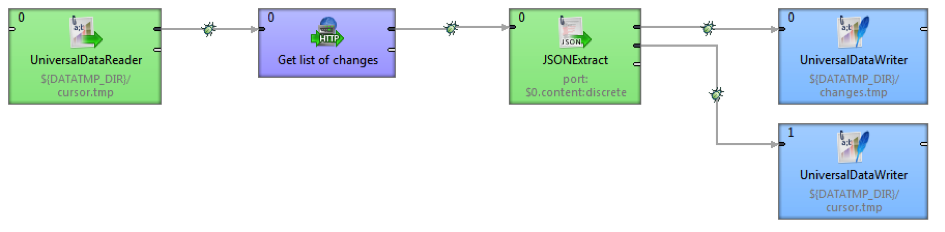
You need to get a list of changes made in Dropbox since the last run of this graph. The operation called is named delta and the result is parsed by JSONExtract as any other result returned in an HTTP response. The list of changes is stored in a temp file named changes.tmp. You also want to store information about the current state of your Dropbox. Among other information, delta also returns a string value named cursor. You'll save this value in cursor.tmp and send the value of the cursor in your next request. This way, Dropbox is able to find out the exact time of the previous call and returns only the list of changes made after that.
In the next step, process the list of changes and adjust your local directory accordingly. If a file does not have any details attached, it means it has been deleted from Dropbox. So delete it locally as well. If a file does have more details, one will be information about the file being either a directory or just a regular file. Directories are created in the local folder and files are downloaded from your Dropbox storage.
Remember that the temp file with the current state of the cursor has to be preserved for the reason described above. If you send a request without the cursor value, information about all files in your Dropbox is returned.
The very last thing you have to do is create a new Scheduler in CloverDX Server starting the main jobflow e.g. every five minutes.
You could ask an obvious question after reading this tutorial: How can I set the full (two-way) synchronization instead?
CloverDX Server is able to observe a specified path in your file system – in this case, the local directory you want to synchronize with Dropbox. This feature is called File event listener. If a new file appears in the observed directory or one of the old ones is modified, a jobflow can be started as a reaction to this event. The jobflow would use the previous chunked upload and load the file into your Dropbox.
As you can see from the previous examples, Dropbox connectivity is pretty straightforward in CloverDX. HTTPConnectors basically do all the hard work and the rest is up to your imagination. If you've haven't already, you should try out the examples by yourself. Again, just download these prepared Dropbox examples, and you'll find that you come up with many more possible ways of using Dropbox Core API. And if you have any questions or comments, please post them into the comments section below.