If you ever have a situation where you need to send an email from your data transformation, CloverDX gives you several options to do it. If you need to monitor your transformation's health and status, you would be better off with CloverDX Server, which offers plenty of monitoring and reporting features.
These can be hooked to an “e-mail” action which sends you e-mail alerts based on predefined rules. This is very useful feature in an enterprise environment. We will hopefully cover these options in some later posts.
Today, I would like to focus on a simple, yet powerful way of sending e-mail messages from CloverDX – sending them directly from the transformation graph. You use a dedicated component – the EmailSender – to send e-mail messages from inside a graph.
The component falls into writers category which suggests that it can take data on the input and output it somewhere. In this case, it puts it into an e-mail message. You can map your input onto any aspect of the message – from “To”, “Cc”, “Subject”, etc. to the message body or as an attachment(s). EmailSender reads input records and for each one it composes and sends out a single e-mail message.
A small, but quite nice feature is that you don't need to map all message properties to your input. You need to prepare only such parts that vary with each record and leave the rest to defaults or set up parameters for it. For example, if you want to compose your message body from data input records but want the message recipient to be fixed, you can use a parameter for “To” and keep it separate from data records.
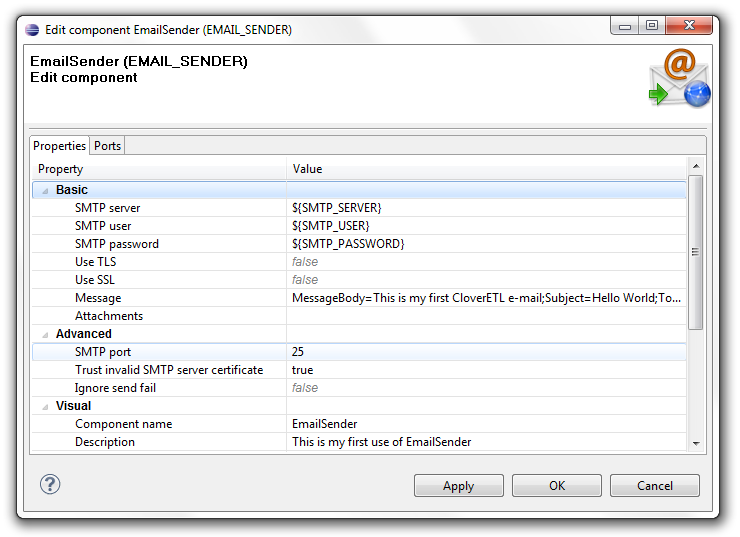
Basic setup of EmailSender requires setting basic parameters for SMTP – host, and username and password if required. You can also setup SSL and TLS if the server supports it.
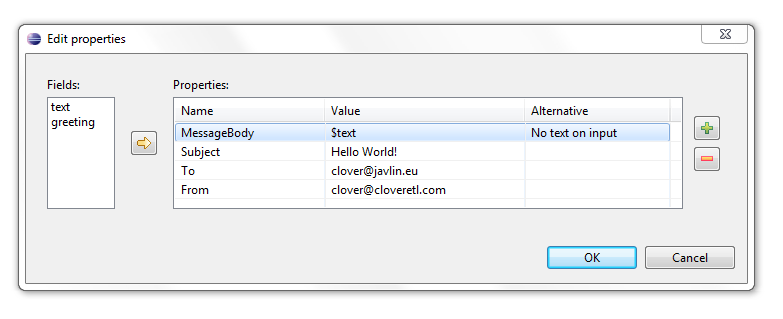
Let's now take a peek at setting the actual message composition and the mapping onto input – the Message attribute. It opens an editor which displays message headers and your input.
The mapping is actually extremely simple – you use fields from your input as variables to fill in the values. Each field is used as $field (see use of $text in MessageBody). Also note the Alternative column – for records where the “text” field in the example has an empty value, this alternative value will be used (can be constant or defined in a parameter).
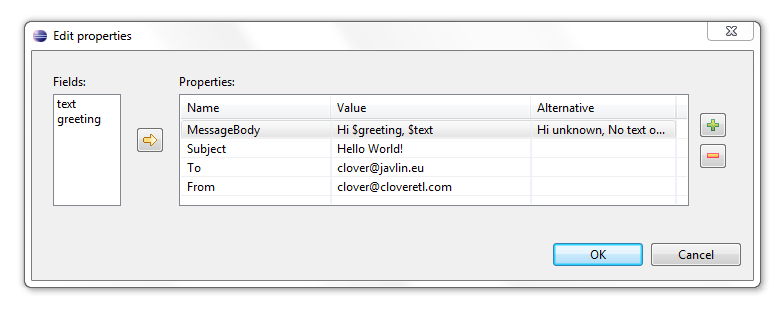
You can even combine several fields into one to form (any) text – not only in message body, but also “Subject”, “To”, etc.
If you need a more advanced approach, you can use the “+” button to add additional keys and values. They are passed as-is to your e-mail message as extra headers (e.g. for “X-Mailer: CloverDX” you set key Name to “X-Mailer” and set its Value to “CloverDX”).
Now, let's look at composing messages with attachments using CloverDX's EmailSender component.
You can add as many attachments to your message as you want. Any attachment can be, as everything in EmailSender, either taken from your input data record or passed as a parameter or static text.
EmailSender distinguishes between two kinds of attachments – files (on the computer where the transformation runs) and data attachments.
File attachments work as one would expect – the file is read from your local computer and attached to the message. In CloverDX you can choose how you specify the file name – either pick a static path or you pass it in the input data record.
Data attachments are composed directly from data coming to the input of EmailSender. This way you can assemble for example XML file attachments, texts and even binary attachments. Obviously, in such case you need to specify additional information so that EmailSender knows how to send your data – specifically its mime type and the attachment name.
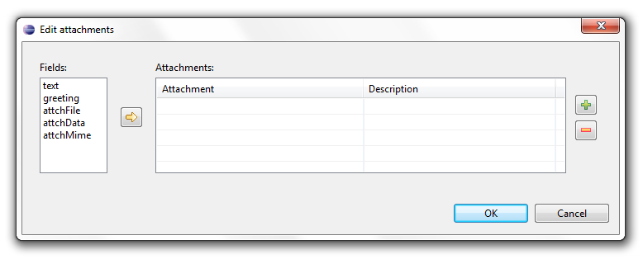
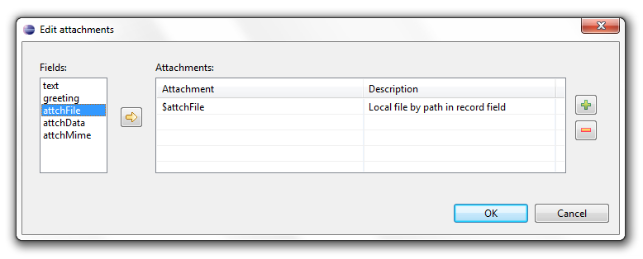
To start with attachments, open the EmailSender edit dialog and go to the “Attachments” attribute editor.
The easiest way to add an attachment is to use the “->” button or drag&drop from Fields to Attachments.
This way you create a file attachment whose path is passed from an input data record (in field “attchFile” in the example above). Please notice the description column which tells you how the attachment will be handled.
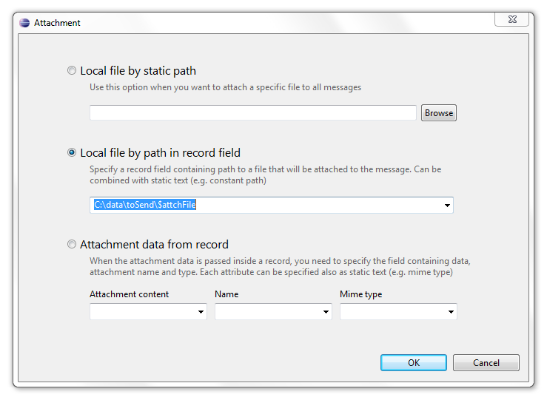
You can also add a new attachment using the “+” button and then editing the newly created item with the “...” editor button (you may find this a bit confusing at first – just hit the the plus “+” button and a new line in the Attachments table appears. Then click in the first column of the new row and click the three-dot edit button “...” - and bingo, you're there!).
In the dialog, you can either browse for a local file or pick a field to use as file name. Notice the screenshot – I can even use the field as just a part of some predefined path. This allows me to compose the attachment path from static path, field value or even parameters (the full example might look like “${PROJECT}attachments$attchFile”).
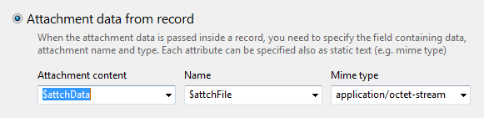
Data attachments can be defined with the last option – Attachment data from record. Simply pick the field where your attachment data will be, then specify the attachment name and mime type – both can again be either taken from a field or static. See the following screenshot to get the hang of it.
That's it! You can now send attachments with CloverDX's EmailSender. Just always remember, that you can set any value to either constant, parameter or field value using the $field notation. With this in mind, you can set up pretty much everything you'll ever need.