ComplexDataReader is a new component for reading heterogeneous data (data which contains multiple types of records that can also depend on each other) without the need of hard coding. Instead, the component is driven by a state machine which can be set-up using the GUI.
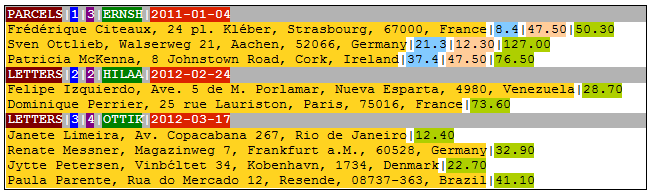
The following example will present some of the capabilities of ComplexDataReader, as well as guide you through the design of a simple automaton, which is used for processing a text file containing two types of shipments grouped into batches. Each batch starts with a batch header; the number of items in a batch is variable and it is part of the header.
For every parcel and every letter, send to the output the address and the charge to the output, also add the batch ID, customer ID, and the date from the respective batch header.
The first element of a batch header determines the type of its elements, and the third element contains the number of items in the batch.
Before starting the configuration of the component, all the required metadata should be defined. Also, the component should be connected to the succeeding component(s) and the output edge(s) should have metadata assigned.
You may also set the “File URL” property of the component to point to the input file.
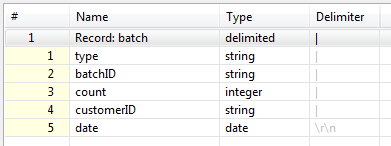
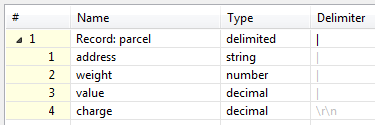
Internal metadata (used for parsing the input):
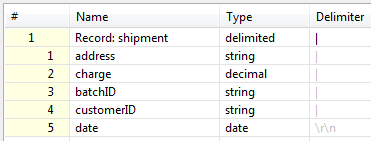
Output metadata (used for output mapping):
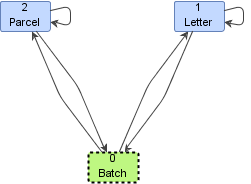
First, we have to design an automaton, which will guide the component through parsing the input. The automaton may look like this:
The idea behind it is that we start by reading a batch header, therefore the initial state is set to "$0 – Batch". Then we can decide, depending on the value of the "type" field, whether to proceed to "$1 – Letter" or "$2 – Parcel". In either of these states, we read as many records as specified in the "count" field of the previous batch header, then return to "$0 – Batch" and expect a new batch header.
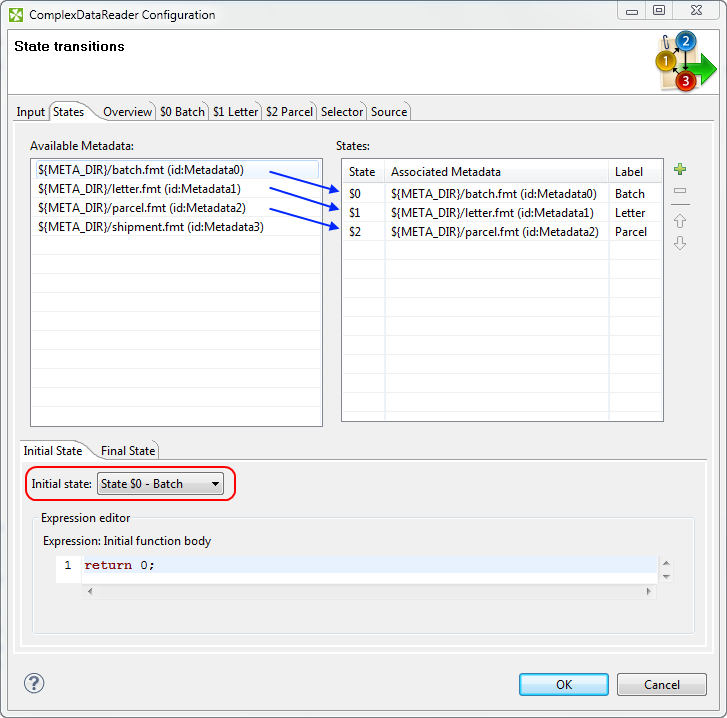
To start building the automaton, open the configuration dialog by double clicking the component and then its "Transform" property.
Create three states by dragging the "batch", "letter" and "parcel" metadata, respectively, from the list of Available Metadata on the left to the list of States on the right. You can also edit the labels of the states. Set the Initial state to "State $0" by selecting it from the drop-down list.
Optionally, you may switch to the Overview tab and press the Undock button to get an interactive overview of the automaton being built.
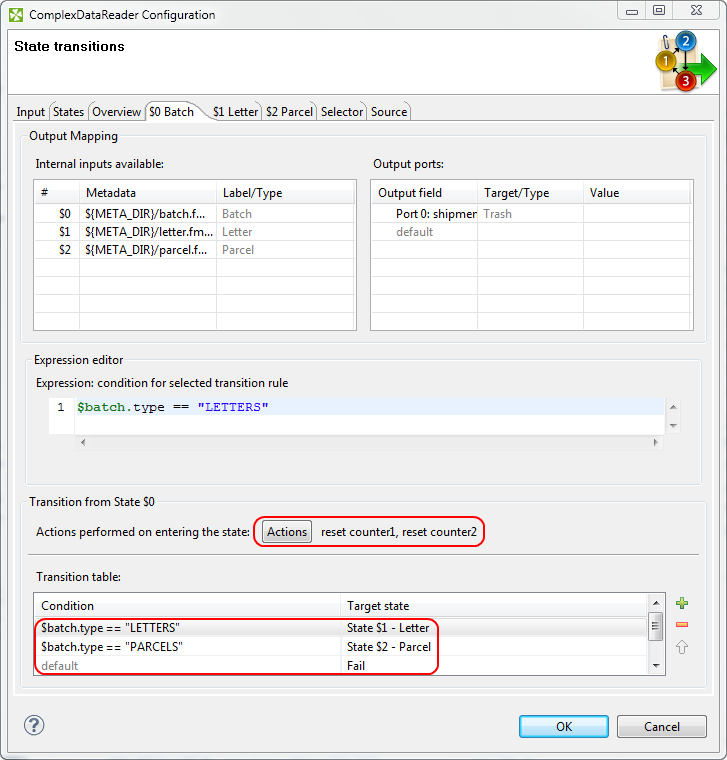
Switch to the State $0 tab. This state represents a new batch. Set the automaton to reset the counters for state $1 and $2 by pressing the Actions button and ticking Reset counter for "State $1" and "State $2". Add two rows to the Transition table. Set the condition of the first row to $batch.type == "LETTERS" and the condition of the second row to $batch.type == "PARCELS". Set their target states to "State $1" and "State $2", respectively. You may also set the target of the default transition to Fail to detect unexpected batch types.
Note that in state $0, no output mapping is defined; hence no data will be sent to the output.
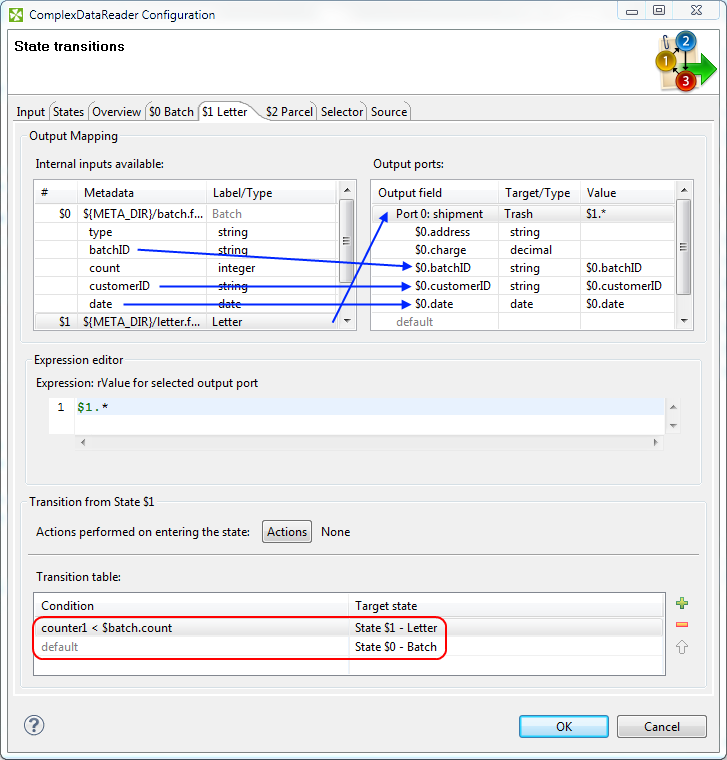
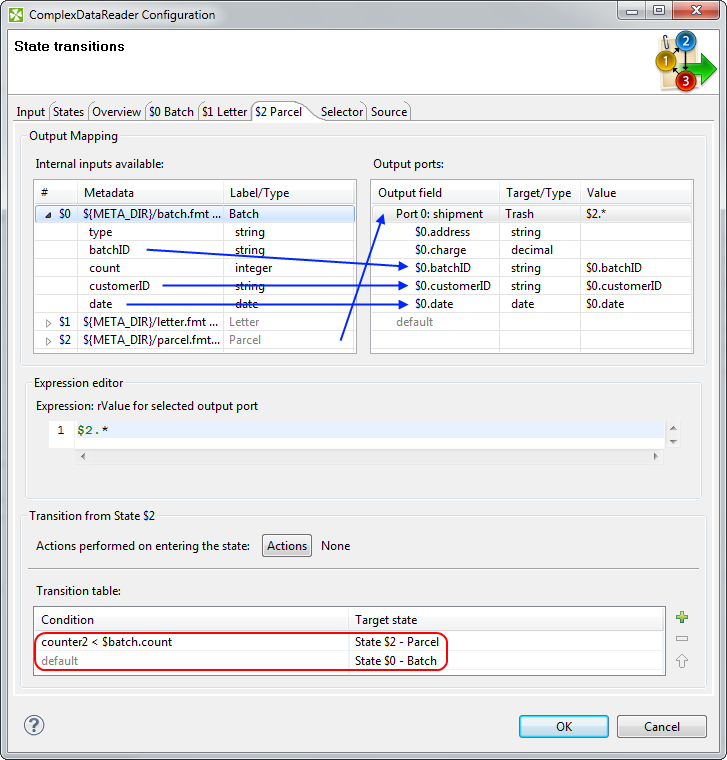
The configuration of state $1 and $2 will be very similar. In these states we want to produce output, therefore we have to define output mapping. For example, in state $1 we need to send to the output "address" and "charge" fields from internal record $1 (last letter record) and "batchID", "customerID" and "date" from internal record $0 (last batch header record).
For state $1, define Output mapping by dragging row "$1" from the left table onto "Port 0" in the right table. Then expand row $0 on the left and Port 0 on the right and drag "batchID", "customerID" and "date" from the left onto "$0.batchID", "$0.customerID" and "$0.date" on the right, respectively.
Add one row to the Transition table and set its condition to counter1 < $batch.count and its target to "State $1". Also set the target of the default transition to "State $0".
Similarly, for state $2, drag row "$2" onto "Port 0" and "batchID", "customerID" and "date" from row $0 onto "$0.batchID", "$0.customerID" and "$0.date". Add one row to the Transition table and set its condition to counter2 < $batch.count and its target to "State $2". Again, set the target of the default transition to "State $0".
Download the transformation graph with data