Netsuite is a powerful cloud-based data platform, used by more than 40,000 businesses worldwide. At its heart, Netsuite provides streamlined business management for a wide range of processes, leading to better decision-making and business outcomes.
But, while Netsuite is certainly an extensive platform, there will always be cases where you’ll need to use it as part of a wider data strategy. For example, if you need to combine several data sources into one single reporting database for analysis, you’ll have to export your Netsuite data.
This is crucial for organizations that want to keep better track of their data processes for compilatory reasons or otherwise. But, unfortunately, getting your data from a cloud-based service can be cumbersome work. So, to migrate your data safely and efficiently from A to B, you need to know how to connect a data integration tool, such as CloverDX to NetSuite’s SuiteTalk API.
Since Clover doesn’t come with a native Netsuite connector, you’ll need to implement your own. But don’t worry, using our subgraphs feature, it’s incredibly easy to hook up SuiteTalk with CloverDX’s Web Service capabilities.
Let’s run through the process in full and outline a couple of working examples.
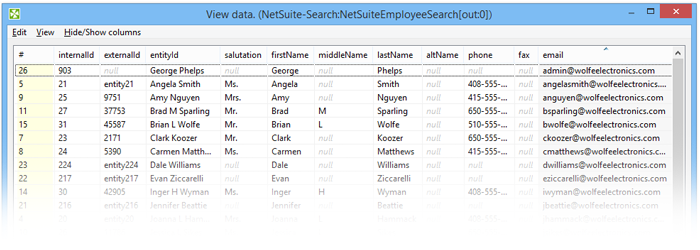
In the following example, I'll demonstrate how to search through an “Employees List” using SuiteTalk – a SOAP-based NetSuite API that offers a wide range of operations for retrieving and storing data.
You can visit NetSuite Developer Resources to read more about SuiteTalk, get SuiteTalk WSDL, or use their handy Schema Browser.
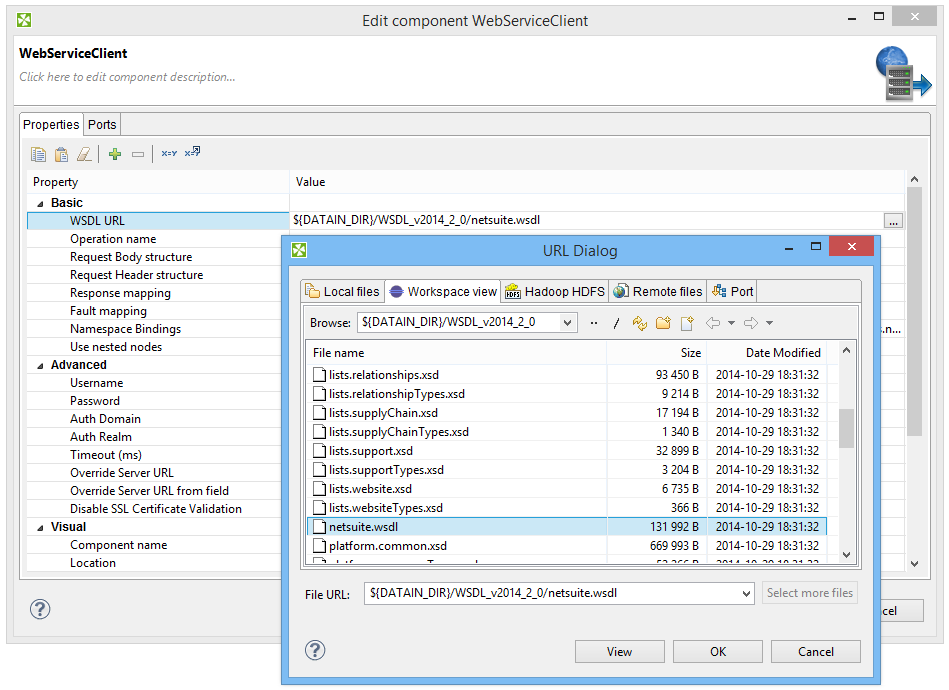
To use Web Services in CloverDX, you’ll need to use the generic WebServiceClient component and configure it to work with SuiteTalk API. WebServiceClient takes the WSDL of the service, letting you visually configure the operation and map data to the Request and the Response. This makes using SOAP structures much simpler. When building connectors to modern cloud data sources, you often need to use multiple WebServiceClient components in sequence to retrieve service URLs, authentication tokens, issue search query, retrieve resulting data, etc.
To demonstrate how you can build connectors in CloverDX, we're going to make a new component that searches through an employee list in NetSuite using email addresses. There’s no coding involved, just a few clicks.
Here's what we're building:
You can see we have a new component here –NetSuiteEmployeeSearch – that contains one simple configuration parameter for the search term ("Email Search (contains)") and three authentication credentials. It will issue a search and then fetch the results in a nice, simple format.
NetSuiteEmployeeSearch is a subgraph that takes care of talking to the SuiteTalk API and retrieving data from it. While doing this, it hides the underlying details of the operation and presents only the important settings to the end user.
Usually, “connectors” like this present a great opportunity for using subgraphs. A subgraph performs functions that you would like to use more than once, only varying the configuration slightly in each instance. Most importantly, you want the connector to present a clean interface and to be simple to use.
Let's take a look inside.
Inside the subgraph, we need to make two calls to the SuiteTalk API. First, we need to get our data center URL. This is because, since September 2012, NetSuite hosts their customer accounts in multiple data centers. It's best to ask for a link first even though you might already know where your data is being hosted. The second step is to call the 'search' operation of the API.
You can download the example and customize it to your needs. Getting it to work is easy:
Now let's look at some of the inner workings of the connector. Don't be scared by the configuration options of the two main WebServiceClient components when you see it for the first time! Luckily, there are useful GUIs for all XML SOAP structures and settings.
Here are a few important tips on working with the connector:
I strongly recommend using a local copy of the SuiteTalk WSDL, as the remote one can be painfully slow. (There's a copy under data-in folder already.)
We use NetSuite API operations called “getDataCenterUrls” for getting your data center link and “search” that returns records based on the type of searchRecord (see Request Body structure below).
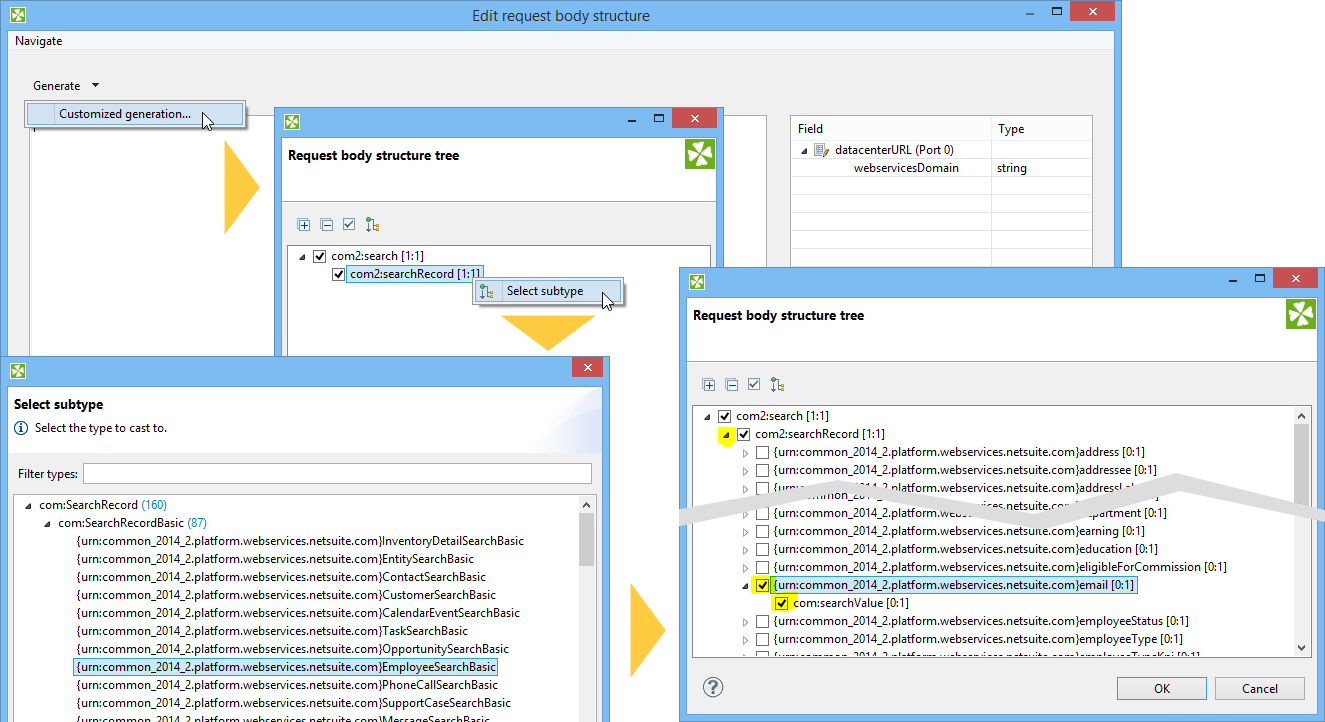
We need to create the payload for the API calls. Fortunately, there's a template for everything. For data center URL, you just use the Generate button and fill in the account ID as needed. The search request is a little trickier, but using customized generation makes it fairly straightforward.
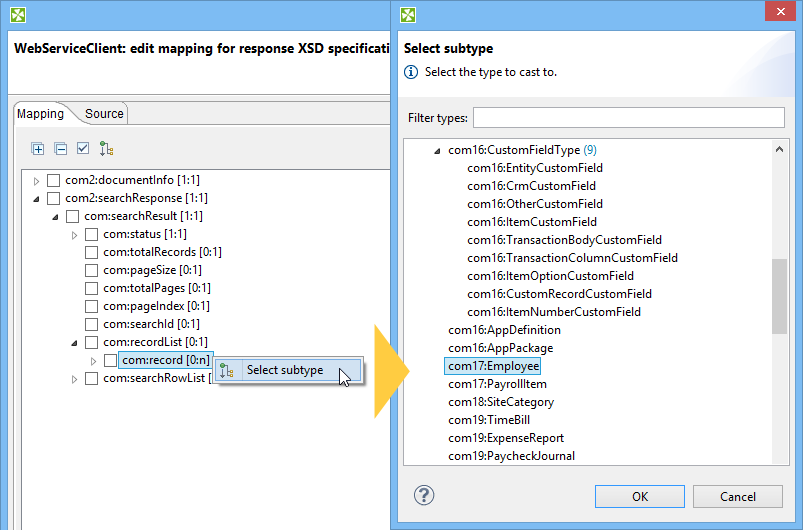
To generate the right search request, use Generate > Customized Generation and then right-click “searchRecord” and Select subtype. Once you select the search type (EmployeeSearchBasic), click OK. Now you can expand searchRecord and you will be able to select the field you want to use as search criteria (email>searchValue). Keep in mind, that you can't expand searchRecord until you've “casted” it to the right search type using Select subtype. (It's probably easiest to check the image below.)
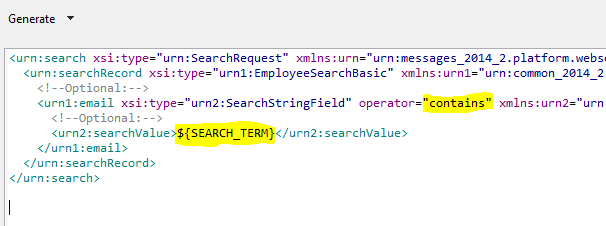
Once you've done the above step, CloverDX generates a corresponding piece of XML code for you. Don't forget to change the search operator (“contains”, in this case). The only place where I was able to find a list of valid operators was on an actual search form in the NetSuite web interface.
The parameter $SEARCH_TERM is taken from the subgraph user configuration ("Email Search (contains)"). It’s marked as a public parameter, meaning it’s available for the user to modify.
Authentication is simple – you just need to pass the three values (email, password, account ID) into the Request Header structure. There’s no login step or complicated authorization as there is for the Facebook API. The parameters ($NETSUITE_*) have the same story as $SEARCH_TERM – they are defined as public, so users of the subgraph can either provide them as part of the component configuration or edit them directly in the netsuite.prm file.
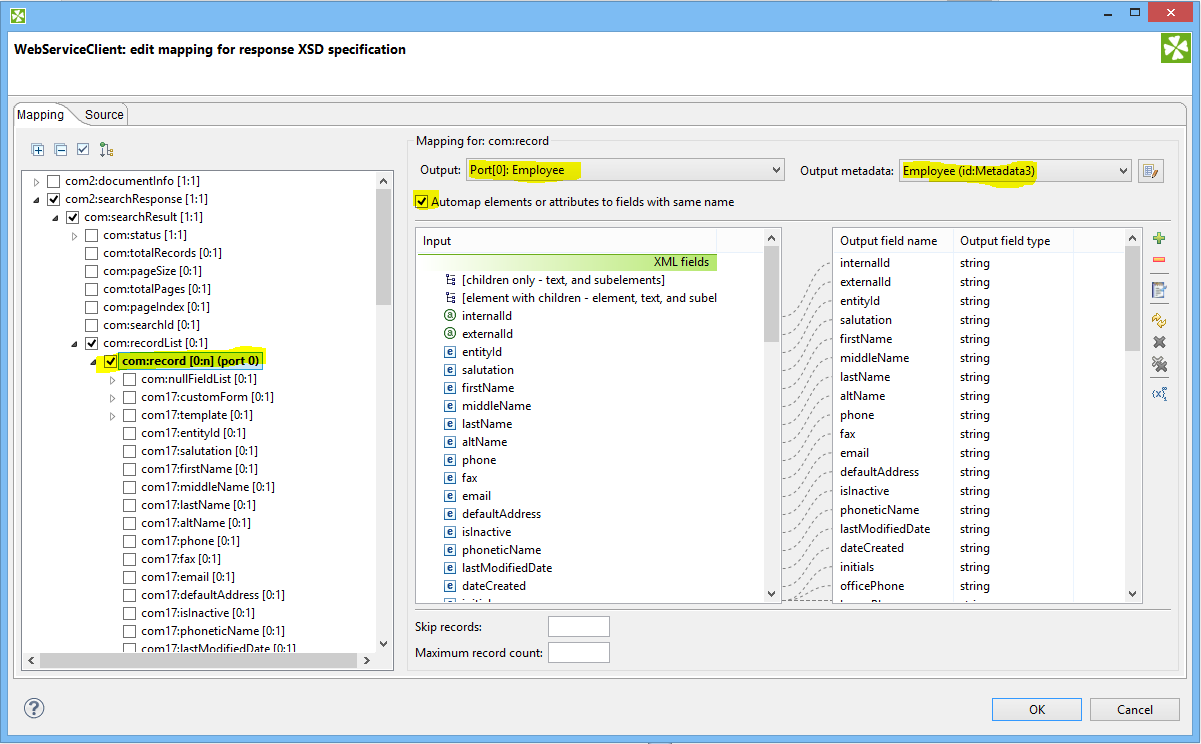
The API operations return a structure response which you will need to map nto the output. Getting what you need might require some experimenting, but if you're familiar with the XMLExtract interface, it'll be fairly easy. Just like with the Request mapping, you can "cast" (Select subtype) items in the left tree to get to the desired structure. See the images below for more detail.
There’s a neat trick you can use to create metadata directly from the Response mapping. Just select any metadata as the output (or blank) and drag&drop fields you want from the middle column, and you’re done!
You’ll see that the second WebServiceClient component is in phase 1, not 0. This is important as it ensures the two calls are made in sequence, not in parallel.
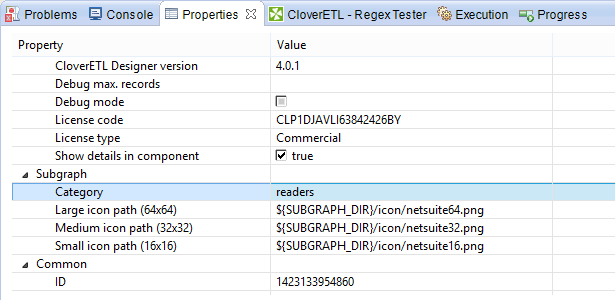
Have you noticed the neat NetSuite icon in the subgraph? You can define custom icons and category colors to subgraphs to make them more visually appealing. When editing the subgraph, click anywhere in the blank space and switch to Properties tab. You can set the Category and icon paths (PNG) there.
You can use this example as a basis for other data operations you might want to run on NetSuite.
Once you get to know the API, creating connectors for CloverDX is quite easy. So, feel free to use this example as a template for some great work.
Exporting data from disparate sources is a necessary task for organizations with big data ambitions. Being able to compile all your information in one place provides greater visibility into your data processes and enables you to maintain a single version of the truth throughout your organization.
But, exporting data from cloud-hosted data platforms, such as Netsuite, is often a difficult and time-consuming process. Fortunately, with the help of CloverDX’s Web Services and the Suitetalk API, it’s now far easier to integrate your data quickly and at scale.
So, there you have it. Once you get to know the API a little bit, creating connectors will become second nature. Feel free to use this example as a template for some great work! And if you have any questions, please don’t hesitate to get in touch with our team.
Editor's note: This blog post has been updated with more relevant content as of January 2020. Enjoy!