Today we'll tackle how to utilize CloverDX with Facebook. Facebook Graph API allows applications to access social graphs. This blog post describes how to use Graph API within CloverDX.
The Facebook Graph API is the primary way to get data into and out of the Facebook platform. It's an HTTP-based API that apps can use to programmatically query data, post new stories, manage ads, upload photos, and perform a wide variety of other tasks.
Querying Facebook via Graph API consist of two steps:
We’ll use App Access Token, as it doesn’t require user interaction during the generation process and does not expire. Check out the documentation to see the differences between available tokens and their limitations. For example App Access Token does not allow to use "me" as userId or search queries are limited to Page and Place type only.
Let’s get to it. First, you need to register the Facebook app. Note that you have to be a verified Facebook user to be able to register the application. Go to https://developers.facebook.com/apps and register a new application there.
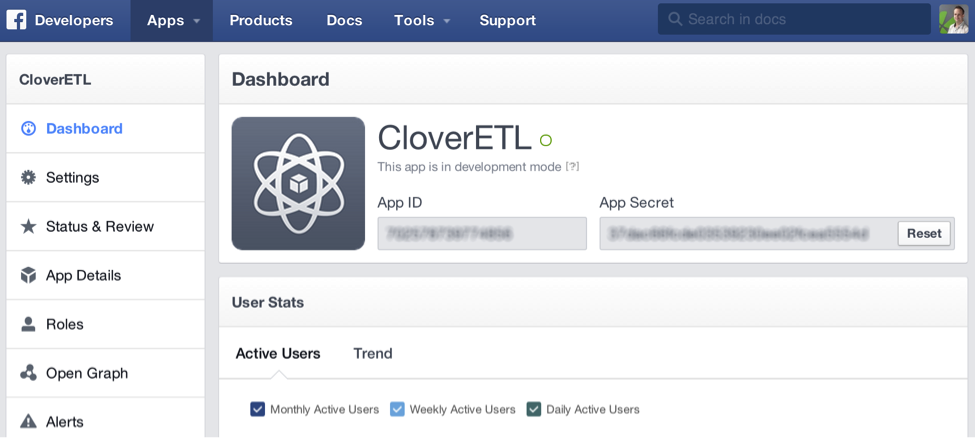
After registering your application, you’ll see App ID and App Secret in the application dashboard. You’ll need these two values in the CloverDX graph.
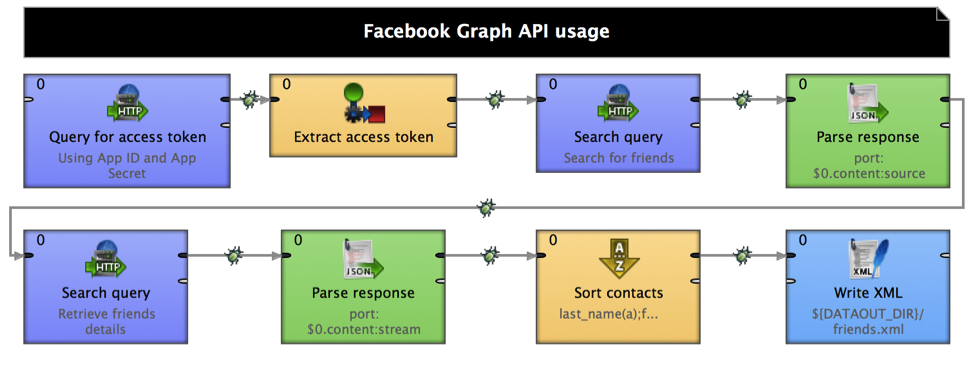
Now we can proceed to CloverDX. This example graph retrieves Facebook friends and stores them in an XML file in alphabetical order.
It uses the HTTPConnector component to retrieve the access token. The query URL is https://graph.facebook.com/oauth/access_token. App ID and App Secret are used as HTTP request parameters.
The access token query in the example is:
https://graph.facebook.com/oauth/access_token?client_id=${APP_ID}&client_secret=${APP_SECRET}&grant_type=client_credentialsThe response content is:
access_token=702578739774856|B0HwJl3tIFM4ShwBXHEuyB3rB20The access token is parsed using the Reformat component and its value is passed to the next HTTPConnector where it’s used as a query parameter. The query URL is https://graph.facebook.com/{user_id}/friends – this time with the access_token request parameter. This is a regular Graph API call. See the Graph API documentation for other available methods.
An example query API call:
https://graph.facebook.com/${USER_ID}/friends?access_token=702578739774856%7CB0HwJl3tIFM4ShwBXHEuyB3rB20Response JSON is parsed using the JSONExtract component and one more HTTP request (https://graph.facebook.com/{user_id}) is performed for each result (=each friend). This query retrieves detailed information about the friend.
The JSONExtract mapping is very simple because it uses automapping by field names. Mapping used in JSONExtract:
<Mappings>

	<Mapping element="json_object" outPort="0">

	</Mapping>

</Mappings>
The final part of the graph just sorts detailed info about friends using the ExtSort component and writes them into an XML file using XMLWriter. The XML writer uses this mapping:
<?xml version="1.0" encoding="UTF-8"?>

<root xmlns:clover="http://www.CloverDX.com/ns/xmlmapping">

  <clover:element clover:name="facebook_item" clover:inPort="0">

    <clover:element clover:name="first_name">$0.first_name</clover:element>

    <clover:element clover:name="last_name">$0.last_name</clover:element>

    <link>$0.link</link>

    <username>$0.username</username>

  </clover:element>

</root>
to produce XML like this (real values are replaced by “...” - I do not want to show my friend’s names here):
<?xml version="1.0" encoding="ISO-8859-1"?>

<root>

  <facebook_item>

    <first_name>...</first_name>

    <last_name>...</last_name>

    <link>http://www.facebook.com/...</link>

    <username>...</username>

  </facebook_item>

  <facebook_item>

    <first_name>...</first_name>

    <last_name>...</last_name>

    <link>http://www.facebook.com/...</link>

    <username>...</username>

  </facebook_item>

  …

</root>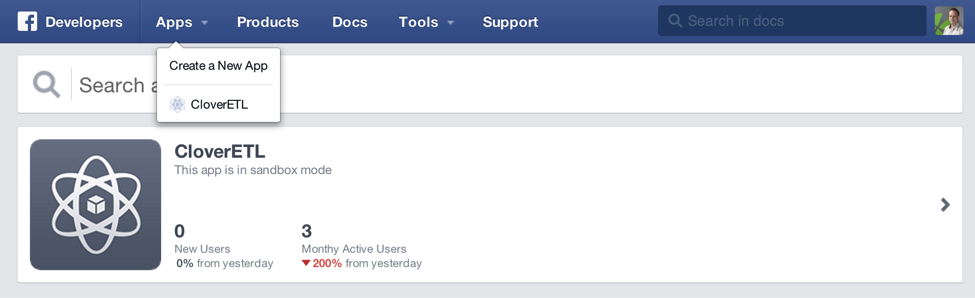