WebServiceClient is a new CloverDX component that was released in 2.9 version. It provides an easy intuitive way to interact with any web services. This technology has gained a huge popularity in the last few years. The following simple example shows the new component´s functionality. The WS component is user friendly and very easy to use.
Our goal is to get the actual weather information for specific ZIP codes from the web service that is running on http://ws.cdyne.com/WeatherWS/Weather.asmx?op=GetCityWeatherByZIP. The zip codes are stored in the flat file and results will be saved to Excel file.
I suppose that you are familiar with CloverDX so I will not describe the input and output setting up but will focus directly on WebService Client component.
Firstly we have to specify the URL of web service WSDL file and select the operation you want to use from the list of all operation WS provides. WSDL URL is the basic attribute of the component and have to be set to http://ws.cdyne.com/WeatherWS/Weather.asmx?WSDL. The dialog for Operation name attribute allows you to select the operation you want to use. In our case it's the operation GetCityWeatherByZIP from the group WeatherSoap (Port:WeatherSoap) as you can see on the figure bellow.
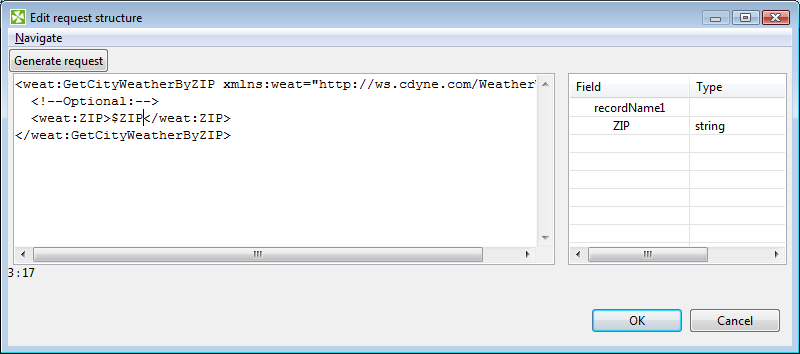
The request is a way how to pass the arguments to webservice. It's the XML file with pre-defined structure which depends on the used webservice and writting it by hand is very annoying. CloverDX provides a functionality that generates the required structure of request in one click. Simply open the dialog for Request structure attribute and click on „Generate request“ button. The skeleton of the request is genereted and we have to map the input port fields of the component to the request placeholders. In our case the only placeholder is string. By drag-and-drop we replace string by the field name from the right panel of the dialog.
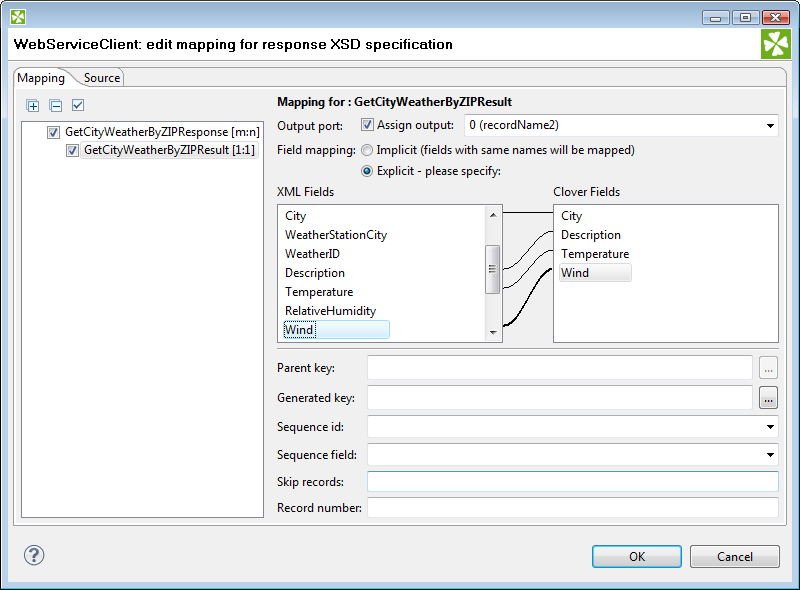
Finally we define how to process the response from webservice. The response is XML file so we will create the mapping among elements and attributes of XML files and the output fields of the component. CloverDX makes it easy for us, it provides drag-and-drop dialog where we can select the item from „XML Fields“ part of dialog and drop them to „Clover Fields“.
And that's all :-). Communication with web services is set-up. Now we can collect actual weather conditions from Internet.
'The Buyers' Guide to Data Integration Software'