Code debugging is a productivity feature well known to developers from various programming environments. It allows you to control the execution of a piece of code line-by-line, and look for problems that are hard to spot during normal runs. [Note: CloverETL is now CLoverDX].
Why would someone need that? Think of it as being able to play-back a scene in a movie, frame by frame, and thus look for mistakes that would otherwise quickly pass unnoticed.
Code debugging in Designer works on a similar principle - being able to suspend and inspect code. But where does the code come from? Don’t worry, I’m not talking about exposing you to the internals of the CloverDX engine and making you sift through tons of arcane code. I’m talking about mappings in Joiners, Reformat transformations, Normalizers and Denormalizers, and Filter expressions. All those pieces of your own code that can be debugged with the introduction of CloverDX version 4.3.
First, you’ll need some breakpoints in your code. You can easily set them by double clicking a line number or using a keyboard shortcut (Ctrl-Shift-B on Windows, Command-Shift-B on Mac). Breakpoints are markers that tell CloverETL where to suspend execution of the code and give you manual controls.
Code Debugging - Breakpoints
Breakpoints can either be “always on” or set to activate only under certain condition. Imagine wanting to skip next thousand “activations” or only stop execution based on some expression evaluating to true. You can set this by right-clicking the breakpoint and selecting Breakpoint Properties.
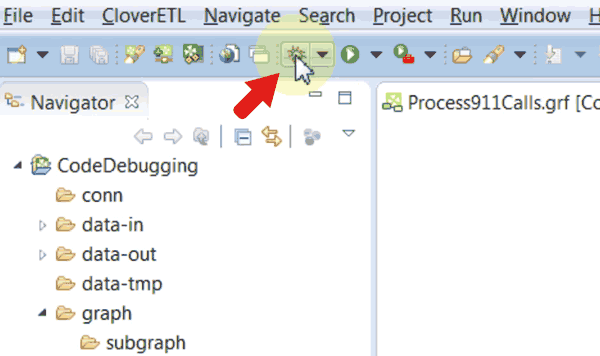
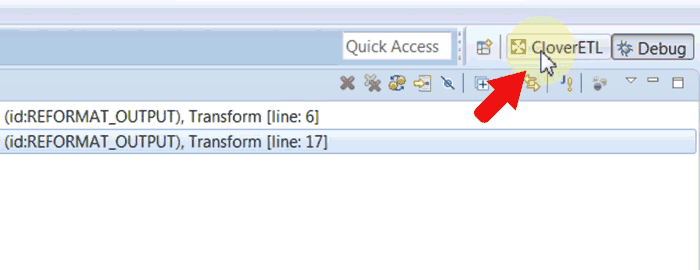
Then next thing you need is to run the transformation using the Debug action, not regular Run. This is important as the following procedures won’t work in the normal Run mode.
DON'T FORGET - Run using the DEBUG ACTION
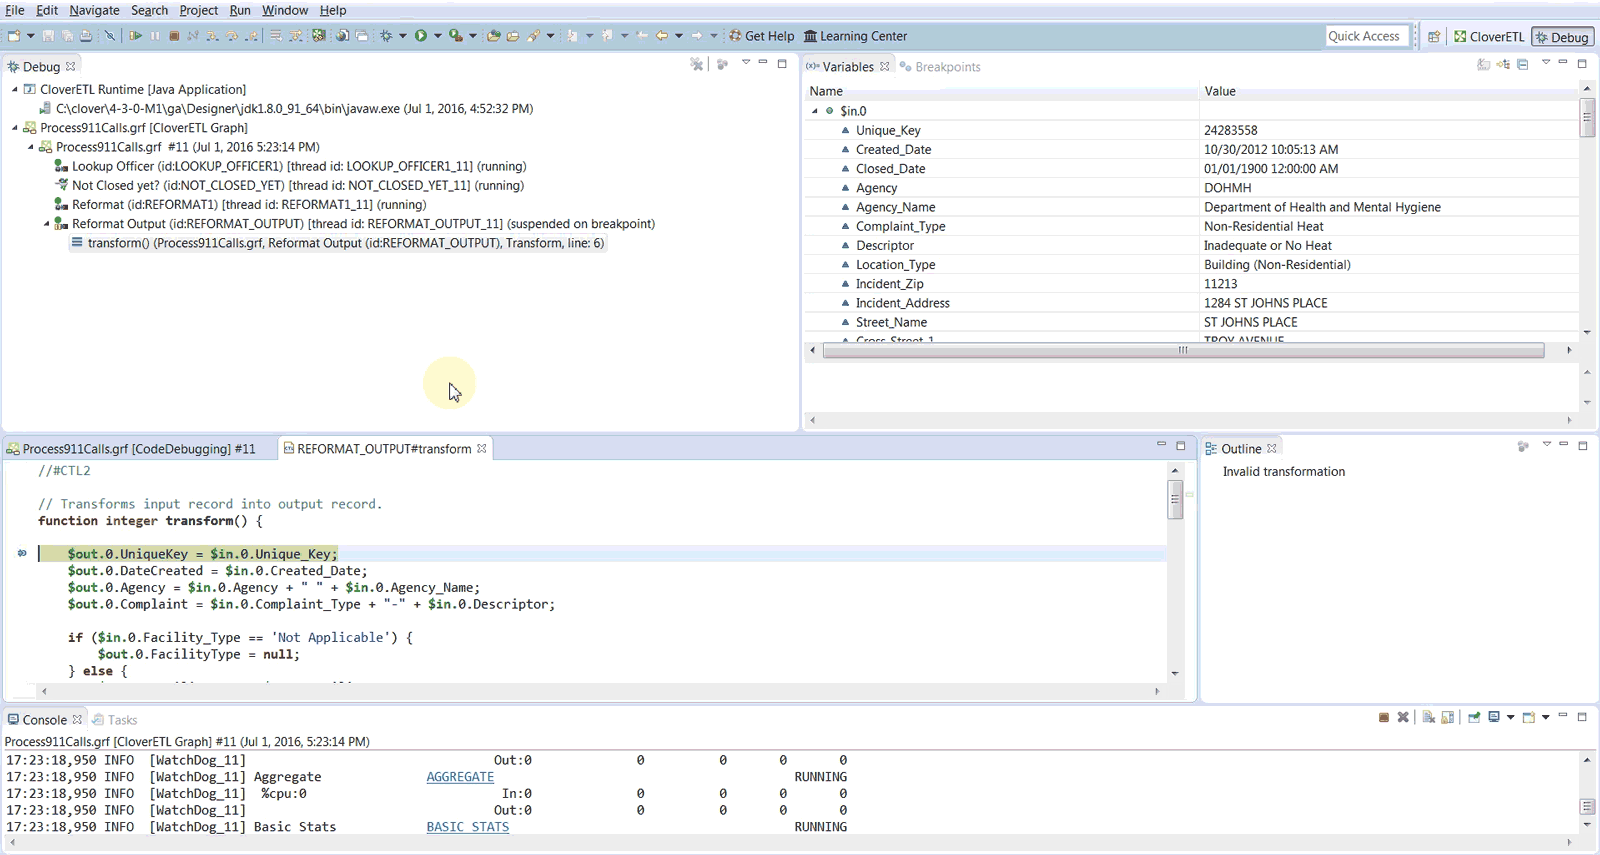
When CloverDX reaches a 'breakpoint', it will pause the component where it’s found it and Designer will switch to a “Debugging perspective”- an interface that shows a bunch of useful views giving you better understanding of what’s going on in your code. I recommend you confirm the prompt with Yes, indicating you want to remember that each time a debug breakpoint is reached, the perspective will switch automatically to Debug.
CloverDX Code Debugging Perspective
It also opens up the suspended code in a separate tab. This is where you get to manually control the execution, using functions found in the Run menu.
“Step Into” (F5) moves one statement further or, if it is a function, it dives into it.
“Step Over” (F6) executes the function and moves one statement further, staying on the same level. This action is useful when you’re interested only in the result of the function but not in debugging it.
There are additional useful stepping functions, including "Step to line" (skipping arbitrary number or rows between current position and the line you’ve chosen) or "Step into Selection" useful when you have multiple nested expressions. For these other options refer to the documentation.
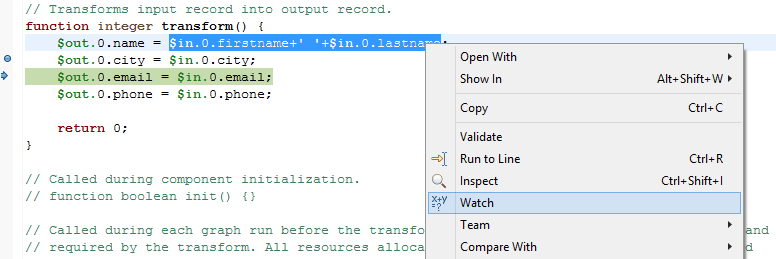
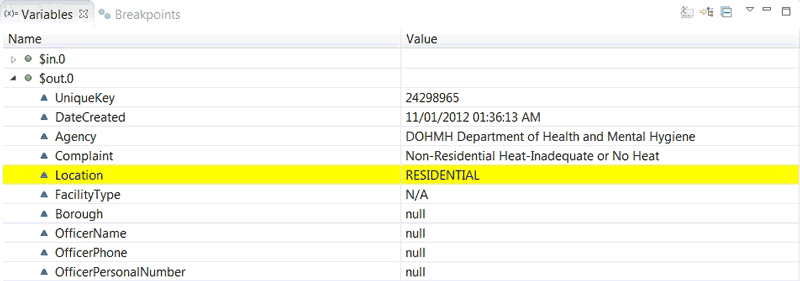
In each step, you can inspect all variables and inputs and outputs of the component in the Variables view. You can also select an expression or a part of statement and add it to a “watch list” - a new view that shows your own list of interesting values.
Now, the big deal --- As you progress through the code, line by line, you can see how variables get filled with values or get modified. At any point, you can resume execution using the Resume (F8) action until a breakpoint is encountered again; either another one or the same one in the next iteration. This saves you time you’d have to spend stepping through hundreds of lines of code. And by the way, you can disable, enable or remove breakpoints in the Breakpoints view at any time.
Inspecting Variables during debugging
When you’re happy with your findings, stop the Debug run just like you would terminate a running transformation. You can now switch back to your standard CloverDX design perspective using the button in the top right corner, close the code debugging tab and fix the problem in the component.
Switch back to standard CloverDX design perspective
Now, what happens if you set multiple breakpoints in different components?
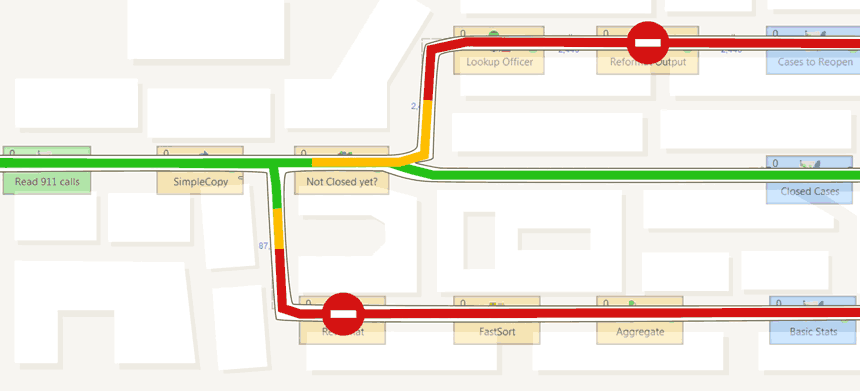
To understand that, let’s look at how Clover pushes data through your transformation first. Think of the graph as a road network, data records as cars and components as either junctions or toll gates.
When a component gets suspended on a breakpoint you’ve set, Clover does not ban movement of all the cars in the network. It just makes them wait at that one stop, maybe causing queues down the road. Like a toll gate suddenly going out of service. The other cars taking different routes are free to continue their business as long as they don’t end up in a traffic jam somewhere (the “roads” run out of buffers), or until they hit another breakpoint in some other component which makes them wait again. The rest continues happily in fluent traffic.
While some branches are suspended in debug, other move on
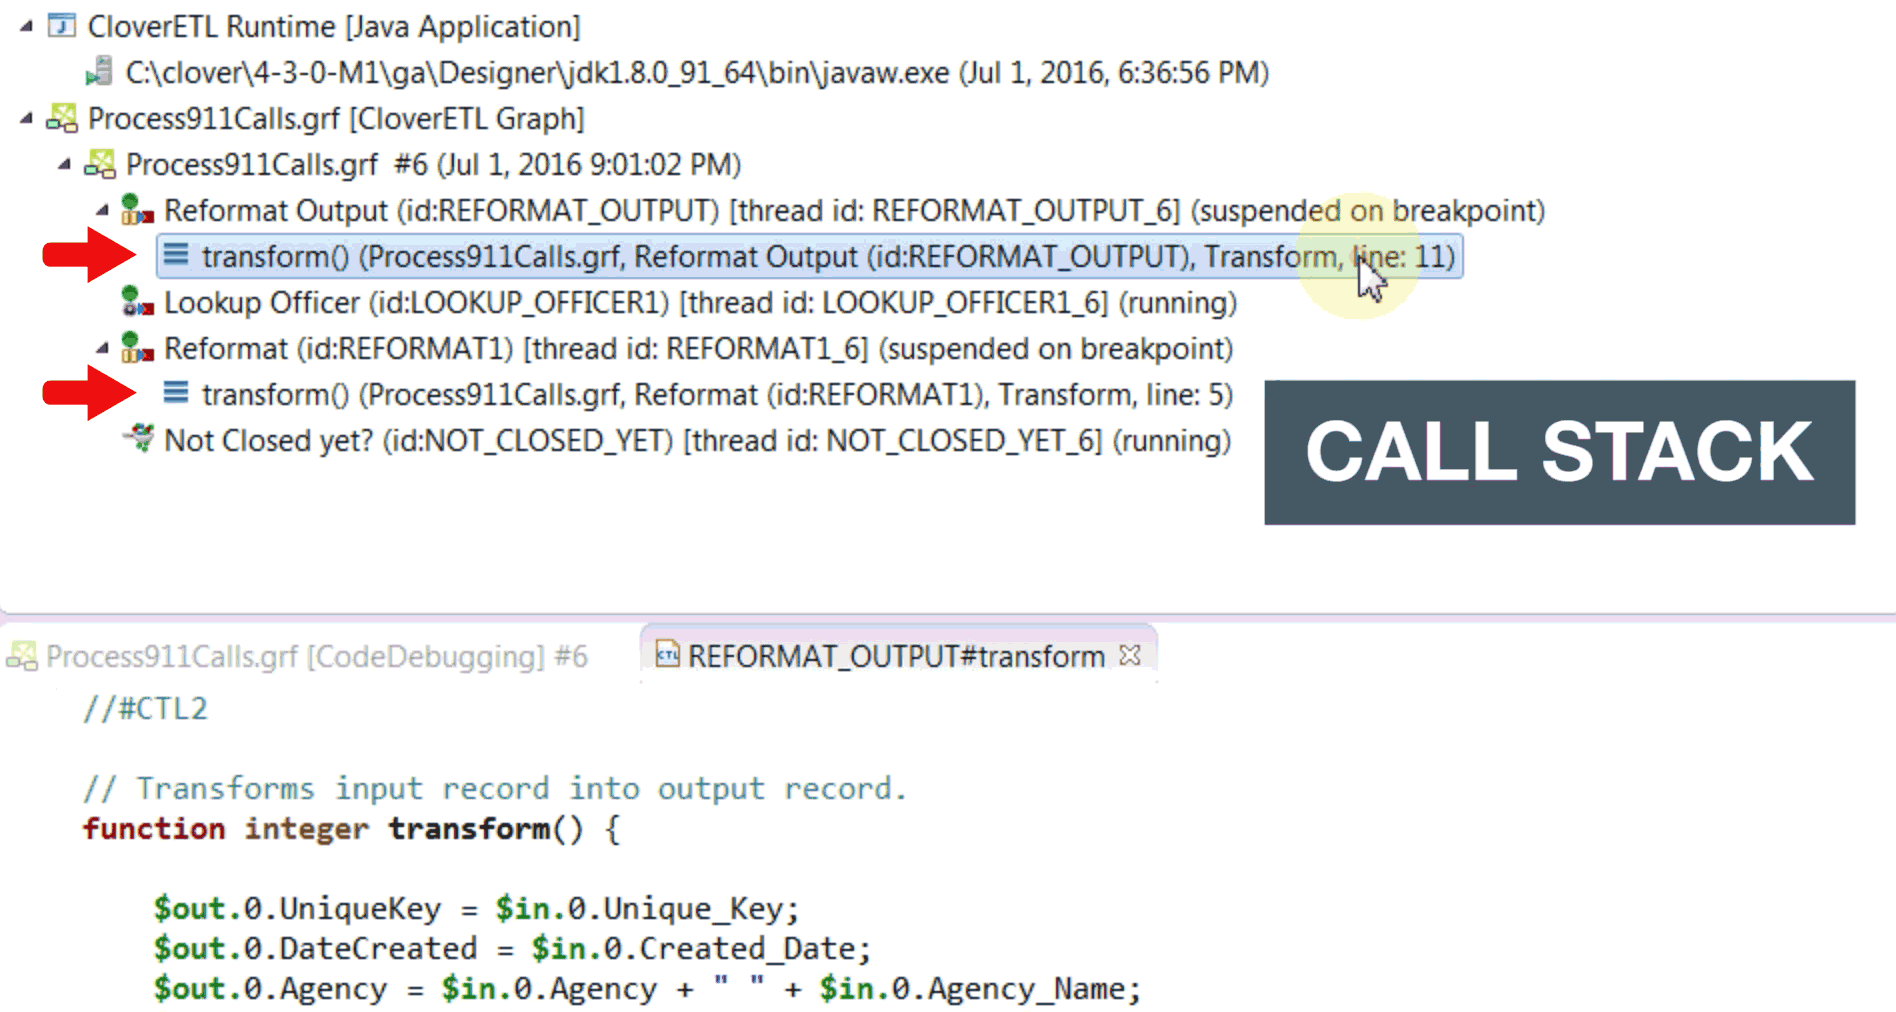
To make some sense of all this in your debugging perspective, the Debug view is there to help. A tree structure, referred to as “call stack” shows you all currently suspended components and functions. There can be multiple branches for each individual component with a breakpoint that’s been encountered and caused the component to pause. You can choose which one you want to control simply by selecting it. Notice the code view and Variables update accordingly. All the control actions apply to the selection which allows to individually control multiple components in a single debugging run.
Call stack showing two components suspended at once
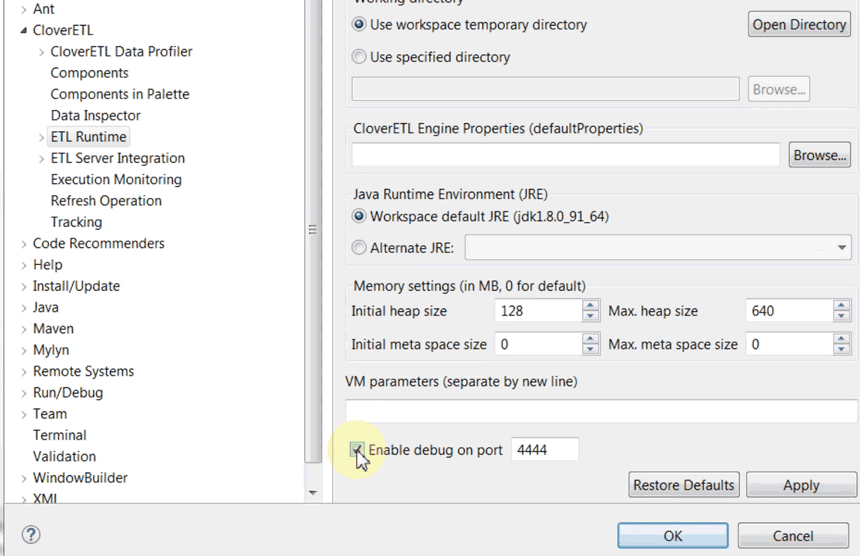
Important note for those using Java. You need to enable debugging of your Java code before being able to use it. Simply go to Window > Preferences > CloverETL > ETL Runtime and check “Enable debug on port”. You can change the port if you like but for most cases the default (4444) will be just fine. After that, you will see some additional information in the Debug view, plus you’ll be able to debug Java code together with CTL in the same way.
Enable Java debugging in CloverDX Designer's preferences
That’s enough of an introduction to code debugging in CloverDX 4.3.
Happy coding.
Everything you need to know to choose the right solution for your business - 'The Buyers' Guide to Data Integration Software'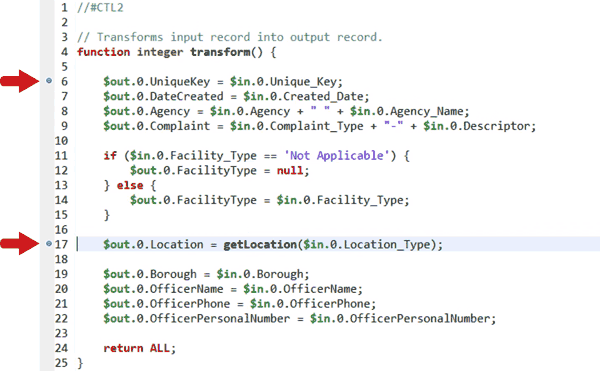